The Isentia App has been redesigned to make keeping on top of important coverage simpler, and give you more flexibly sharing options for while you are on the move. The Isentia app is free to download from Google Play (Android Users) or the Apple App Store (iOS Users). Follow this step by step guide to start using the new Isentia app.
Contents
Cheat Sheets
Check out the Isentia App Cheat Sheet for a quick guide to get started.
Signing into the Isentia App
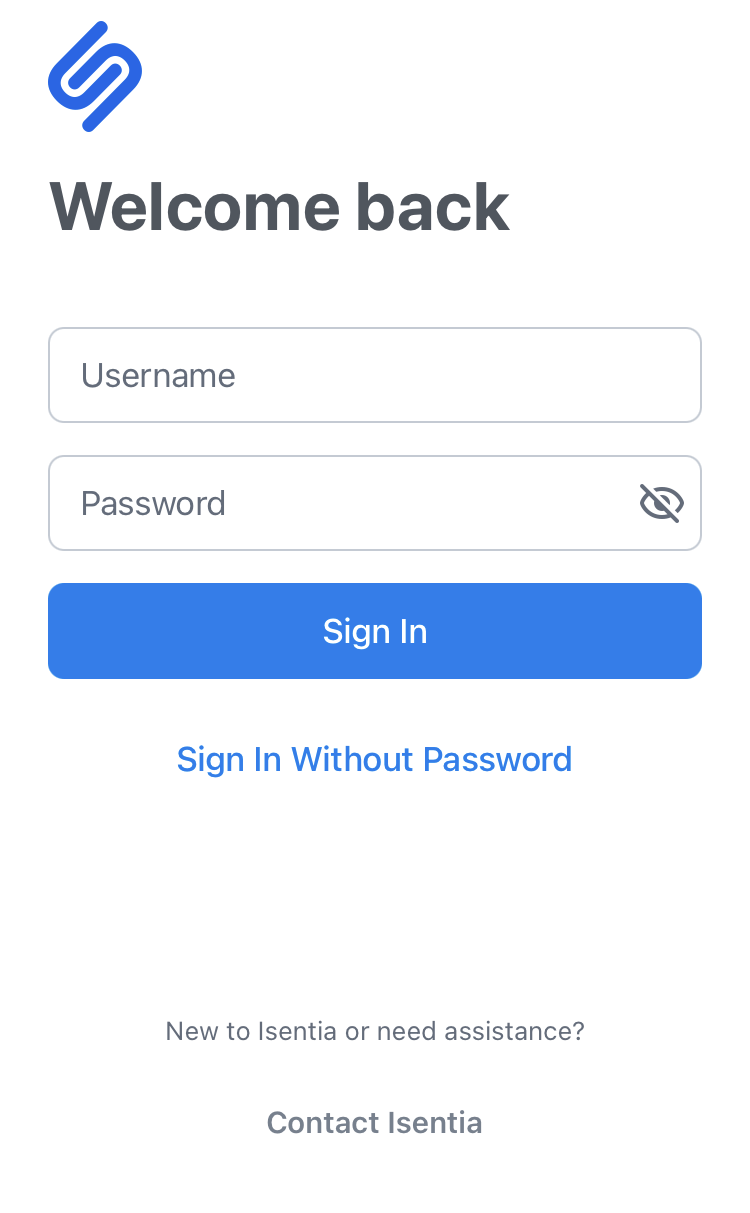
There are two options available when signing into the Isentia app. You can choose to either sign in using the username and password linked to your desktop Isentia account, or you can choose to sign in using a secure code sent to your email inbox. Steps for both options are detailed below:
Signing in using your username and password
To sign in using your username and password simply input the details linked to your Isentia account.
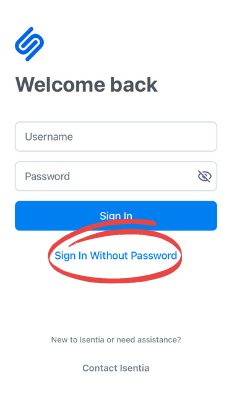
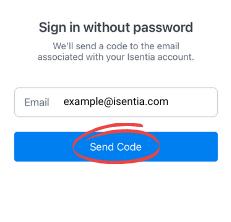
Signing in without a password.
Once you open the Isentia App, choose the Sign in Without Password option and follow the below steps:
- Input the email address linked to your Isentia account and confirm with Send Code
- Check your email inbox for an email containing a unique code
- Input your unique code and select Sign In to complete the process
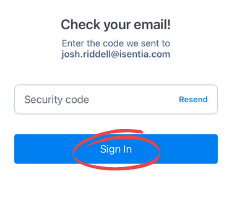
Please note: If more than one Isentia account is linked to your email address, you will receive multiple security codes in the email. Each code will have an account name above it. Pick the security code for the account you would like to log into and enter that code in the app.
The Today screen
The Today screen is the first screen you will see when you log into the Isentia app. We have designed the Today screen to give you an overview of your recent media content and provide you with quick insights into your recent coverage levels and trends.
When viewing the Today screen you will see:
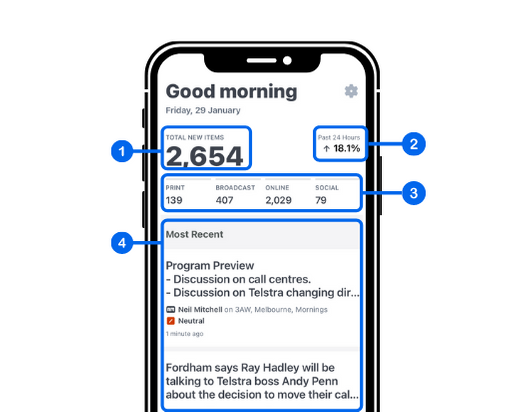
- Total New Items (1) – The total number of new items delivered to your account over the previous 24 hour period.
- Percentage change (2) – An indication of the change in volume of coverage in your account compared to the previous 24 hours.
- Media Type Breakdown (3) – Showing you how the items added to your account over the last 24 hours break down across each media type, so you can easily identify the media types that are driving most coverage
- Most Recent (4) – From here you can access the five most recent items delivered to your account. You can also interact with these media items in the same way as anywhere else in the Isentia app, including viewing, sharing, or saving an item for later to include in a report.
Once you have used the information on the Today screen to see what is going on with your coverage, you can decide where you need to go next. You can dive deeper into a specific topic using your feeds, or you use the search screen to find all relevant items within a specific media type or search query.
Feeds in the Isentia app
The Isentia app uses feeds to show you content from within your monitoring briefs. You can use different filters to refine the content that is captured and appears in your feed, and you can have up to 10 feeds set up in your account at any time.
Feeds can be created and managed in both the Isentia app or the desktop of your Isentia account. If you need any more information on how to use Feeds, check out our Feeds Article.
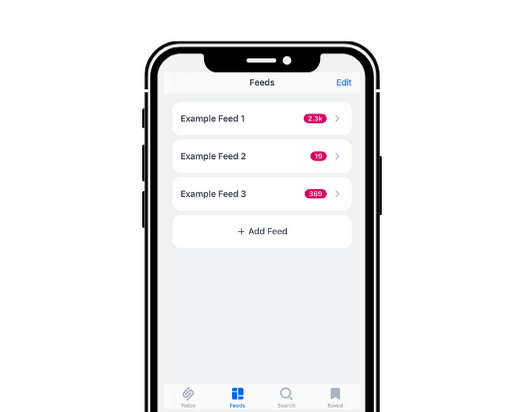
You can access your feeds by selecting Feeds from the tab at the bottom of the app screen. From here you’ll see a list of the feeds you have set up, and you can jump into a feed to view and interact with matching media items, or you can also choose to edit the setup of an existing feed or create a new feed to start tracking a new topic.
Viewing Content in your Feed
When you first access the feeds screen, you’ll notice that each of the feeds you have set up shows a number. This number is the number of items added to that feed since you last looked at it, so this can help you decide which feeds it may be best to check out first.
To start to view items in a feed, simply click into your chosen feed, and relevant media items will be displayed. Once you click into a feed you will see the below screen:
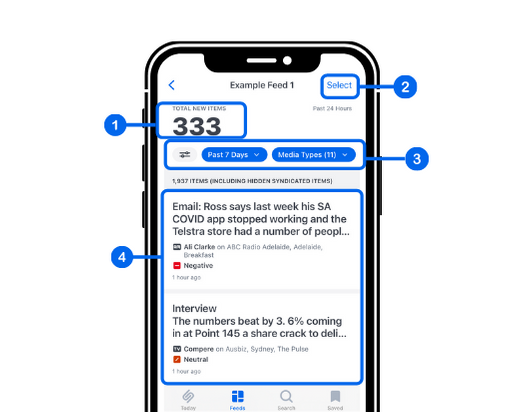
This screen includes:
- Total New Items (1) – The number of new items delivered to that feed
- Multiple item select (2) – Allows you to select multiple items within your feed for either sharing or saving for later
- Feed filters (3) – These can be used to refine the content shown in your feed. By default, your feed will show matching content from the last 3 months, but you can use the filter to show content from the other time periods including the last 24 hours, the last seven or 30 days, or even use a custom date range up to 12 months prior. Your feed will also default to showing all media types, but you can choose to filter out and include or exclude specific media types including newspaper and online content or radio and TV broadcast coverage.
- Relevant media items (4) – Based on the setup of your feed and the criteria you have chosen, matching media items will be displayed. From here you can interact with, and view media items in the same way you can everywhere else in the Isentia app, including viewing the original item, sharing an item, or saving an item for later.
Searching
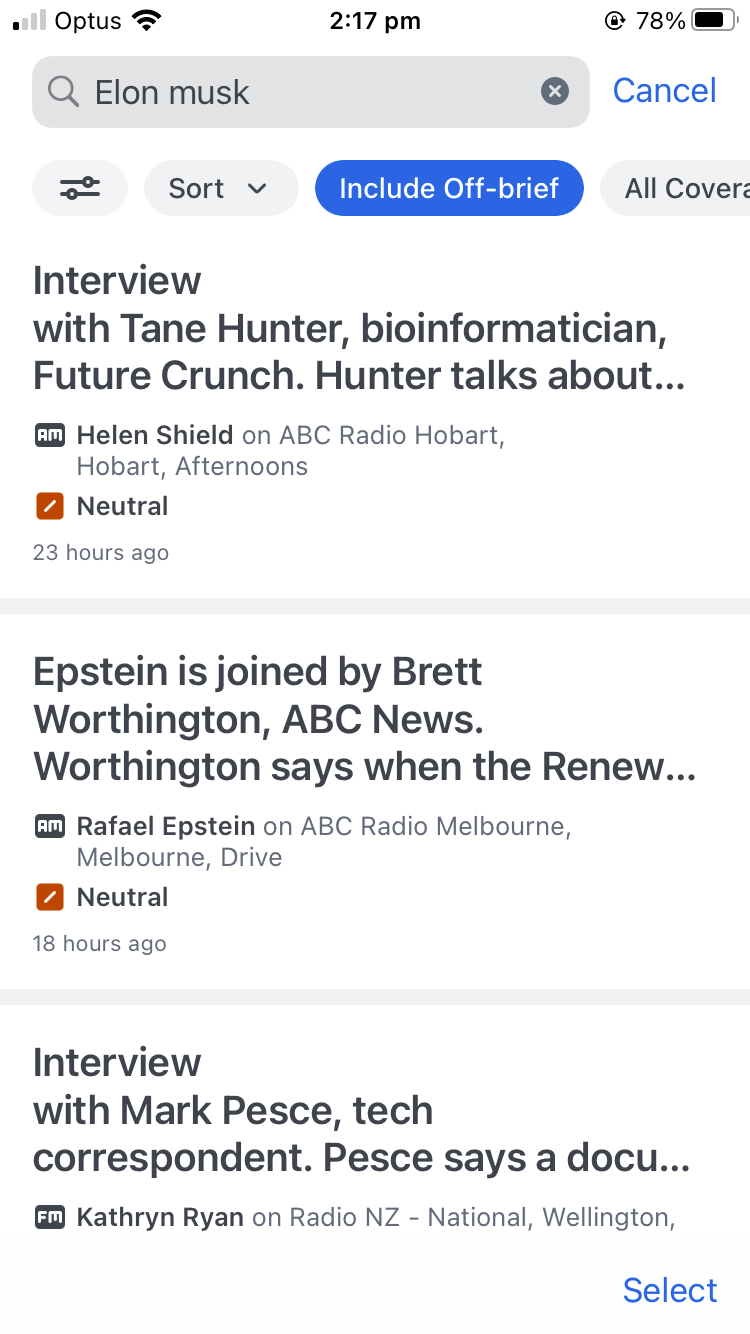
The app allows you to quickly find media items you are tracking in your Mediaportal. Select the Search tab at the bottom of your app screen input the keywords or terms you want to use to find relevant coverage.
The Isentia app also saves your recent search terms, so you can also choose to search using a previous keyword.

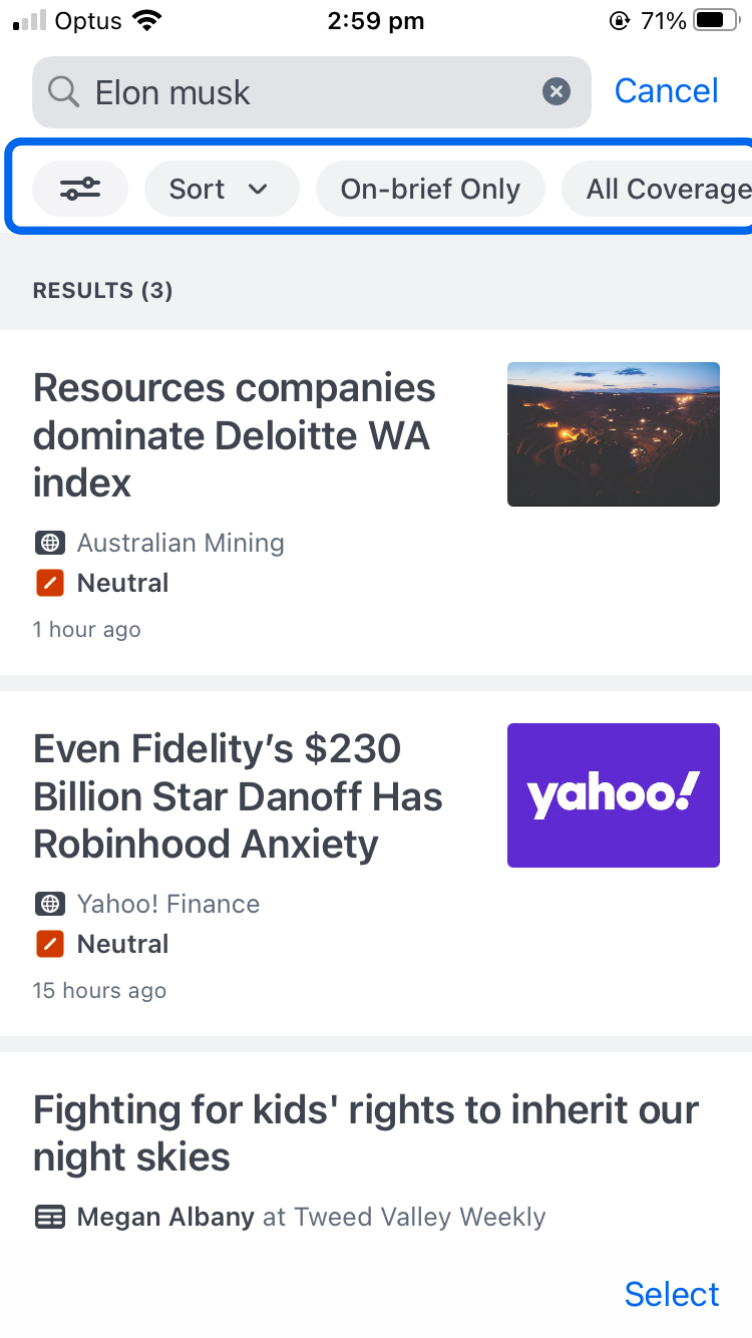
Once you have completed your search, you can choose to refine and filter your results in a number of different ways, including:
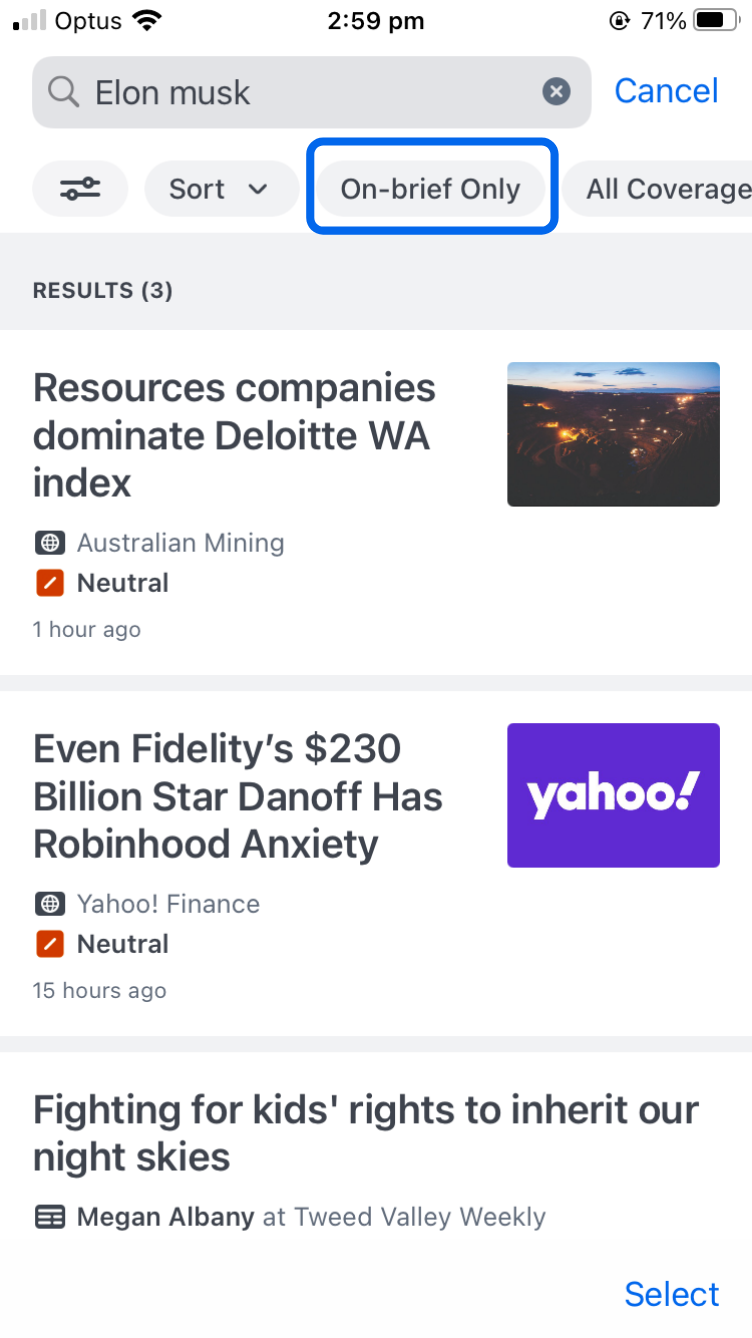
- Sorting by different criteria such as by Media type, Media outlet, Sentiment, Location or Region.
- Searching across All Coverage or from an individual feed within the app.
- Refining your search results to a specified time period
- Filtering your results by media type including TV, Radio, Newspaper and Online content.
All filtering and sorting options can be found in the “all filters” tab on the left-hand side of the search toolbar.
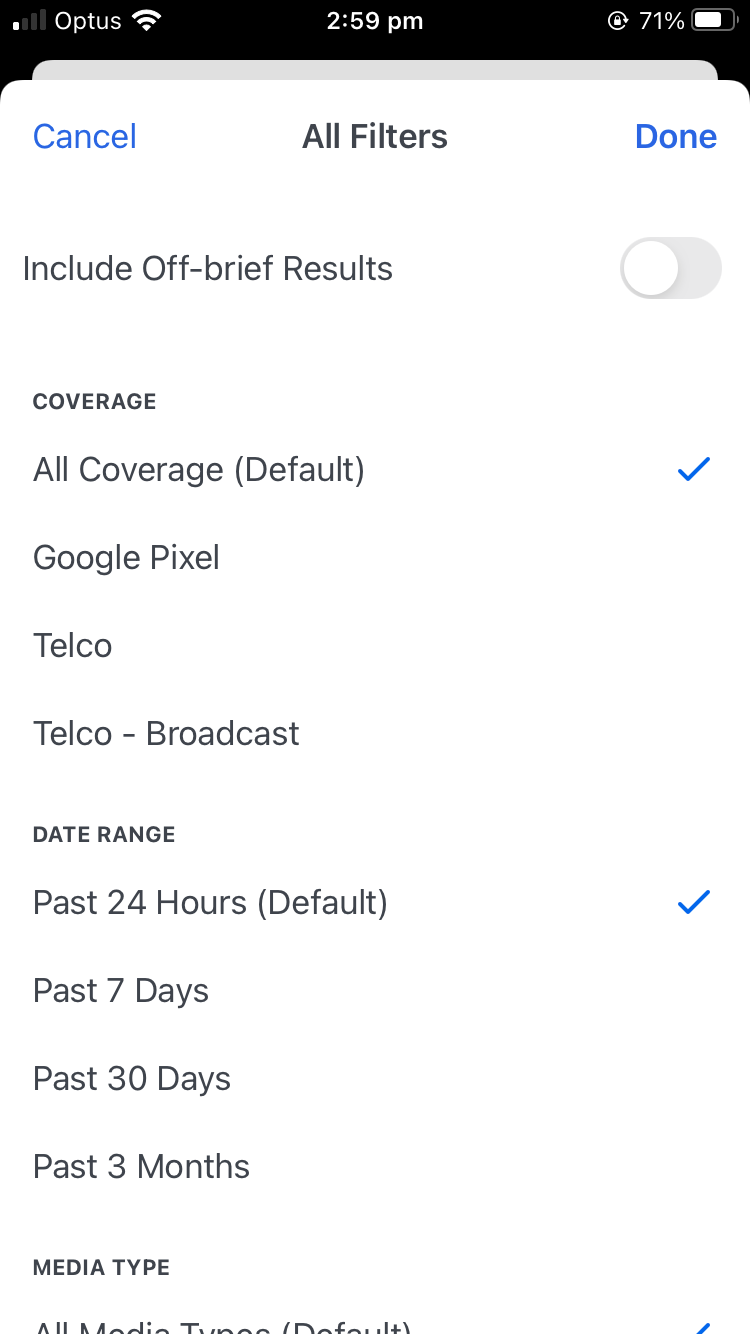
Within the Isentia app, you can also choose to include Off-Brief Search items in your search results. When you search by default your results will only include “On-brief” results, but you can choose to include “Off-brief” items by toggling on the highlighted button. More information on Off-Brief Search can be found here.
Sentiment
Just like in Mediaportal, the Isentia App includes automated sentiment on all of your media items. The automated sentiment model analyses the tone of the text in a media item to grad it as positive, neutral or negative.
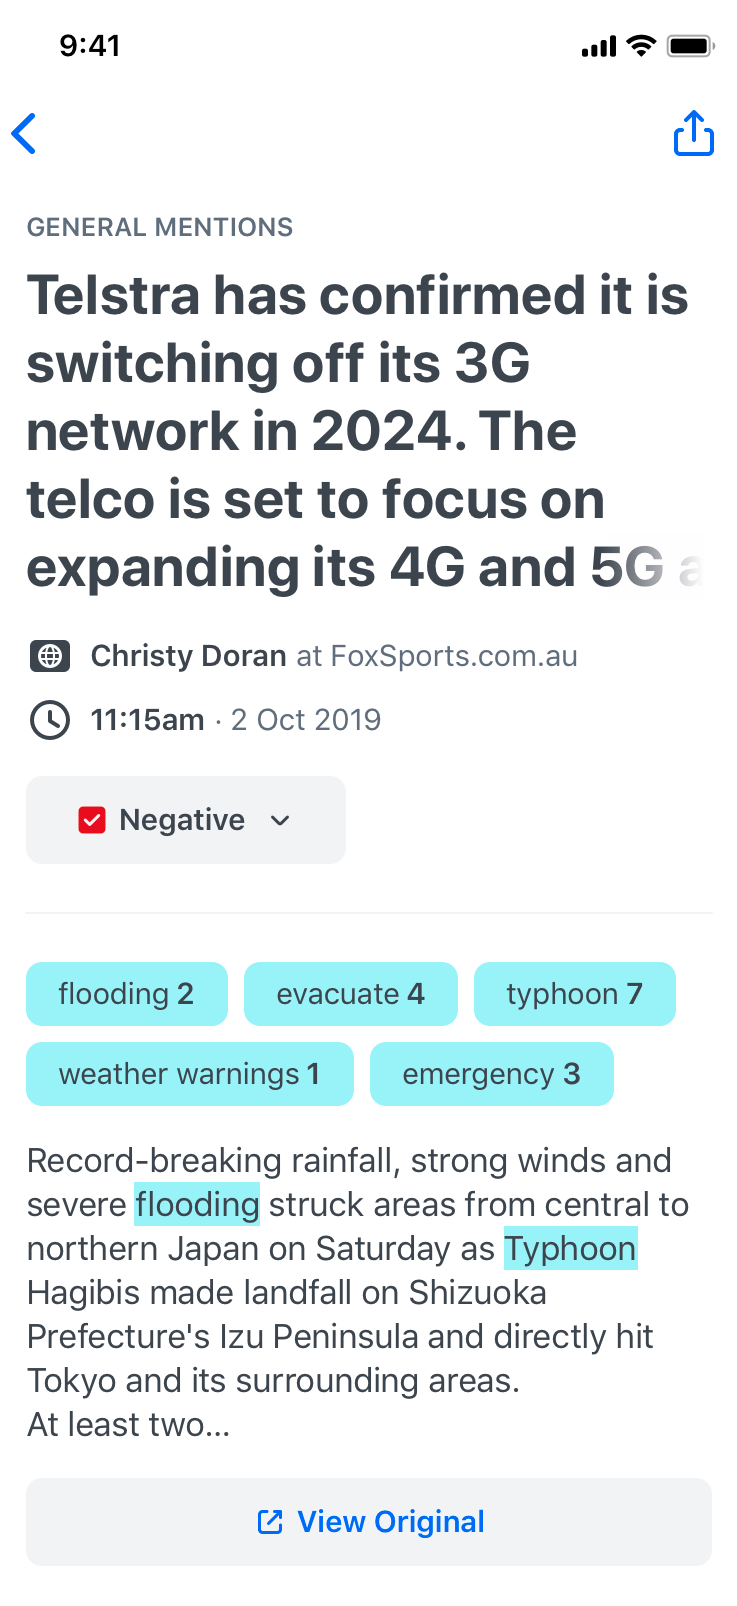
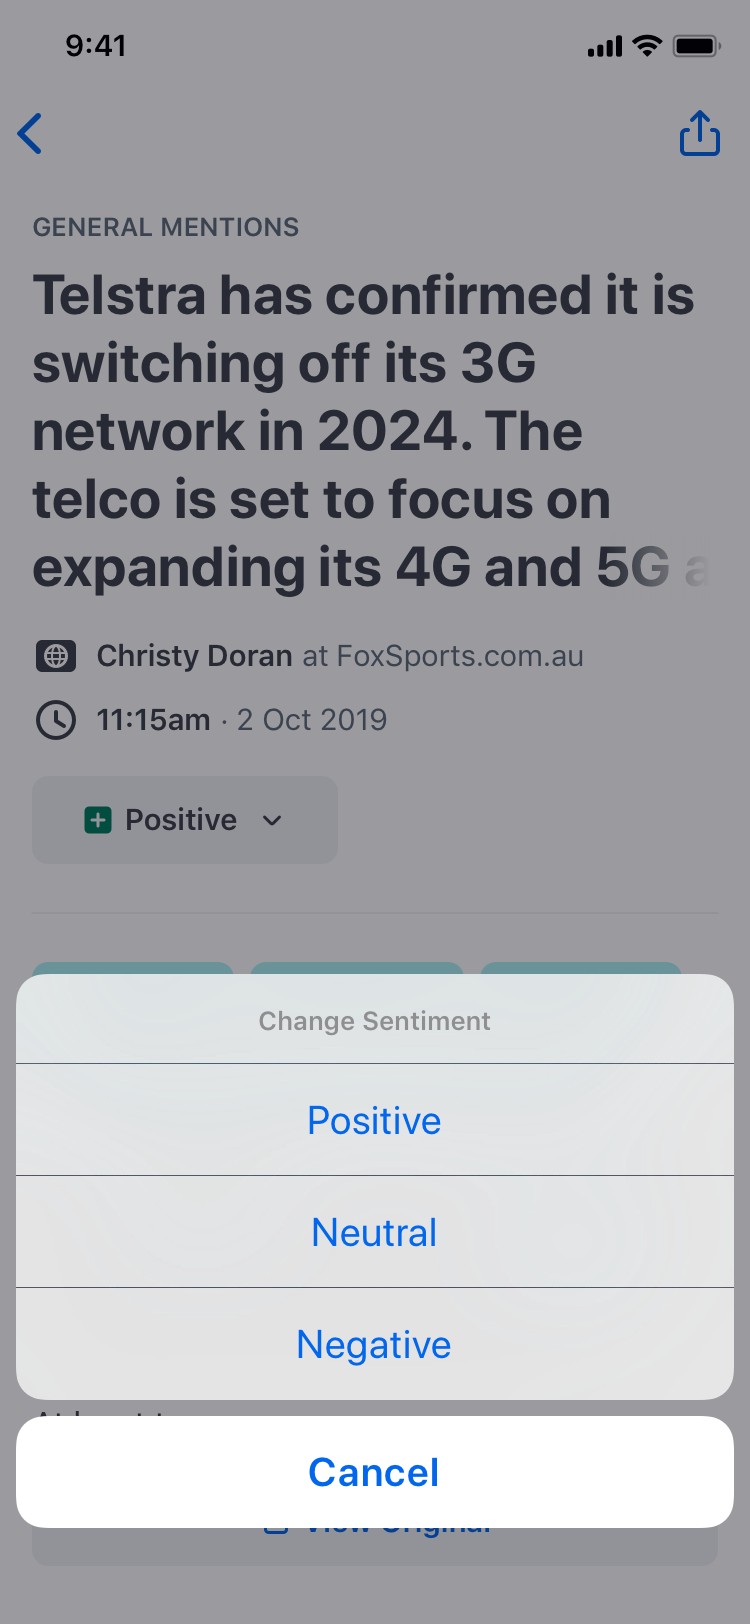
We understand that applying sentiment to an article can be subjective, so we have given you control allowing you to override the sentiment on any of the media items you have captured. All you need to do to override it is click on the sentiment badge, and choose the new grading you would like to apply.
Sharing media coverage
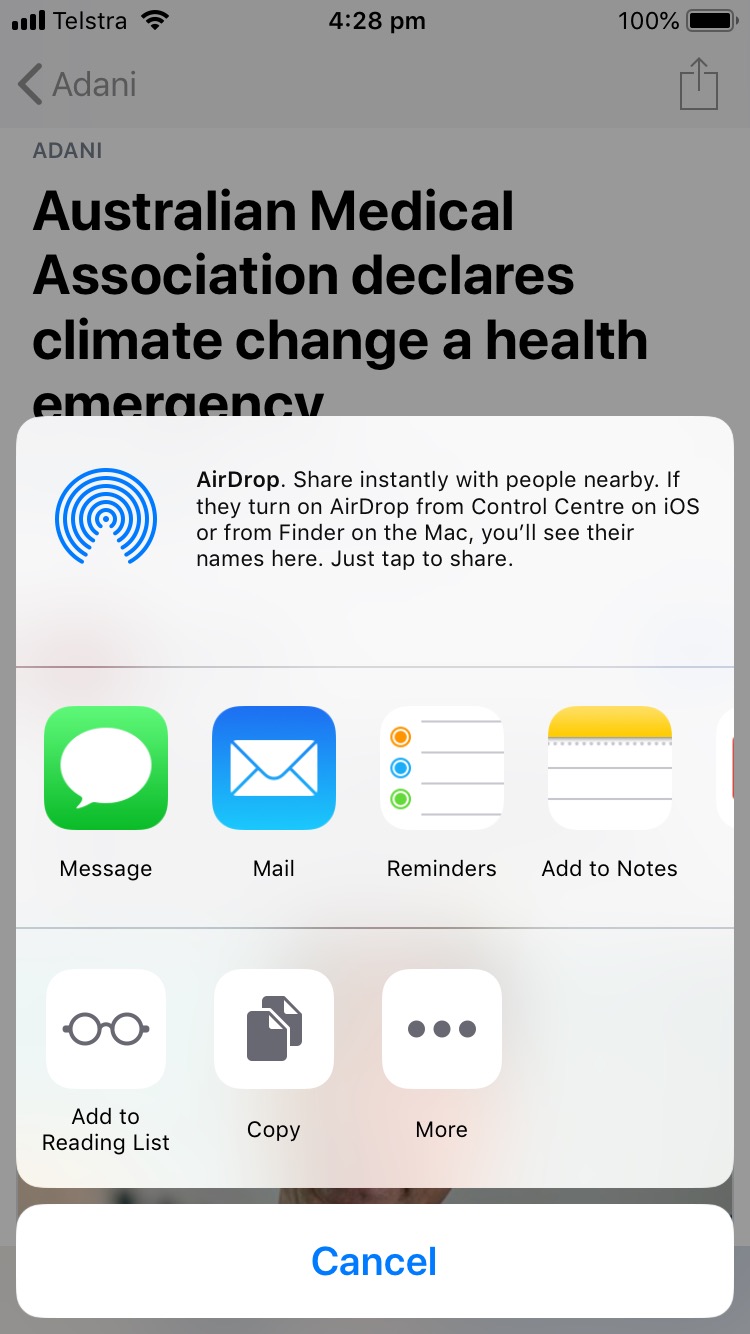
The Isentia app uses you smartphone’s native sharing functionality, so that you can quickly flag coverage with your colleagues or stakeholders via your preferred method. To share a media item, click on the share icon at the top right corner of your screen when viewing the item you want to share.
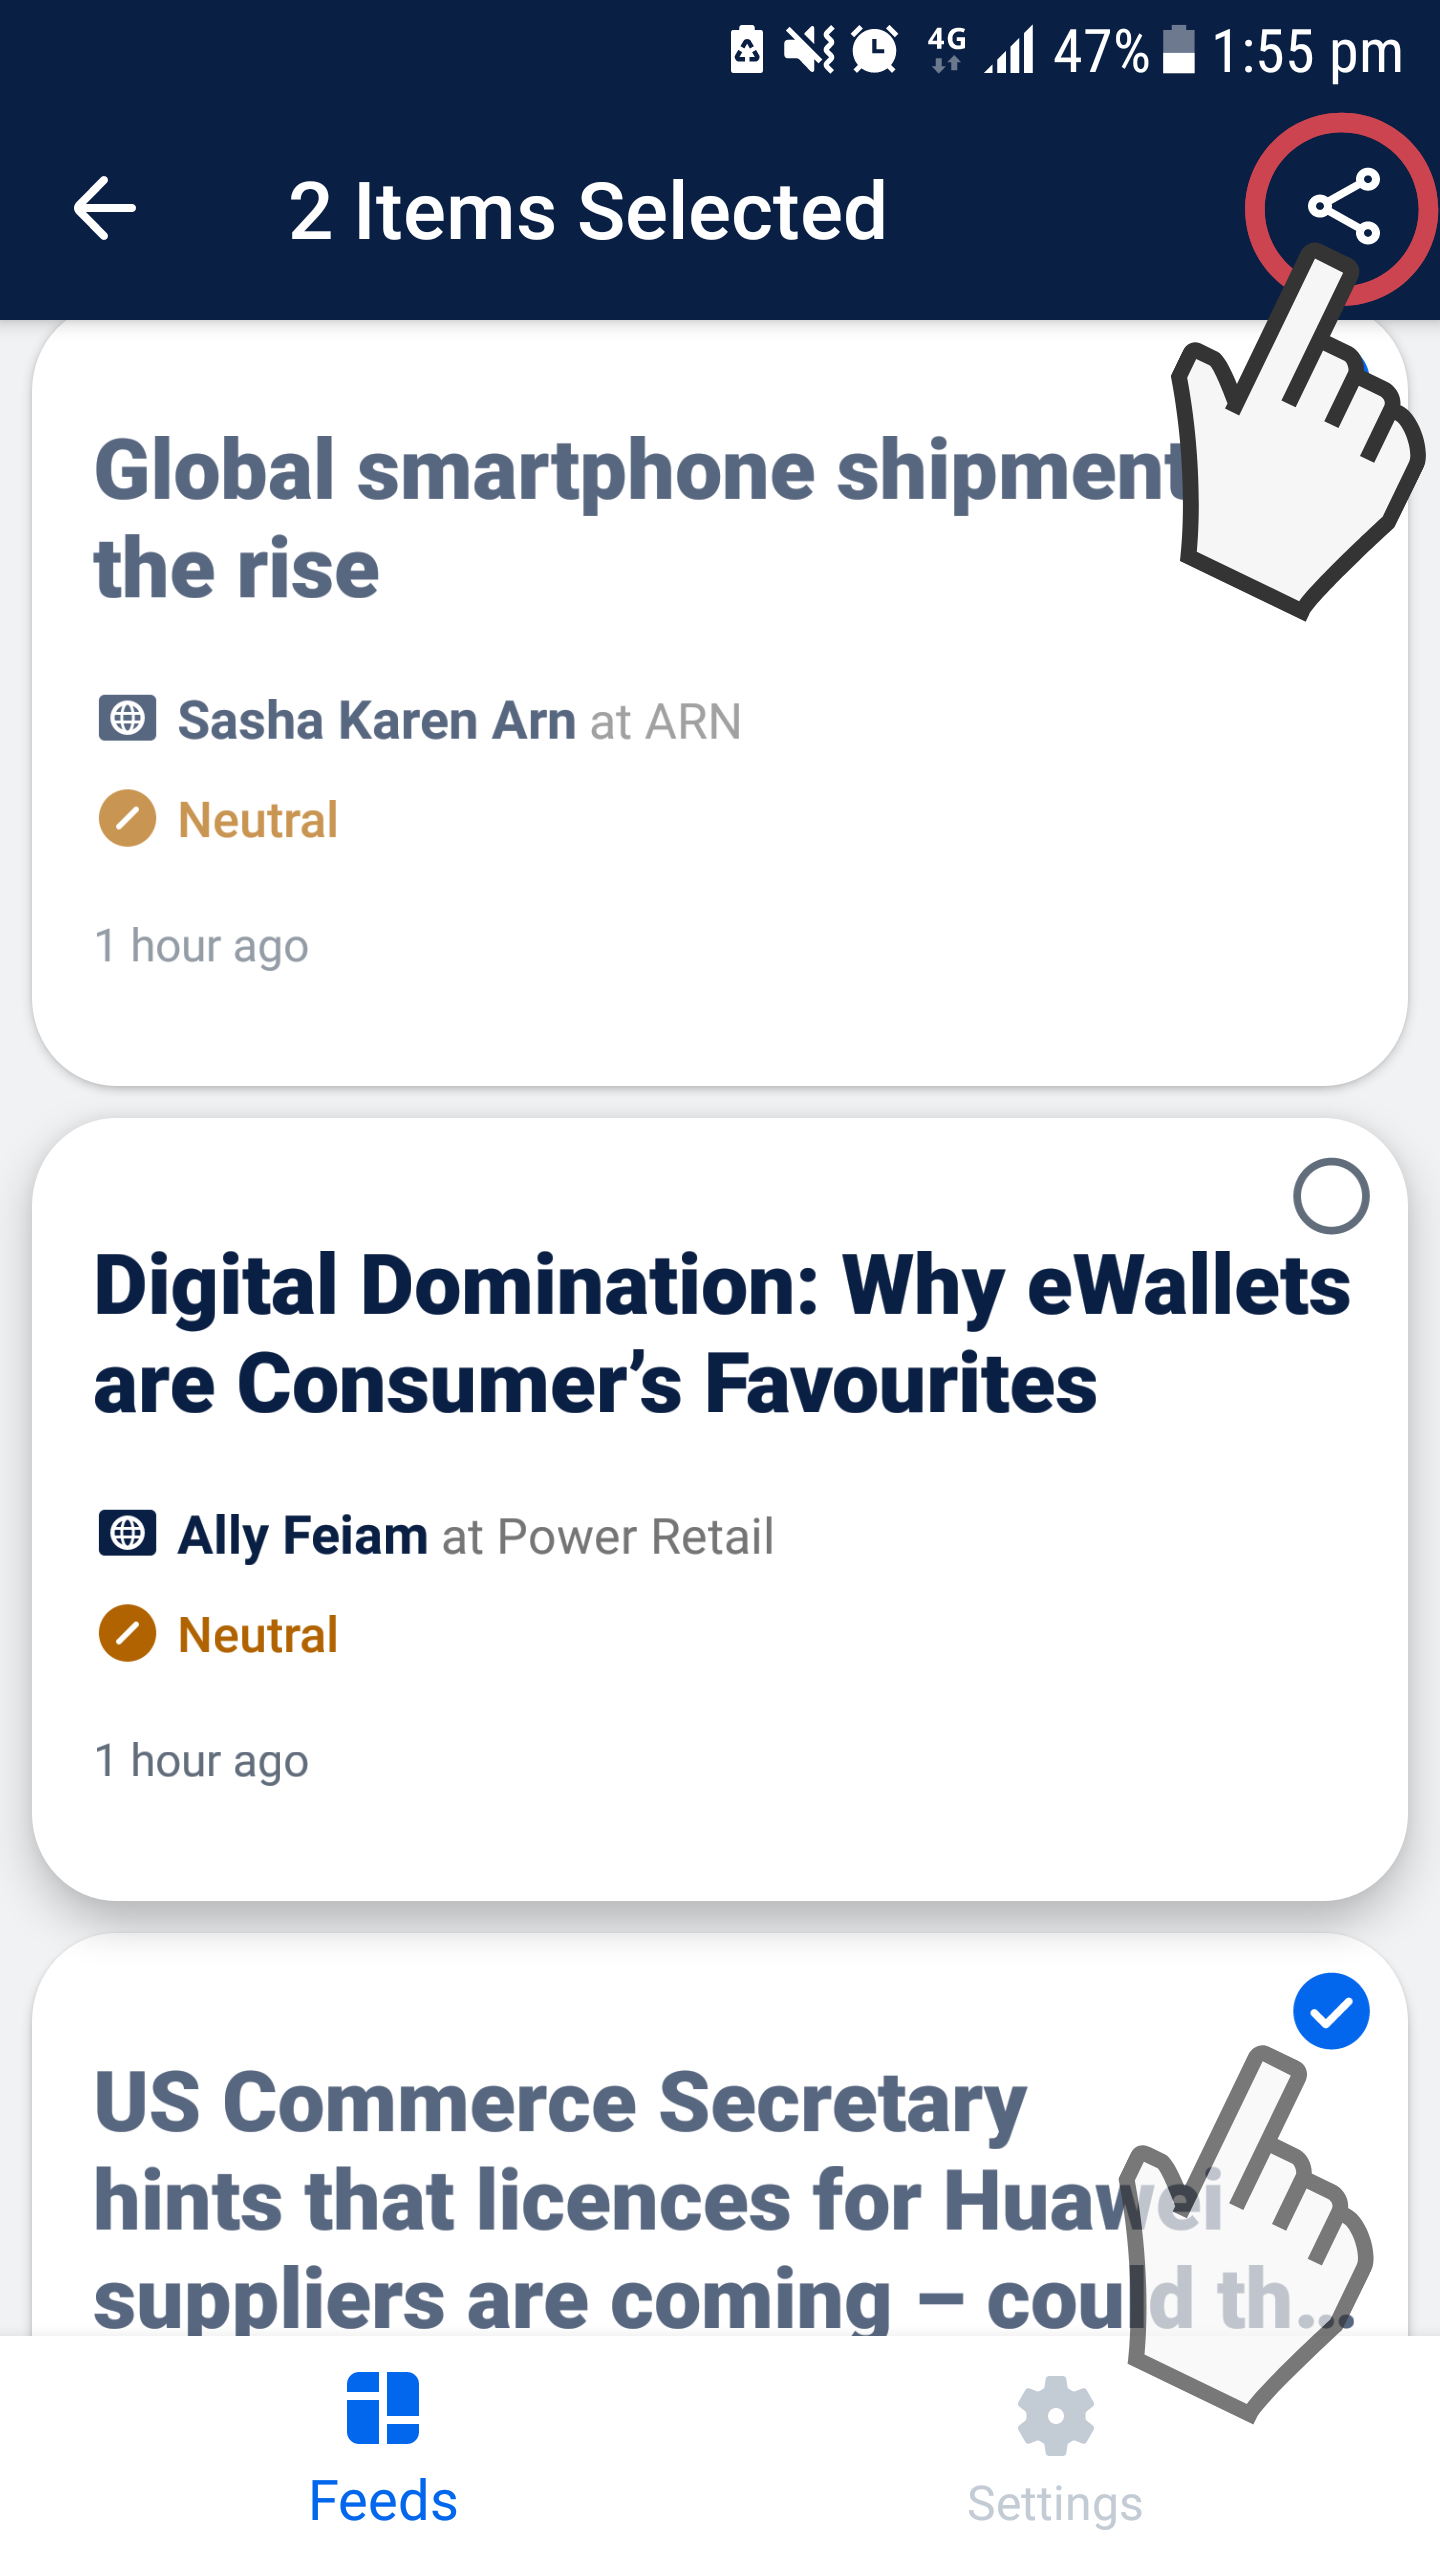
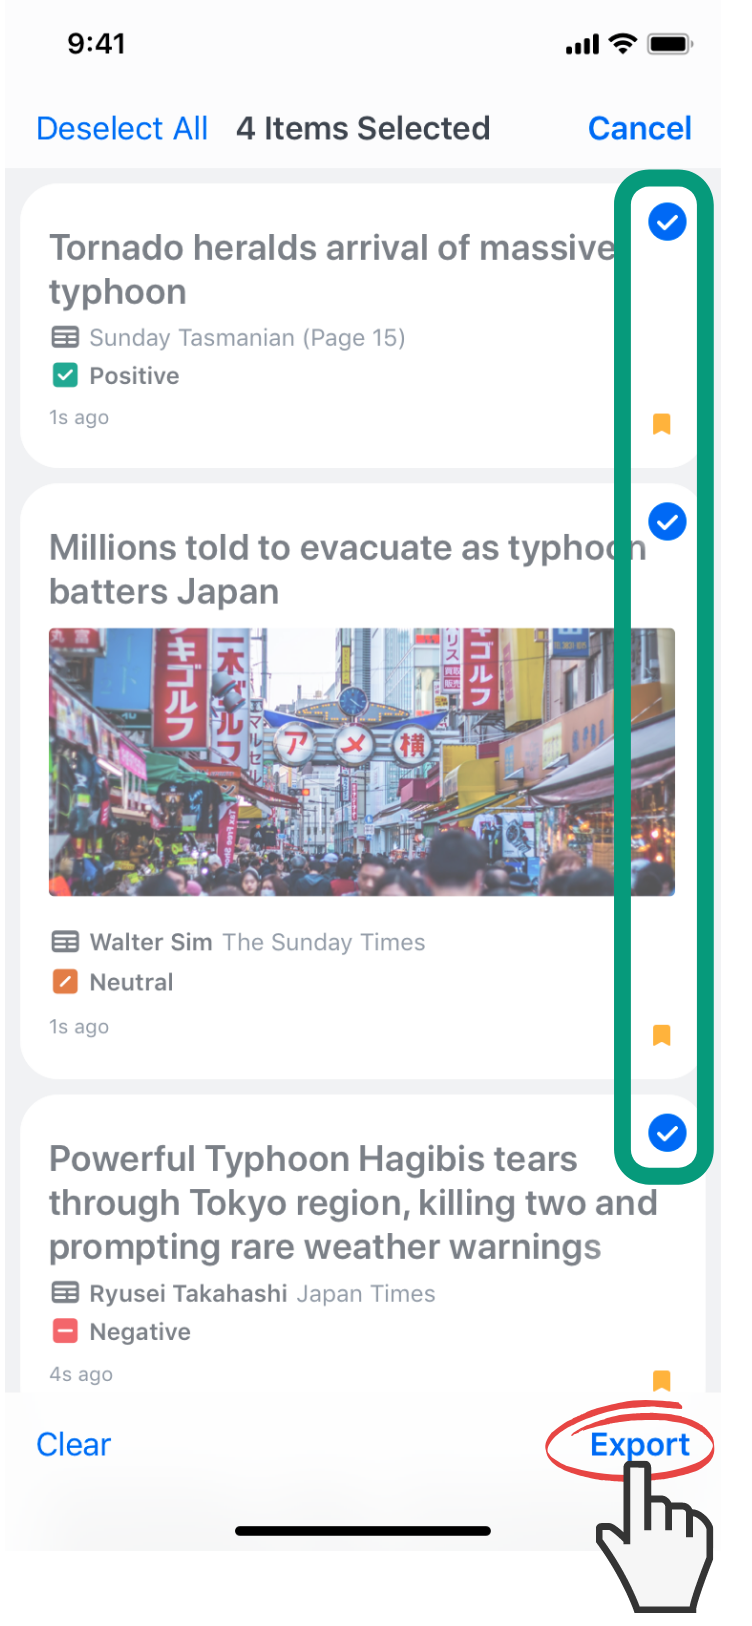
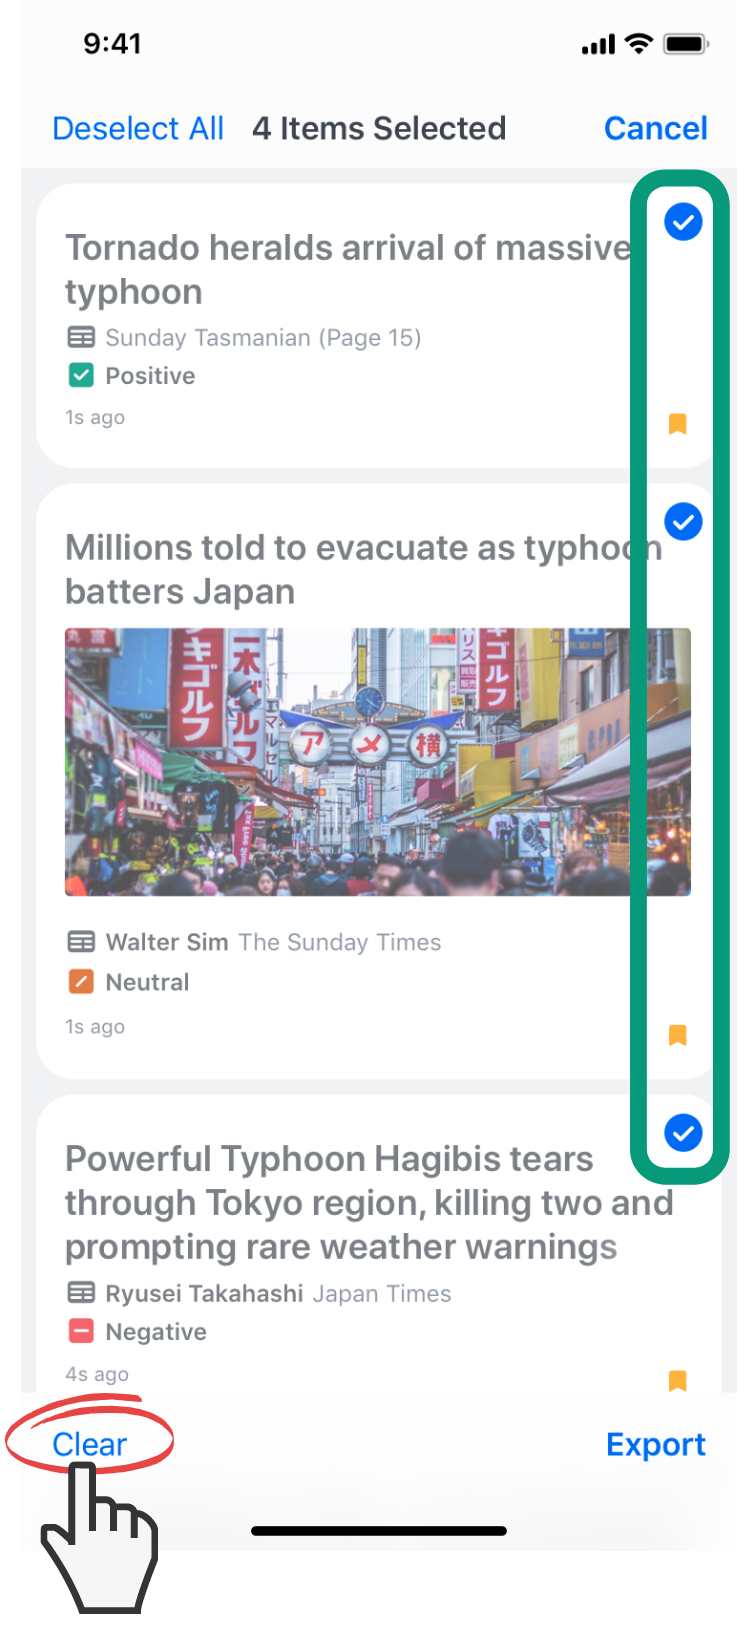
You can also share up to 50 items at a time from the list screen. To do this, tap the “select” button at the top right corner of the screen.
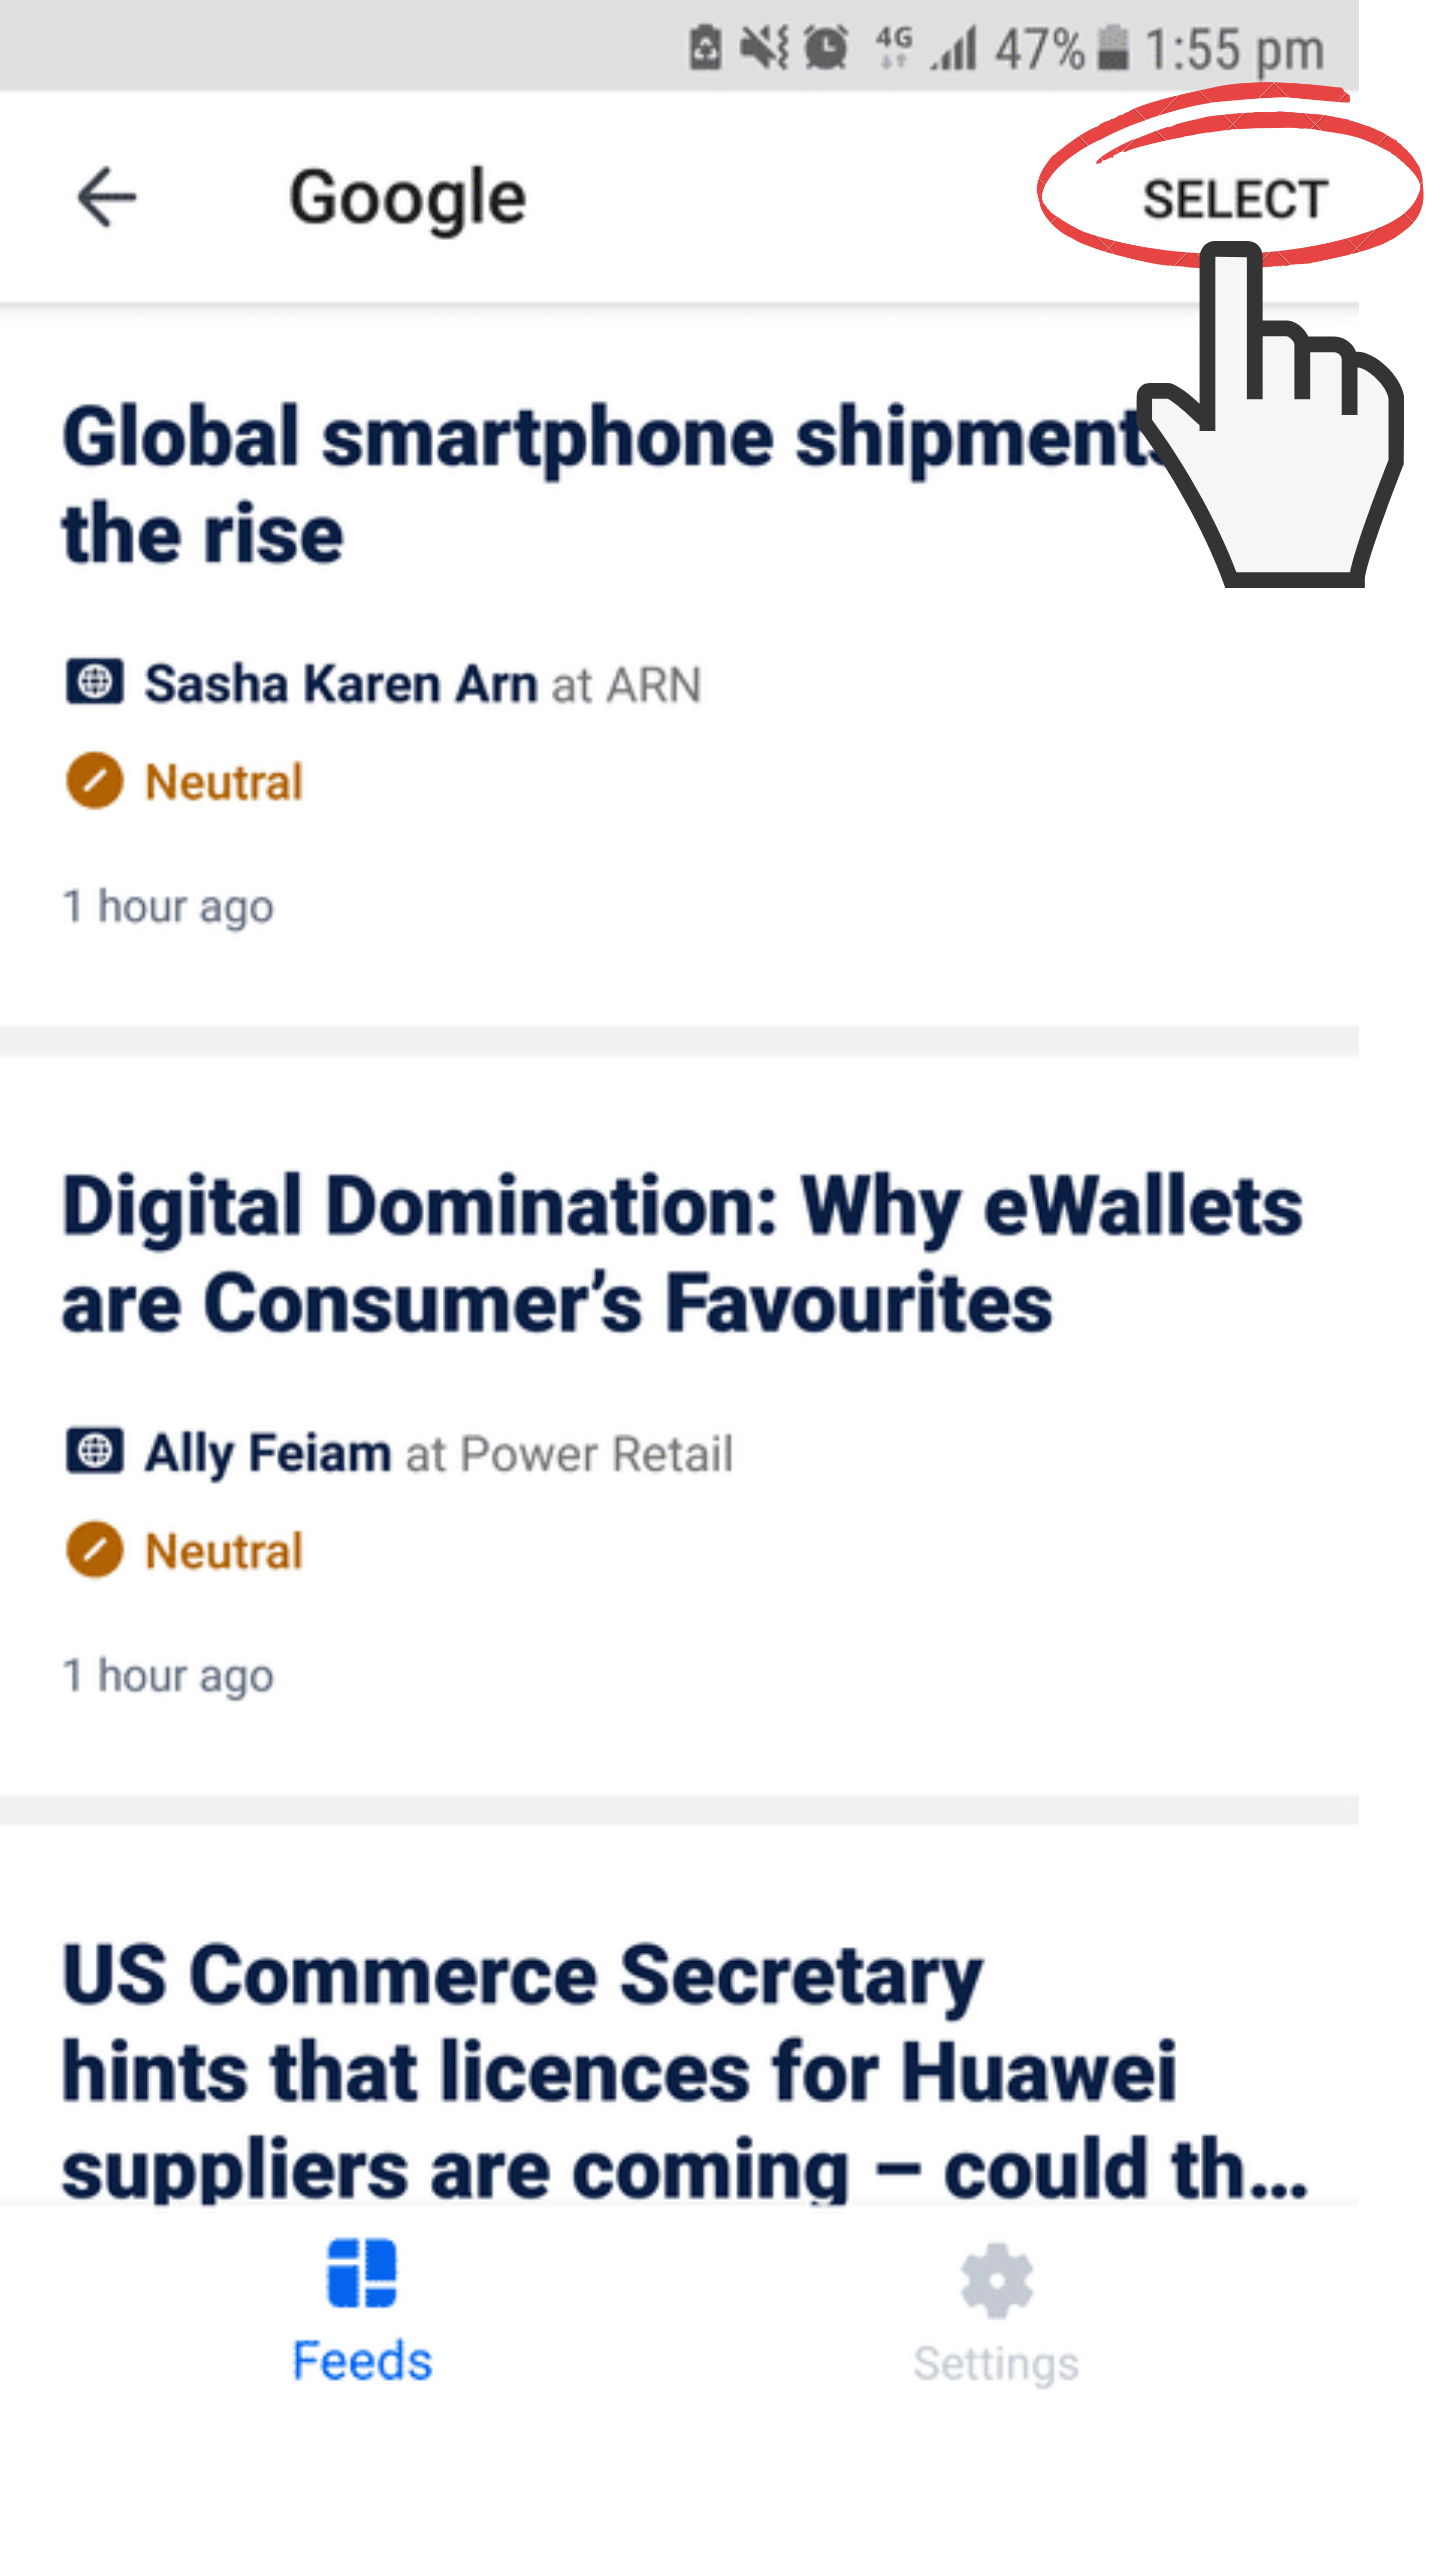
This will allow you to choose the items you want to share by selecting the checkmark on the top right corner of each item. Once you have selected your chosen items, tap the share button at the top of the screen and choose how you would like to share the content.
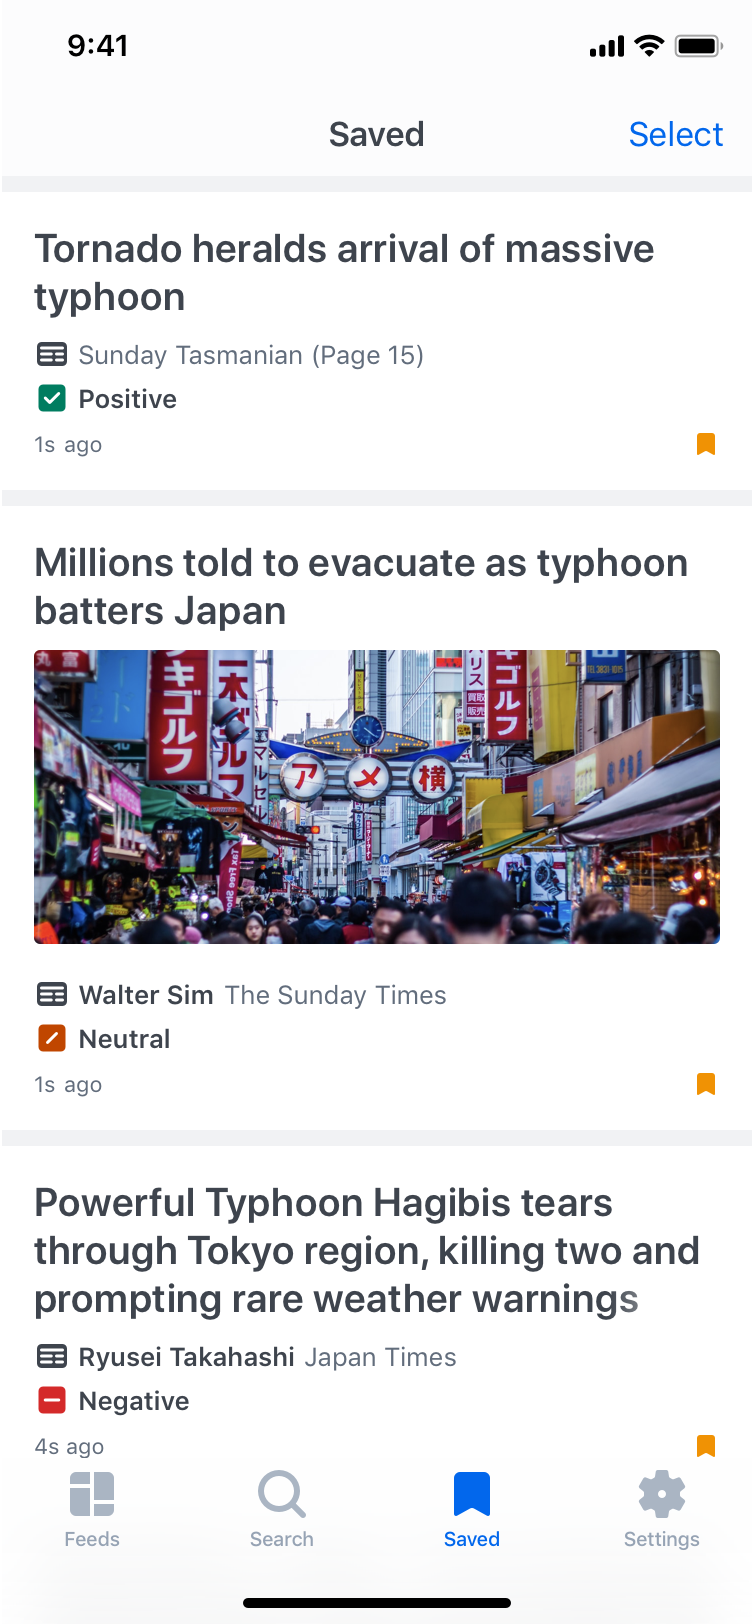
Saving and Reporting
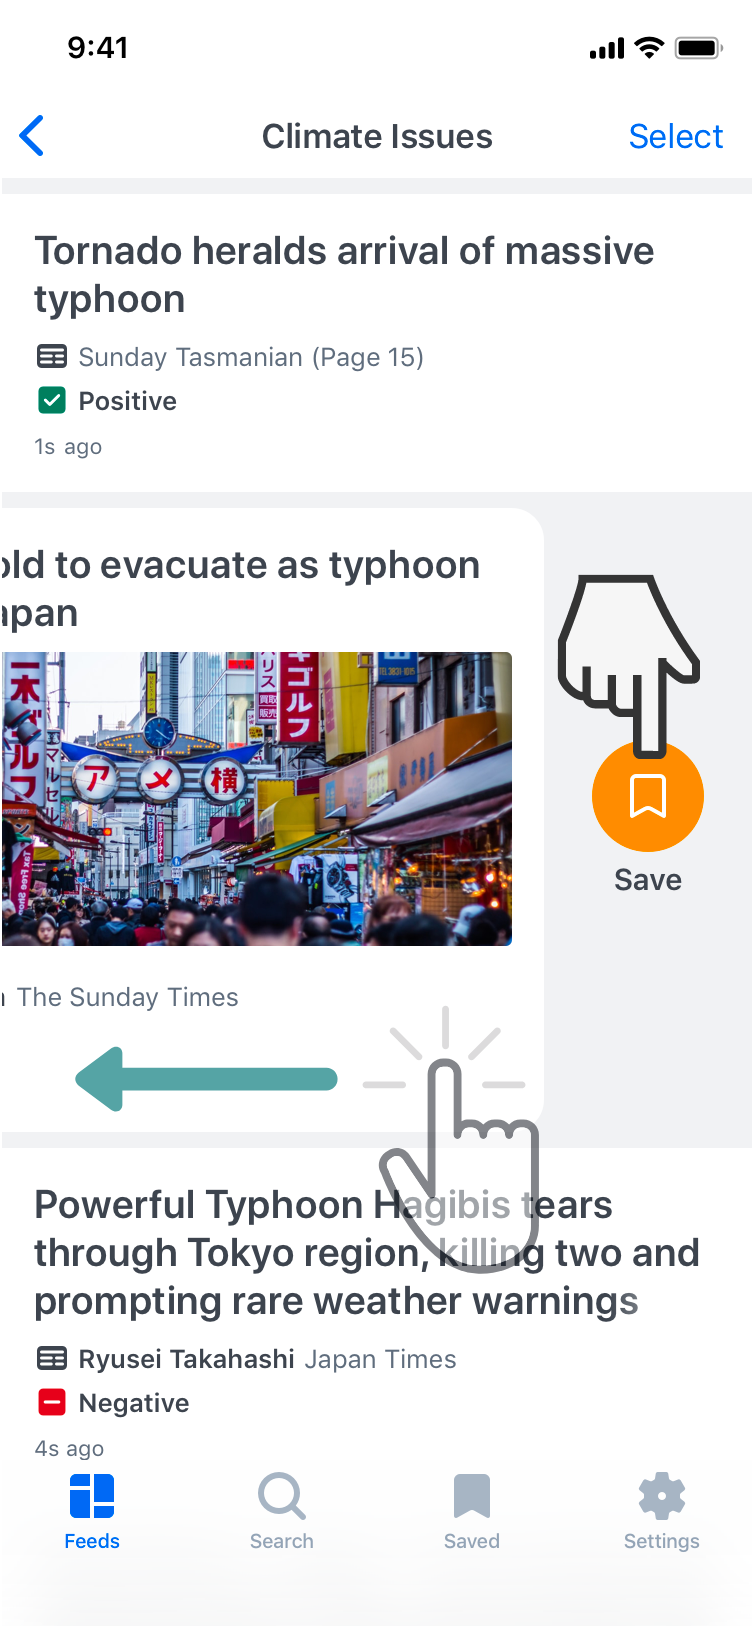
The App can be used to quickly generate PDF and email format coverage reports that appear just like they do when created using Mediaportal. Reports in the Isentia App are built using the ‘Save’ function. To build a report, you will first need to save the media you want to include by swiping left on the item and tapping the orange save button.
Media that has been saved will include an orange icon at the bottom right corner. The Saved tab will also show a blue badge indicating that there are items in the saved list.
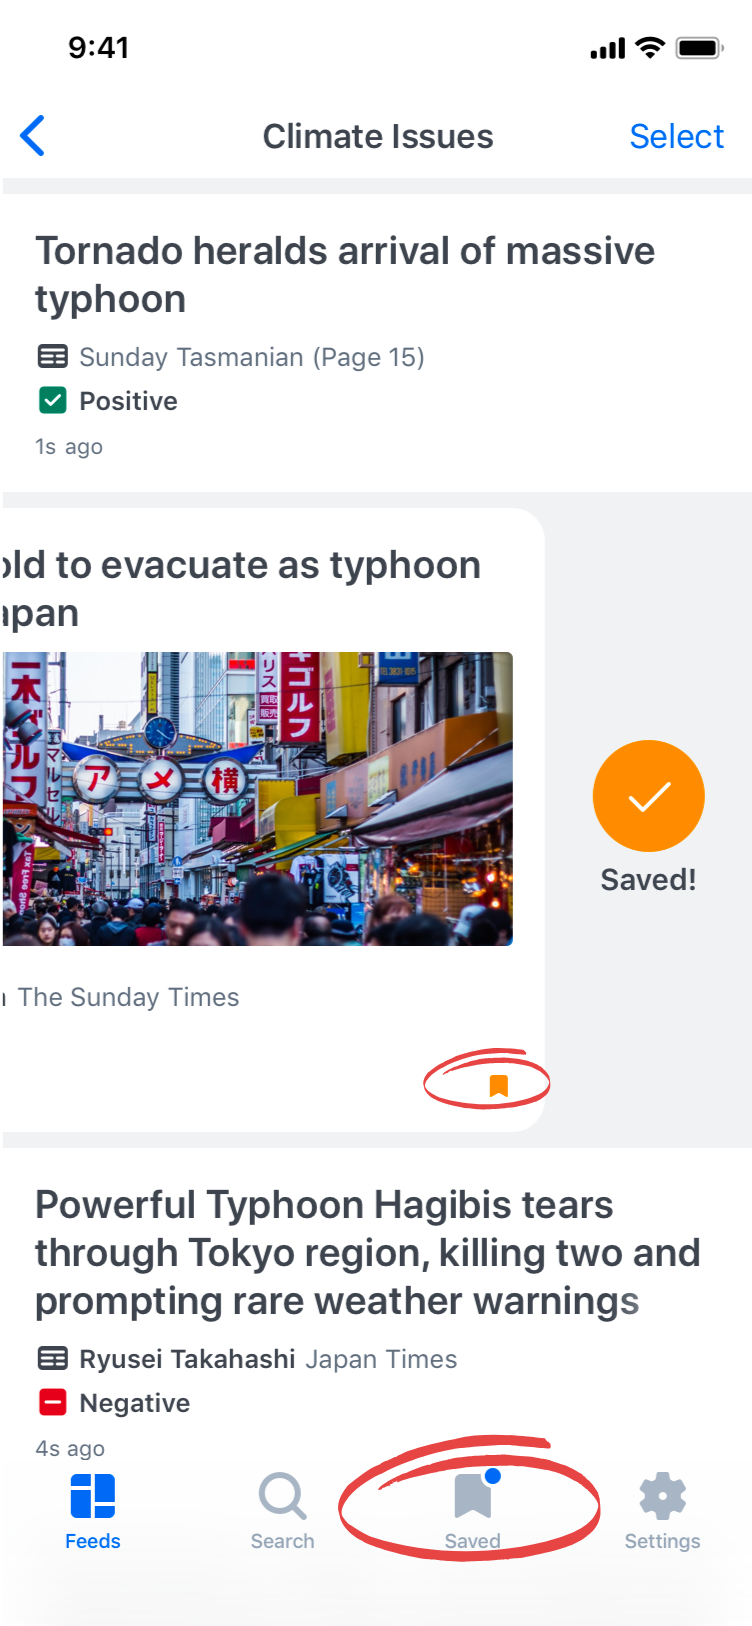
You can view all of the media you have saved by tapping the saved tab at the bottom of your screen.
From here you can select items you want to report on by tapping on the select button at the top right corner of the screen, then tapping on the media you want to include. Up to 50 items can be included in your report. Once you have selected all of your items, click the “Export” button.
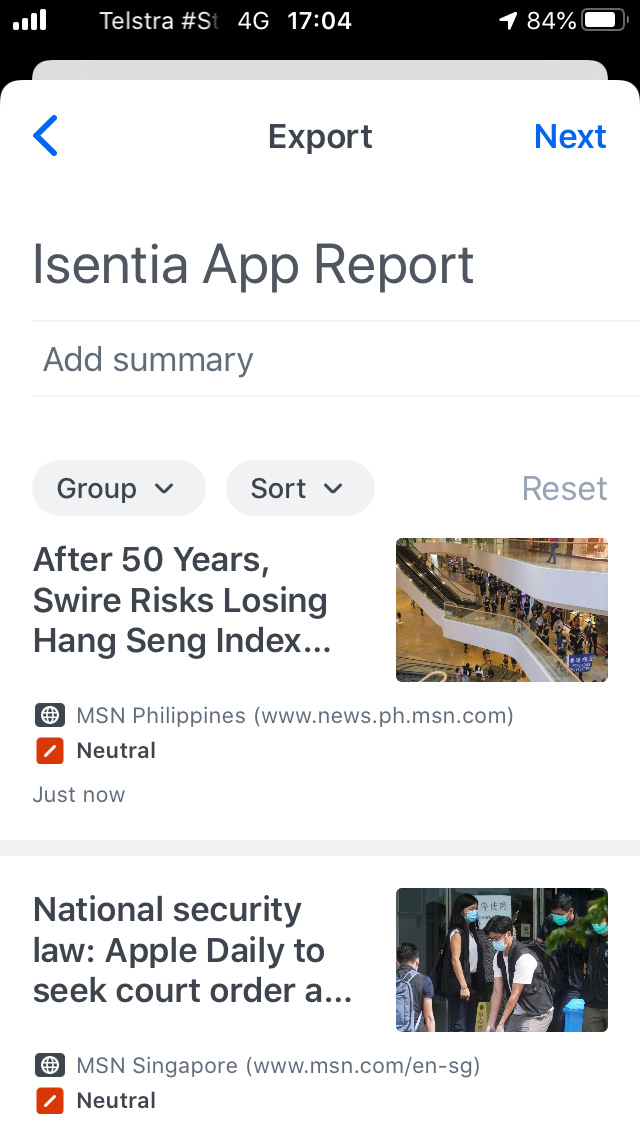
Prior to exporting, you are able to customise your report further by including a title or summary. You can also customise how the items in your report are organised using additional grouping and sorting options. When you are happy with the layout of your report select “Next” to start exporting.
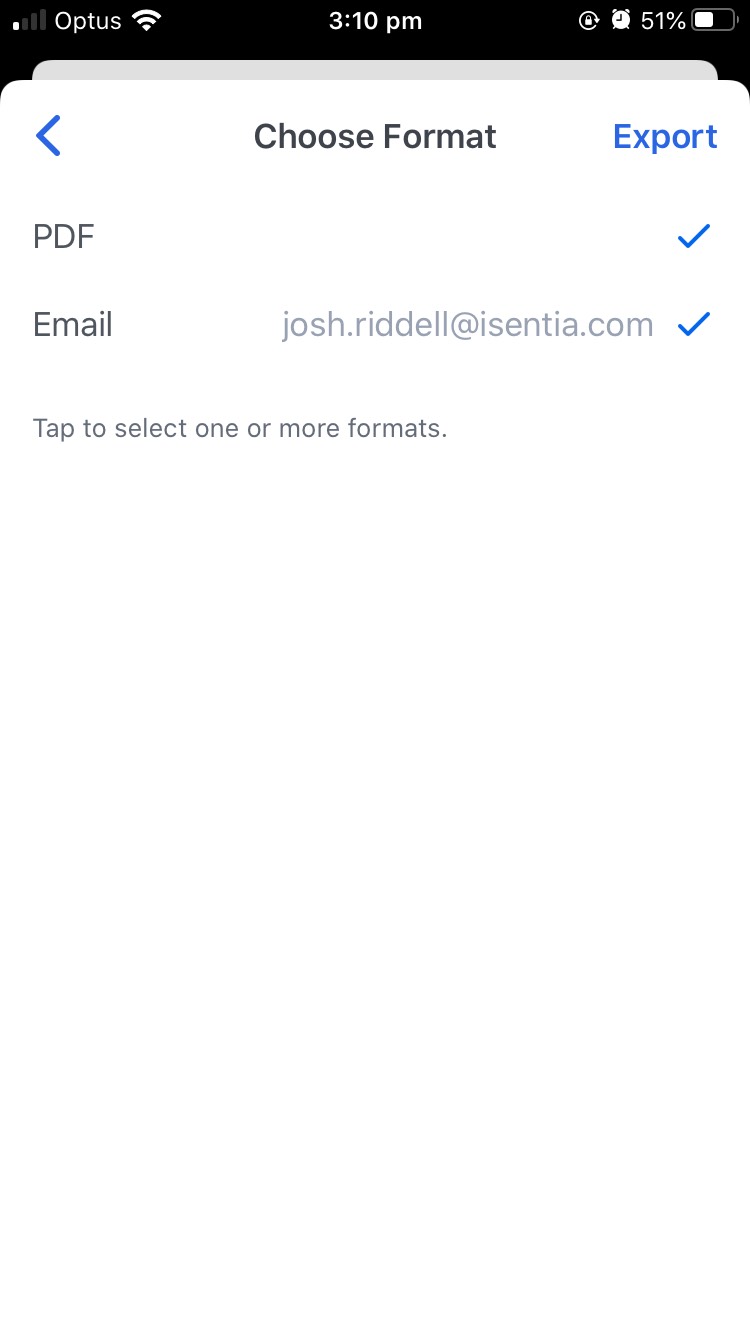
There are currently two formats to choose from when exporting a report, email or PDF. You can choose to export to both at the same time, or alternatively you can select one export option depending on your preference. If you choose the PDF option, your report will download onto your device as a PDF and can be shared using your device’s native sharing functionality. If you choose the email option, the report will be emailed to the address that is linked to your Mediaportal account. Once you have made your selection, use “Export” to receive your report.
If your saved list has started to fill up, you can remove content individually or in bulk. To remove items in bulk, select all of the items you want to remove and tap the “Clear” button at the bottom left of the screen.
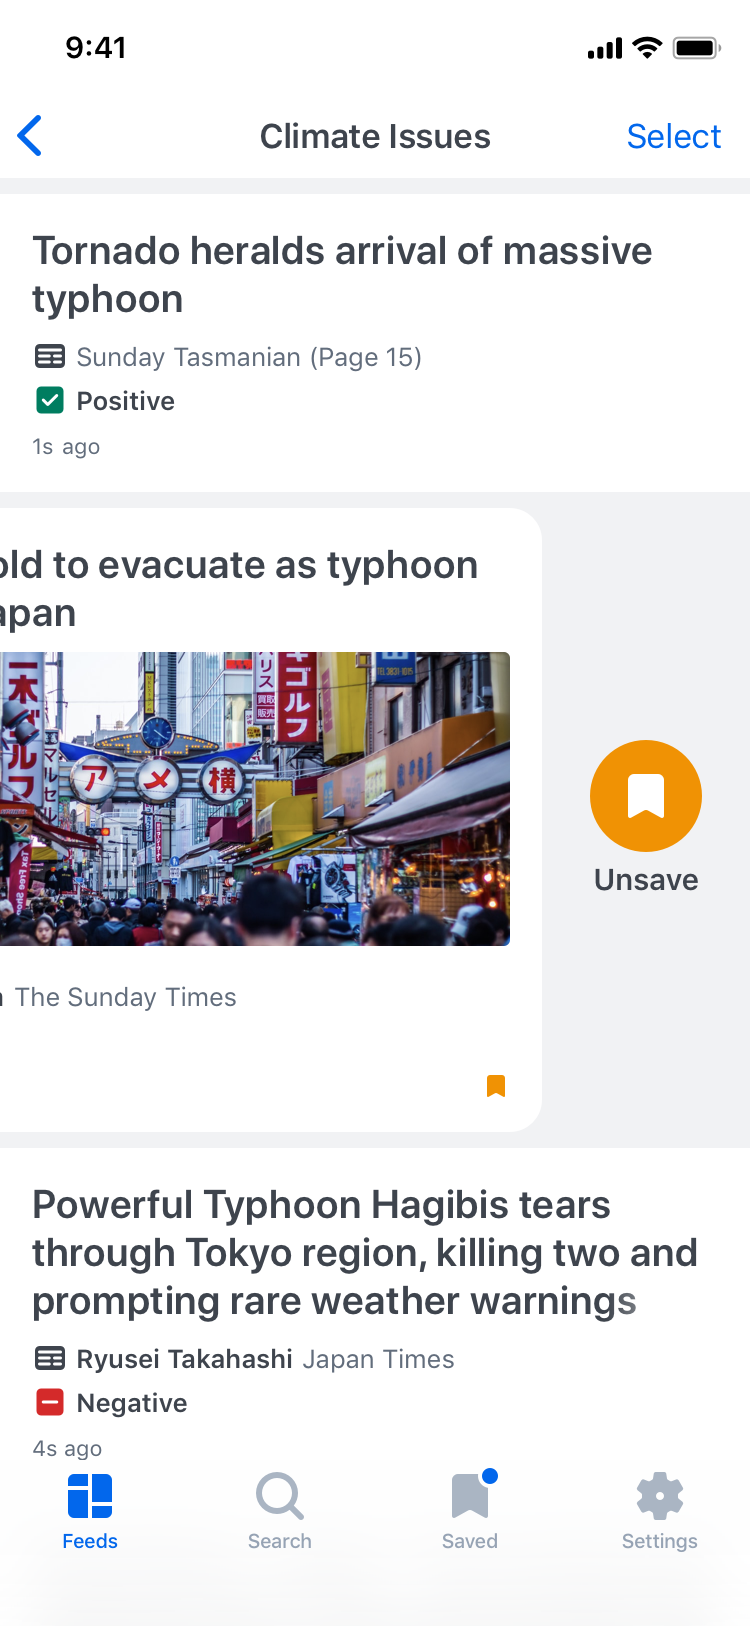
To remove items individually, swipe left on the item and tap the orange “Unsave” button.
Notifications
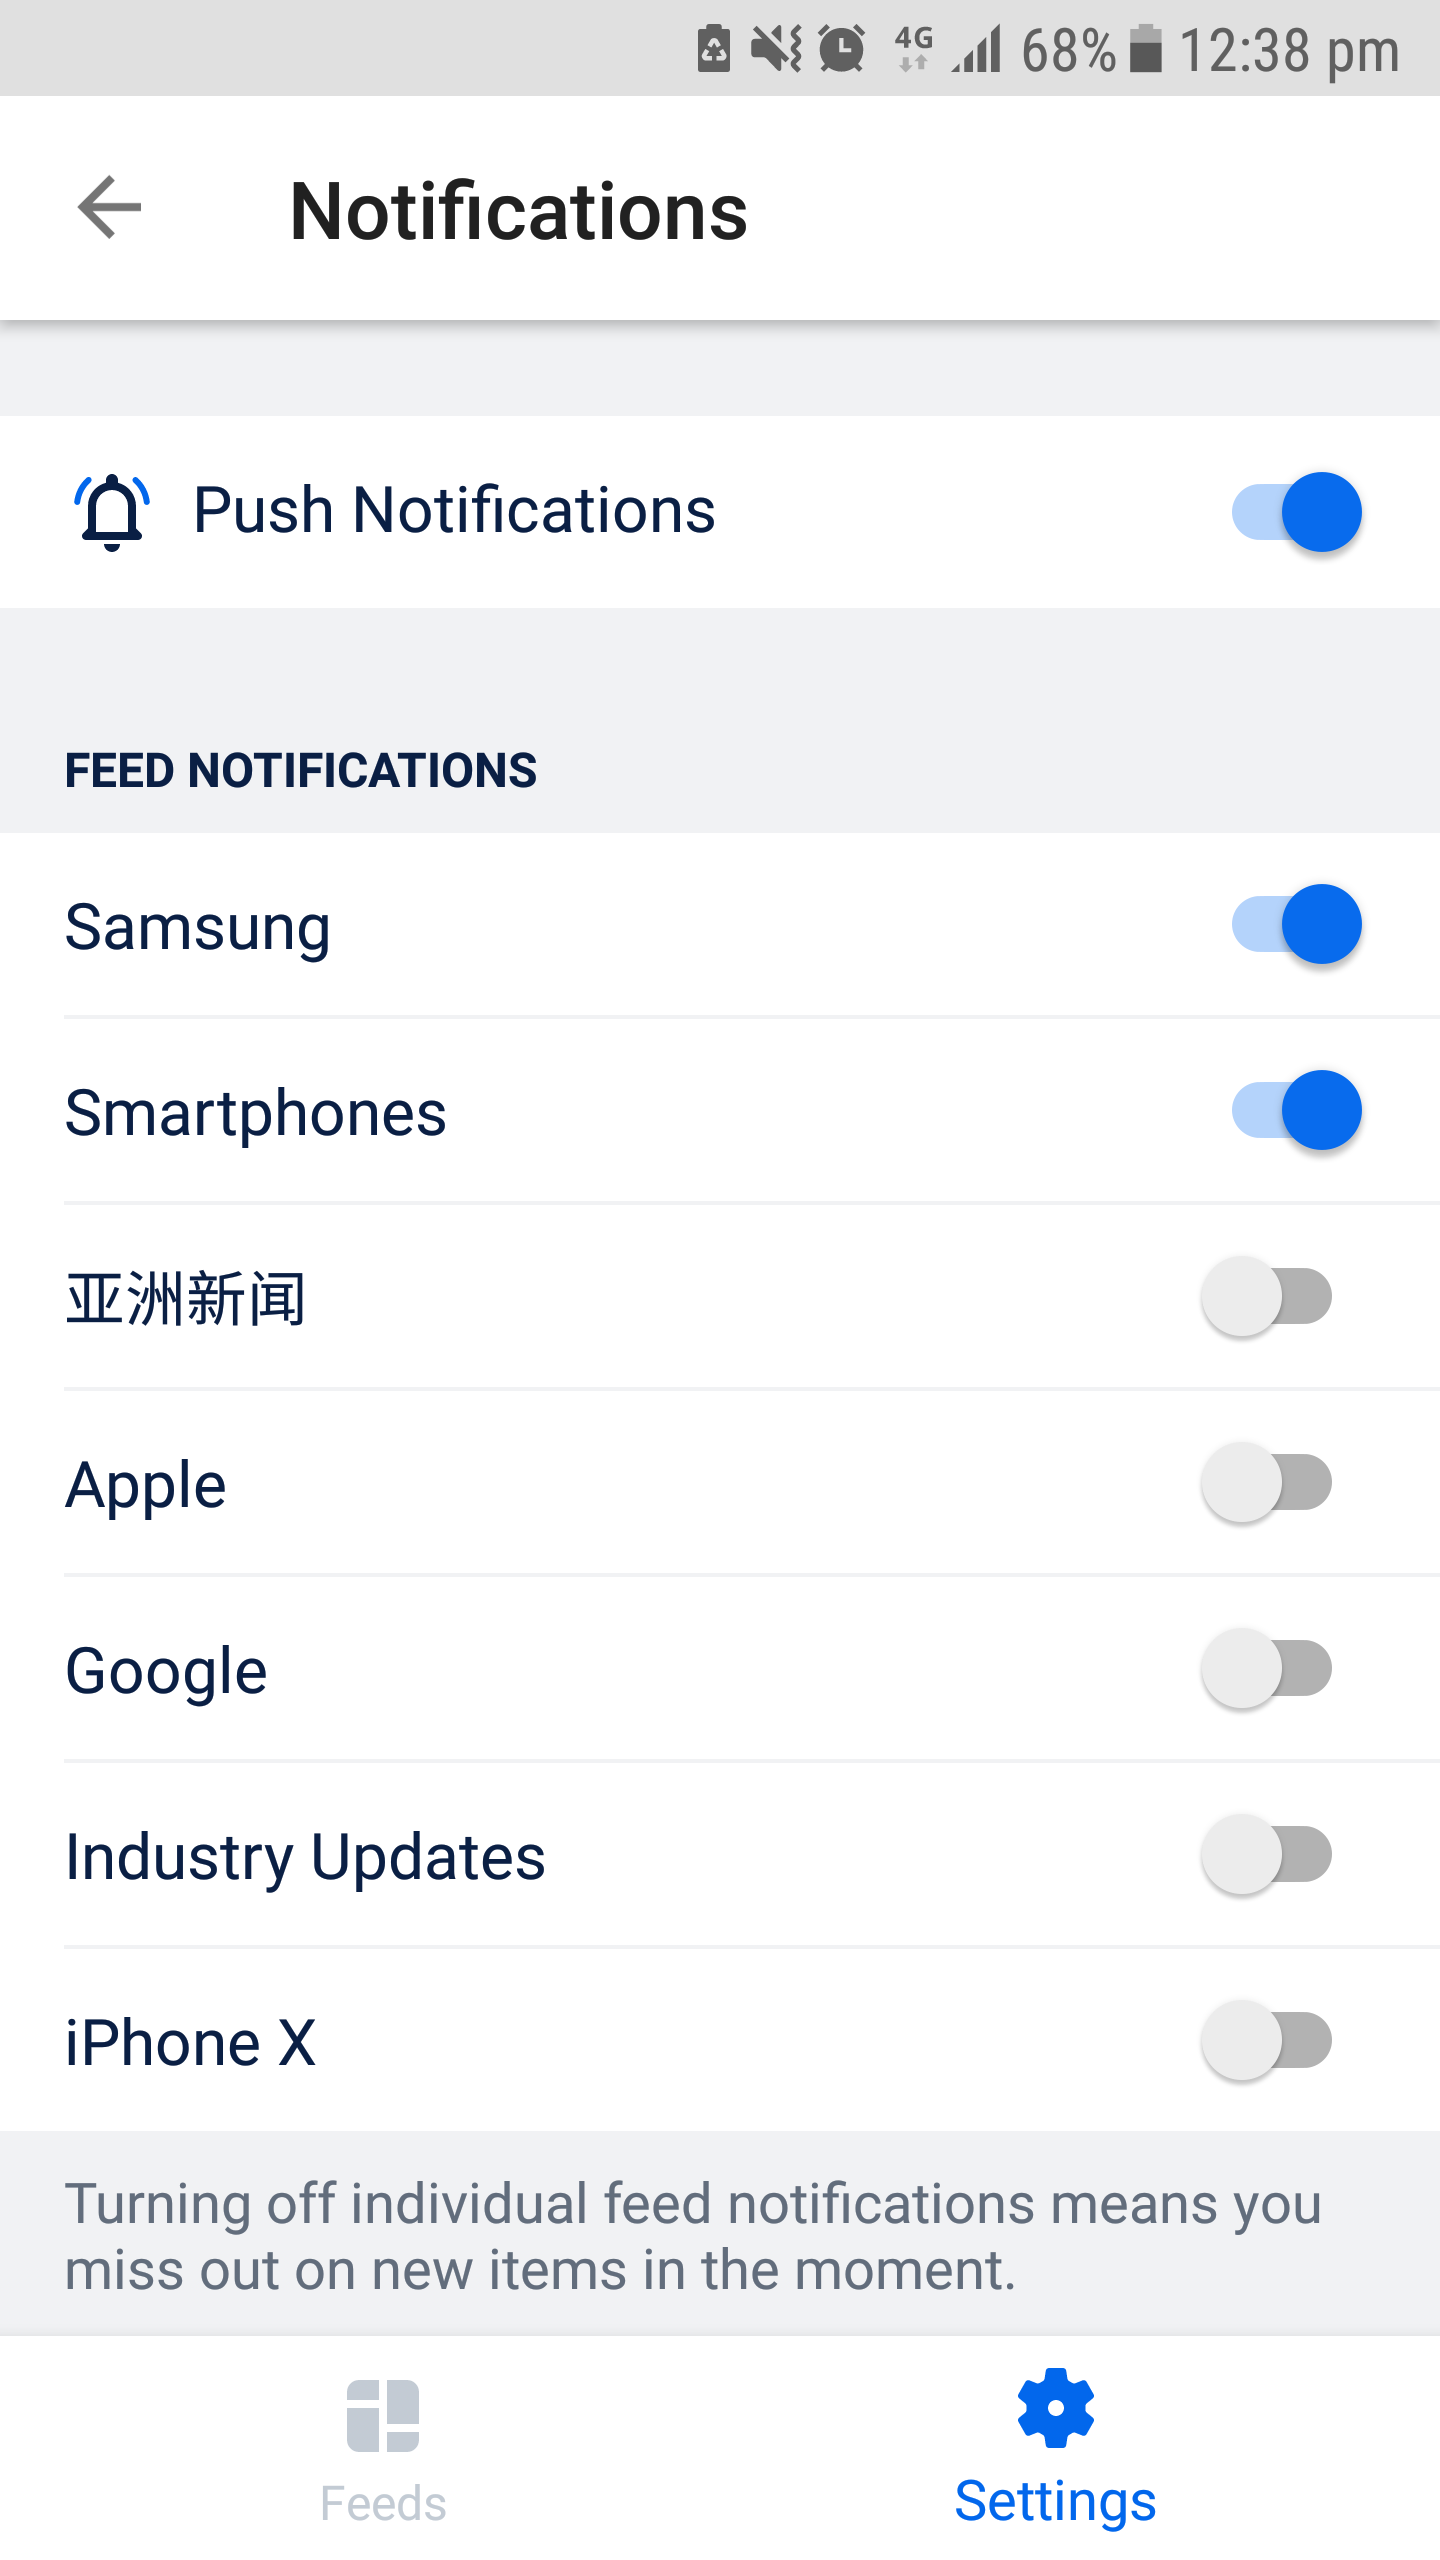
Want to be notified to a topic you are tracking? You can allow push notifications to notify you of any new media matching your Feed topics. To do this, tap the “Settings” button at the bottom of the screen and toggle on “Push Notifications”. From the list, toggle on notifications for the topics you want to keep alerted to.
With push notifications setup, you will receive alerts to media coverage directly on your lock screen. From here you can view or action items.

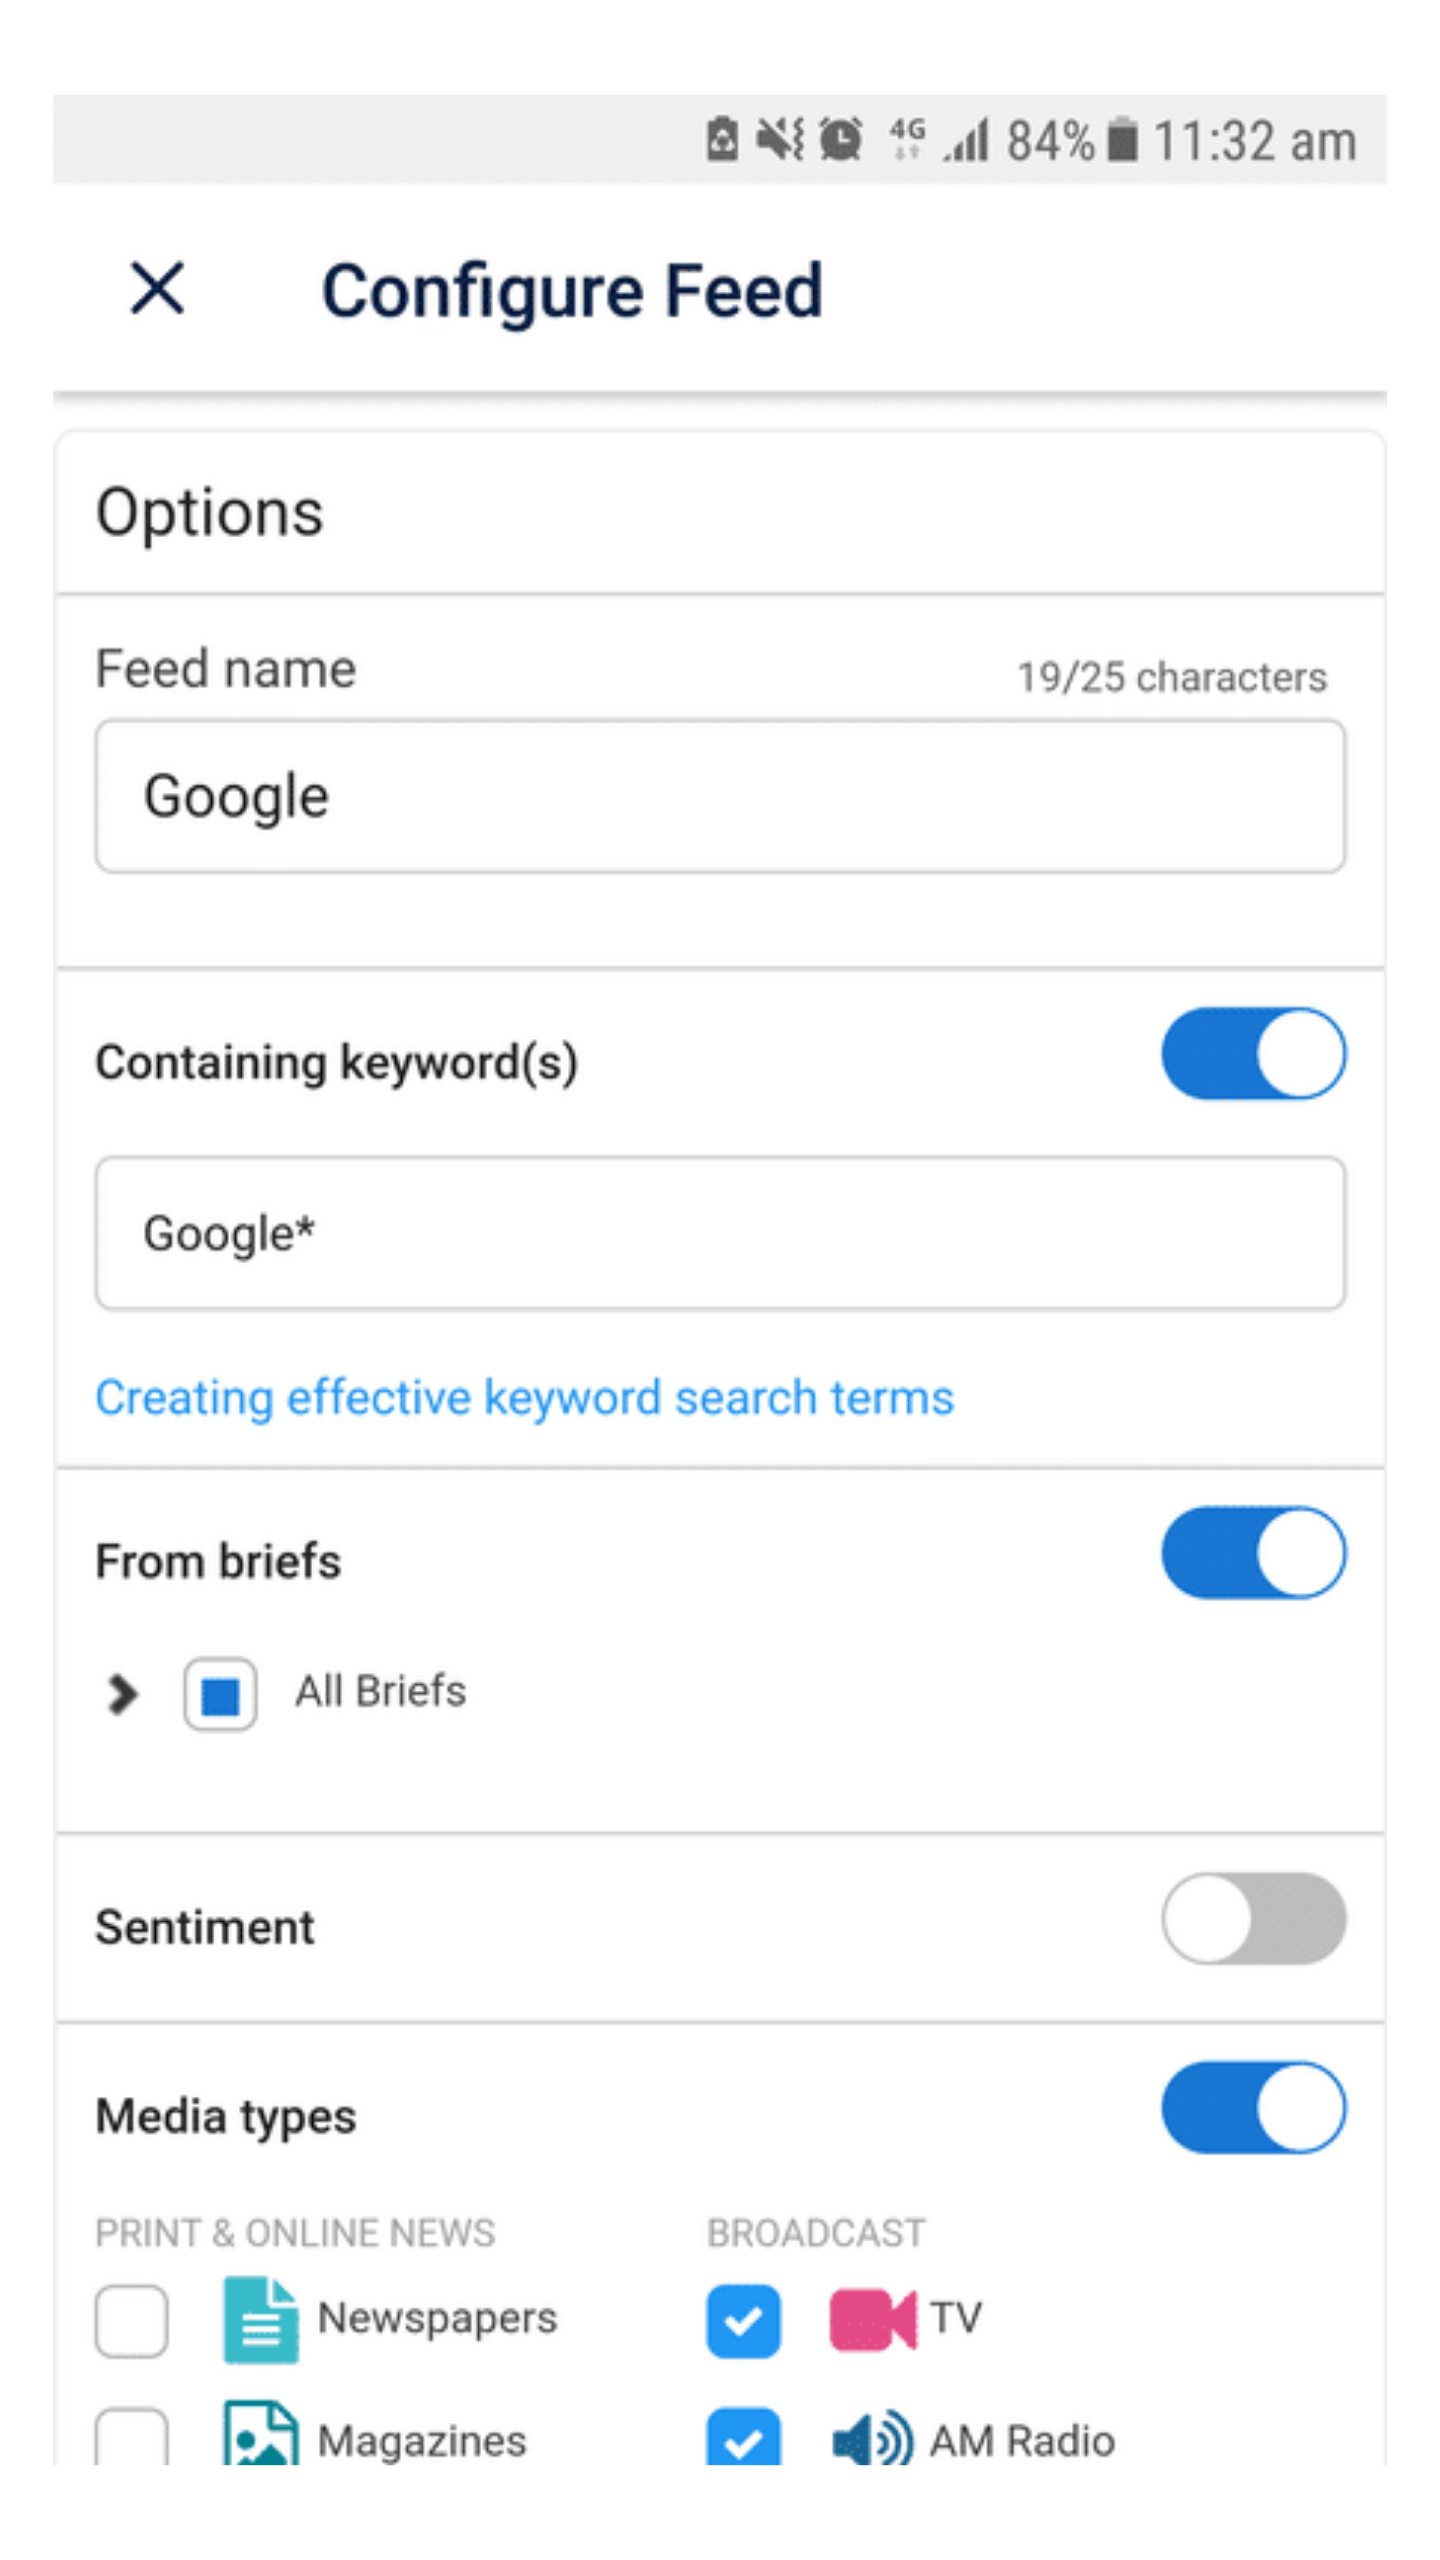
Setting up a Feed in the app
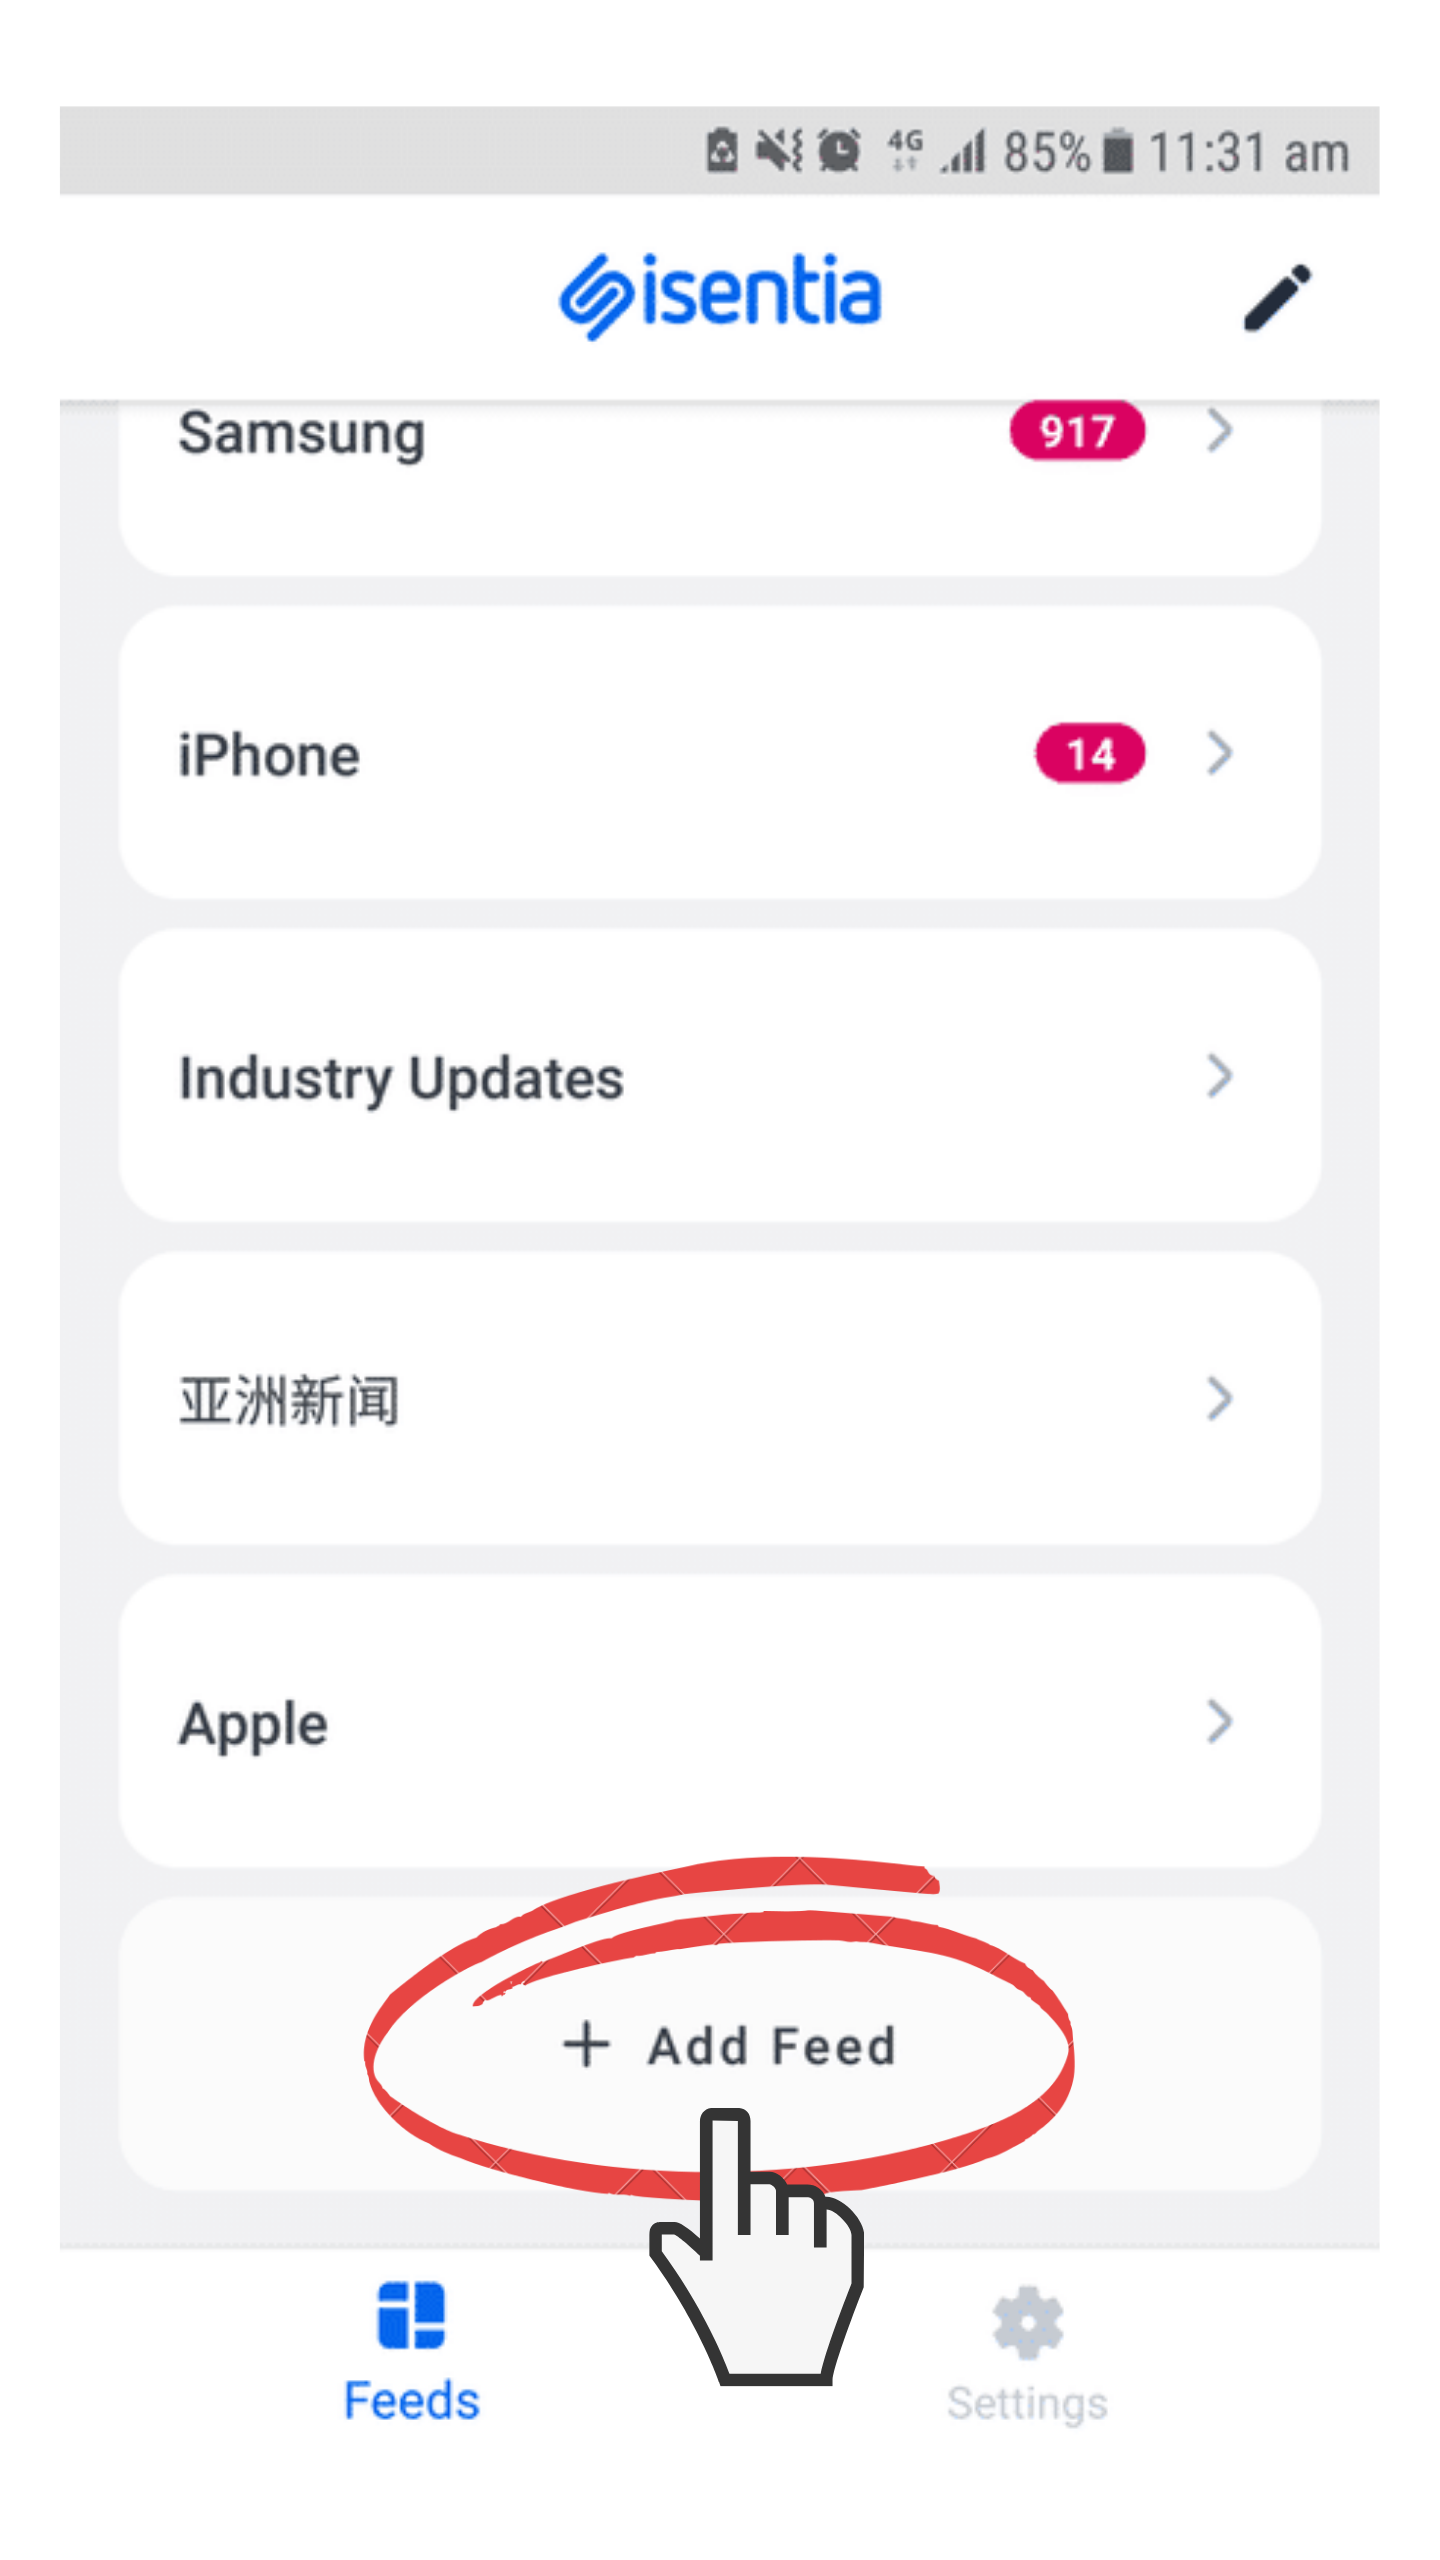
If you don’t already have a Feed setup, you can create one by clicking on the “Add Feed” button on the main Feeds screen in the app.
This will open the configuration screen where you can add a name for the topic, and choose what search rules you would like to add to pull in content. You can use the filter toggles to apply multiple rules at a time to narrow your results.
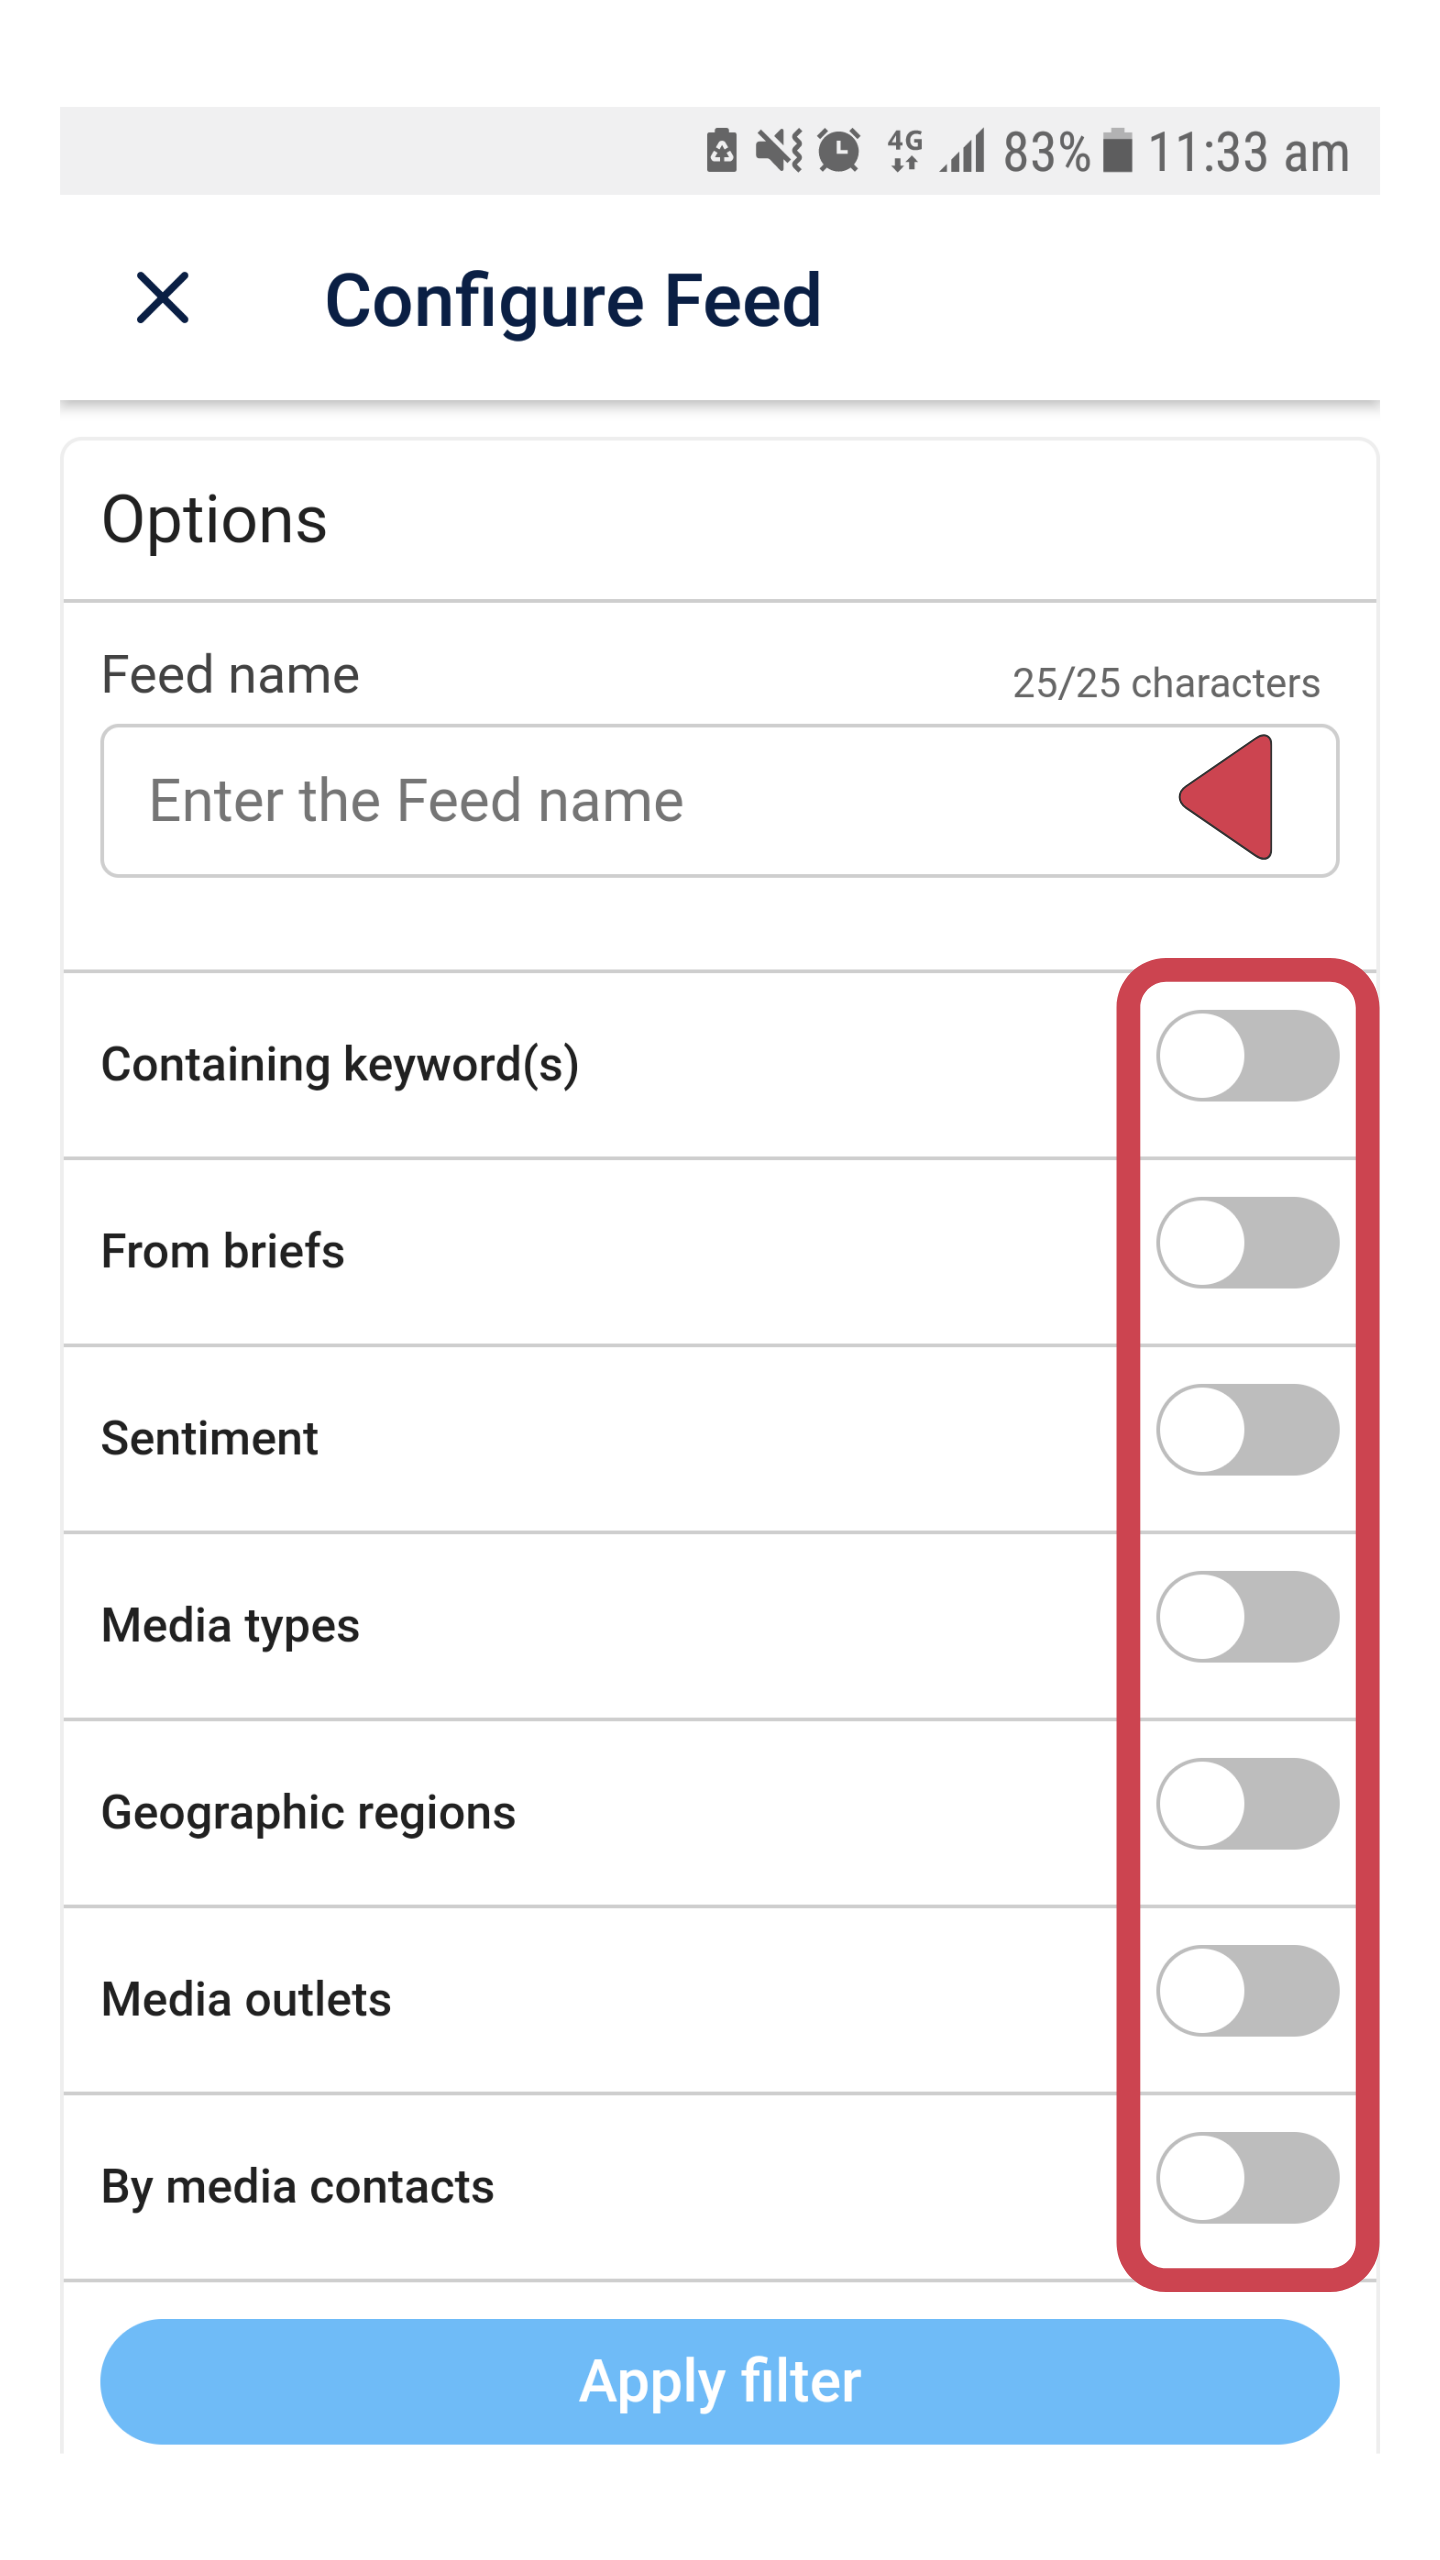
Once you happy with the Feed criteria, click “Apply filter” to save your Feed.
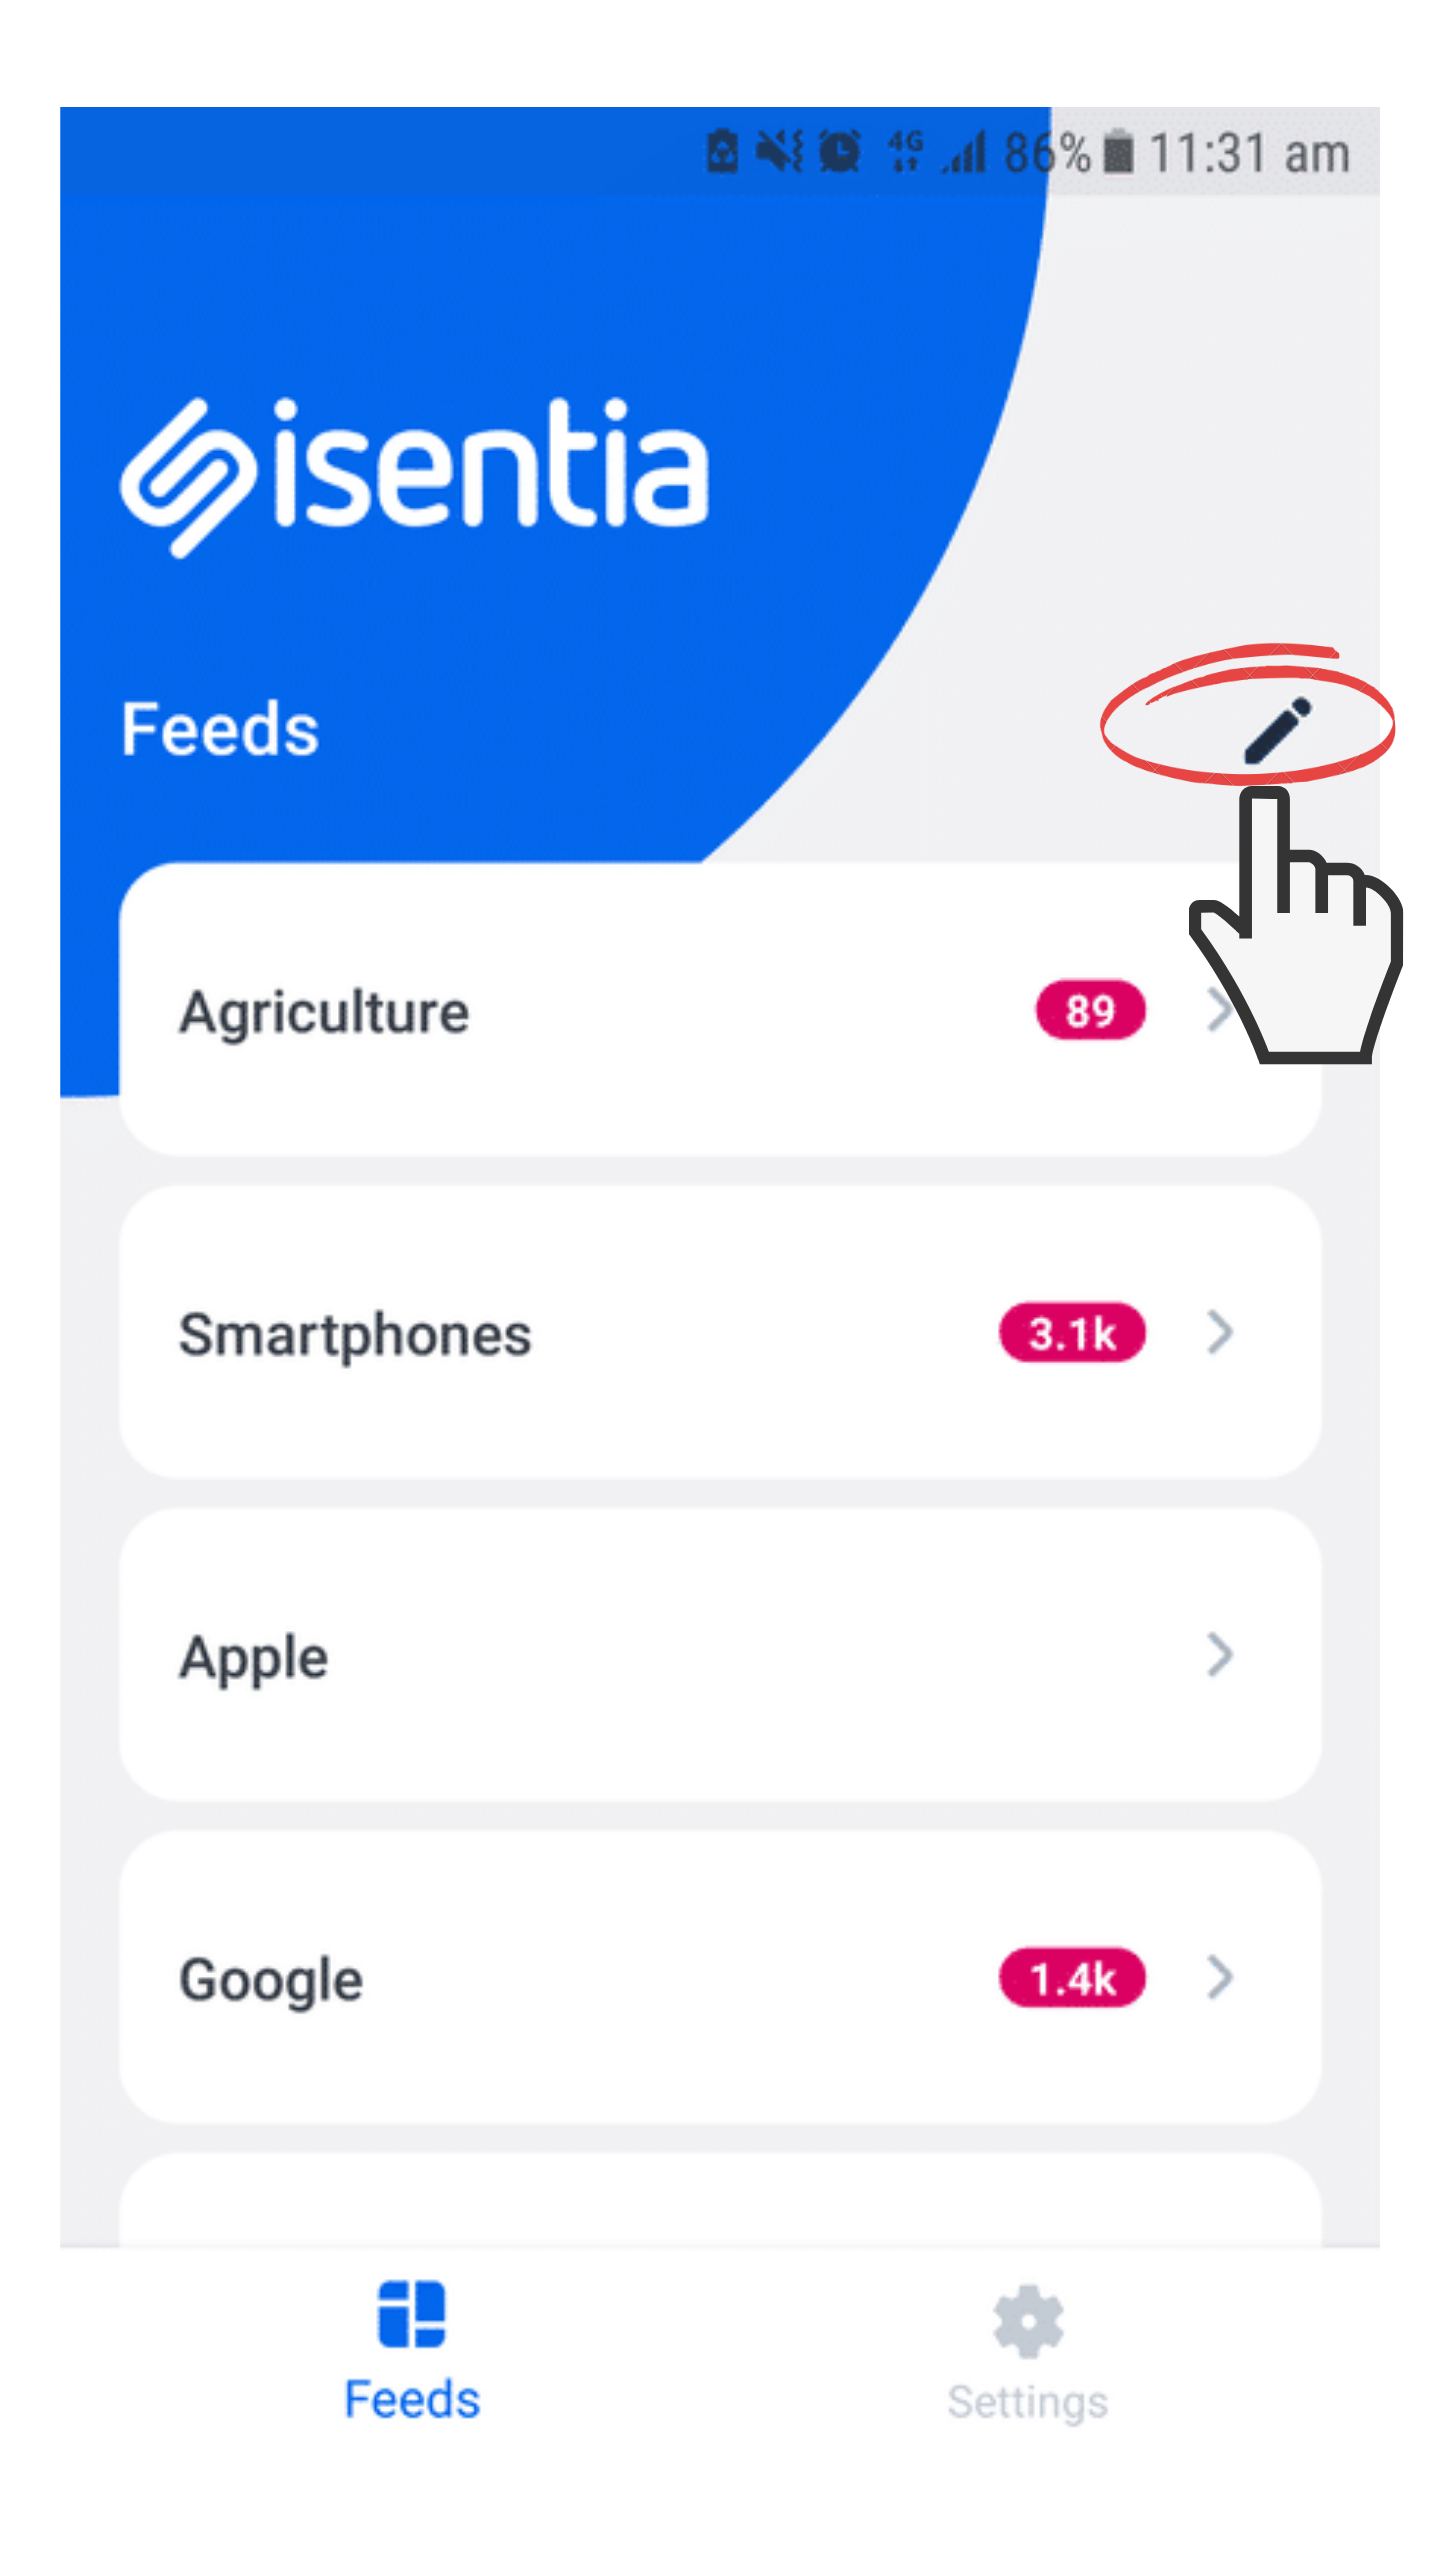
Editing you Feeds
You can also edit any of your Feed topics in the app by tapping the pencil icon at the top of the main Feeds screen.
Next tap the settings icon on the Feed you would like to edit. You can also delete a Feed here by tapping on the red minus circle.
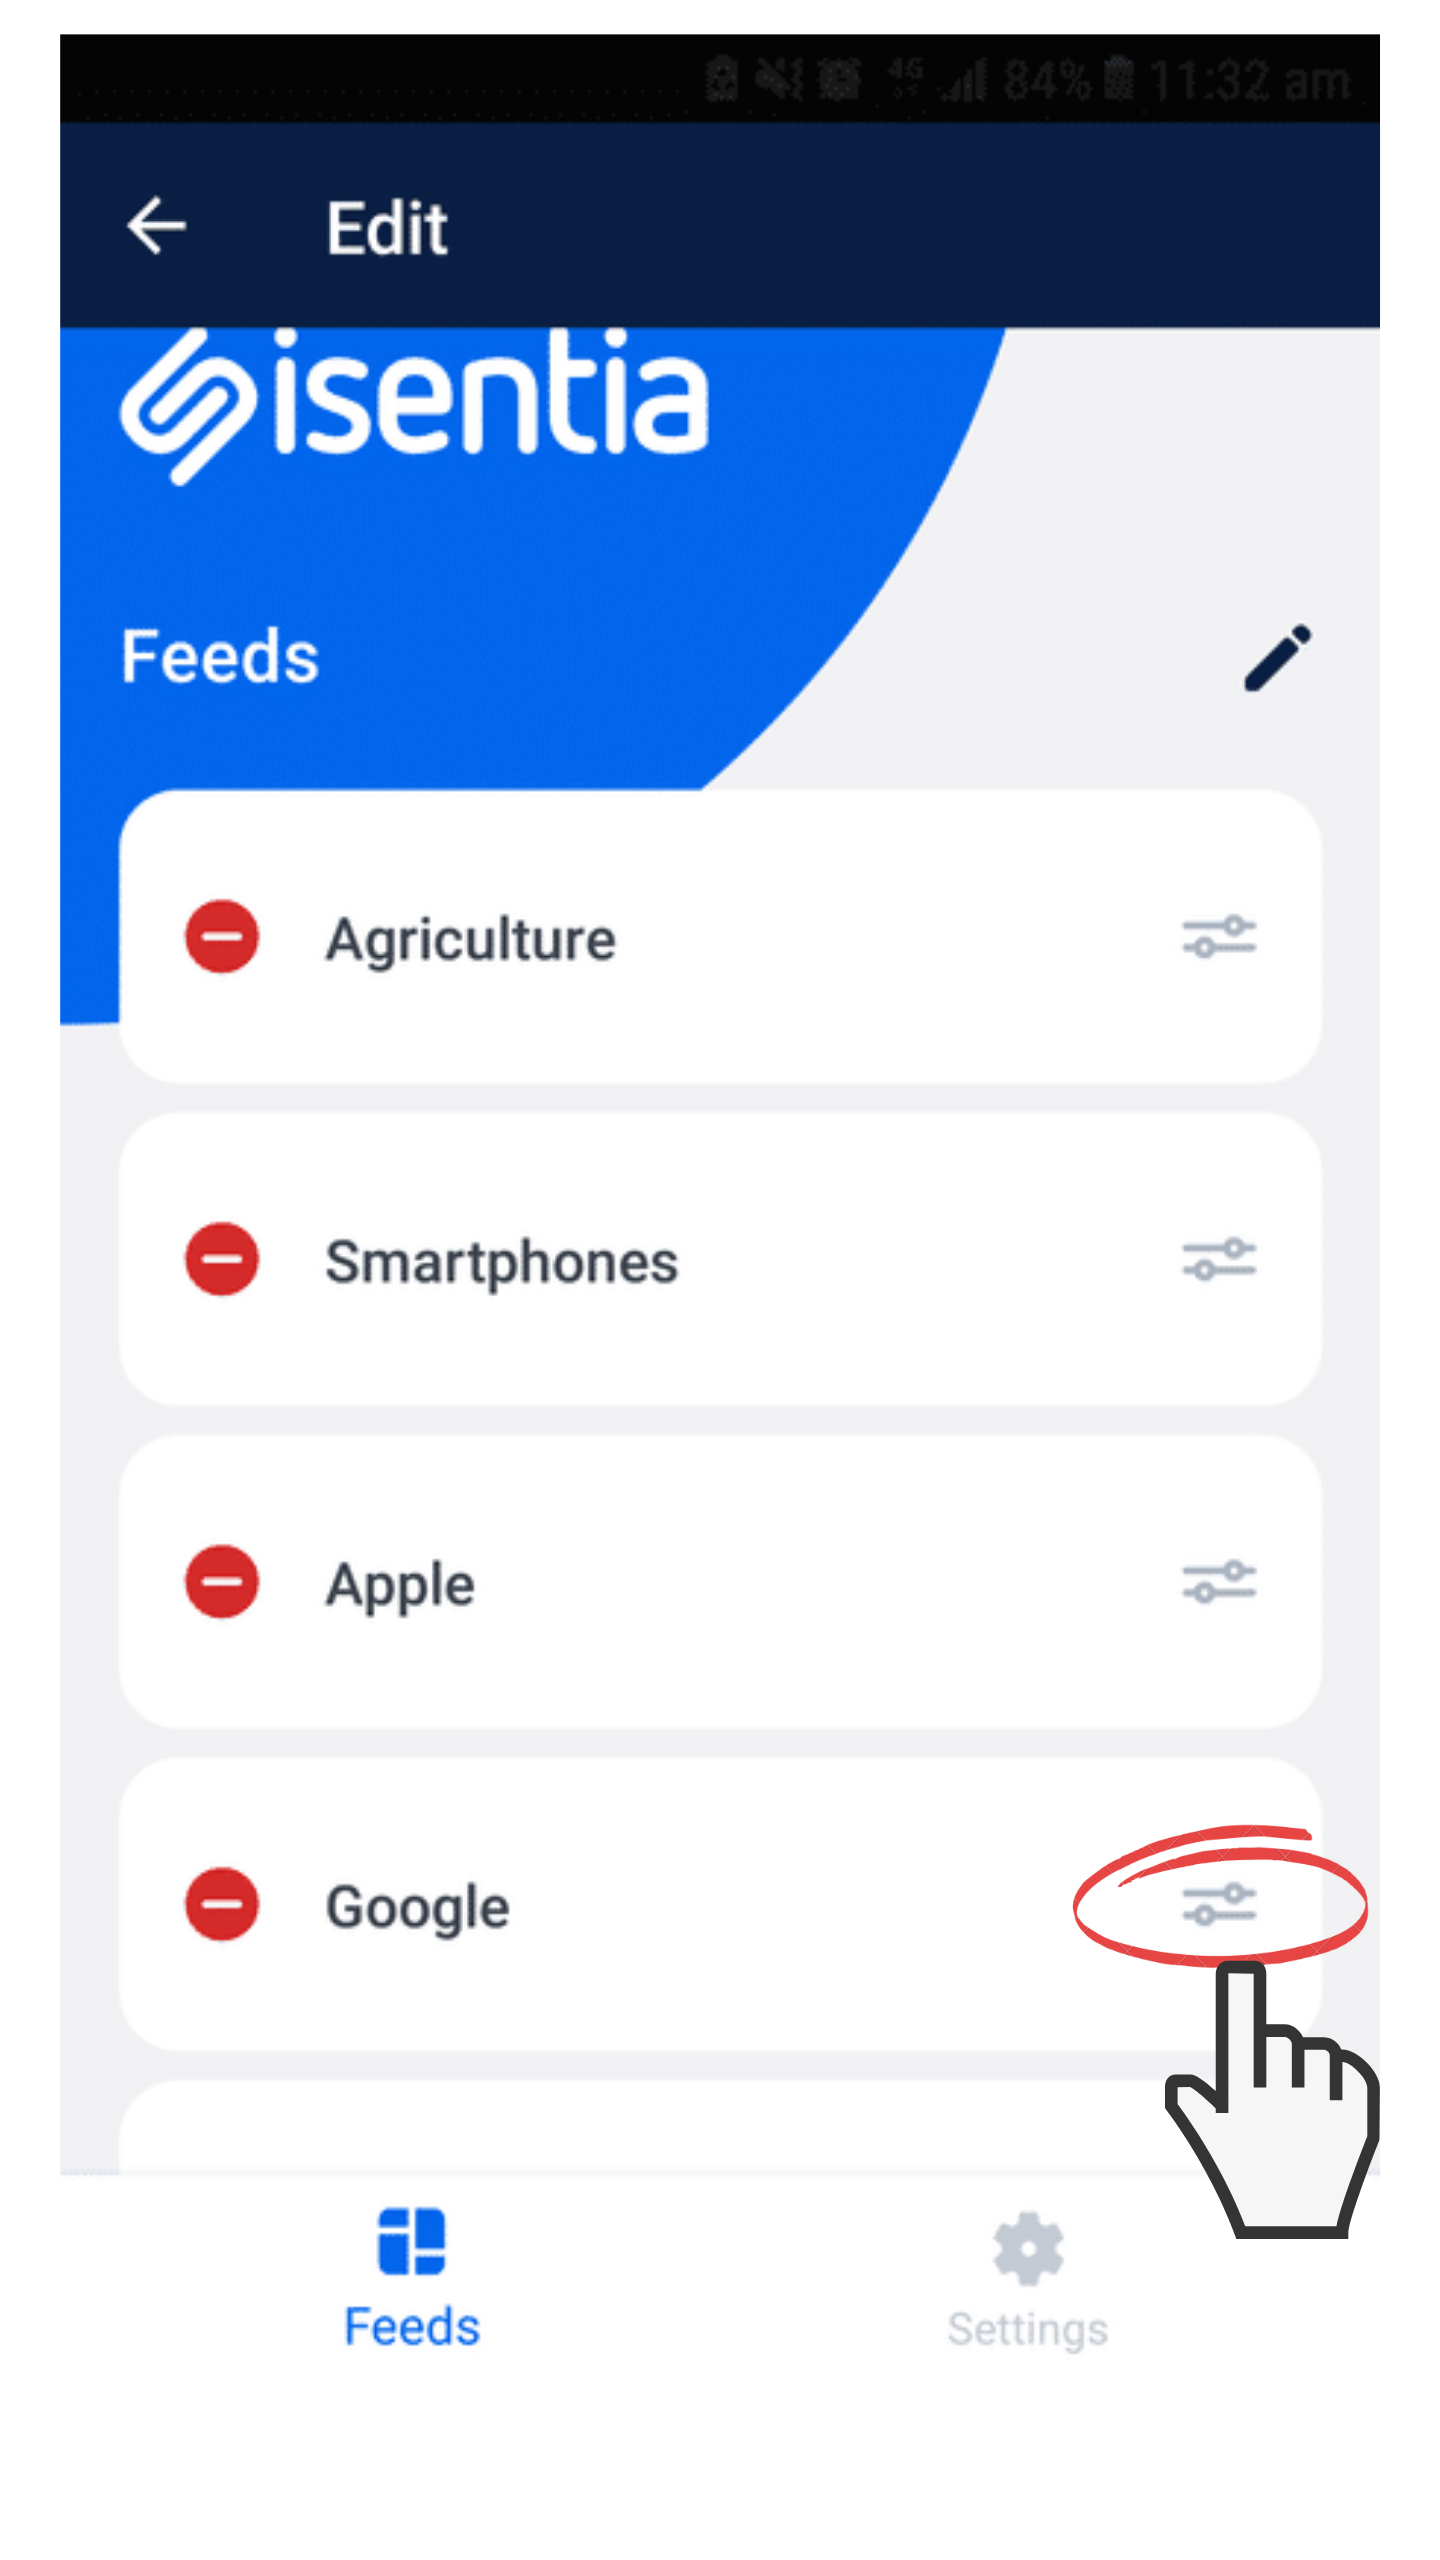
If you tapped the settings icon, you should now see the configuration screen with the original settings of the Feed topic. If you make any changes to a topic, make sure you scroll to the button of the screen and save any changes you have made.