Mediaportal Reports are the perfect way to share information and keep your key stakeholders informed. Keep reading for more information on building reports to share media intelligence with your team. You may also like to download and save this Cheat Sheet for future reference.

This article has information about both the Custom format, and other report formats like PDF, Email, Excel and Plain text. Custom Reports have some additional features, like advanced theming options and the ability to include external content in your reports. If you’d just like to read a guide for just one format, you can navigate to one of the below articles:
There’s more information about the benefits of Custom reports, and why you might use a Custom report over PDF report, check out this article. There’s also a list of FAQs on Custom reports here.
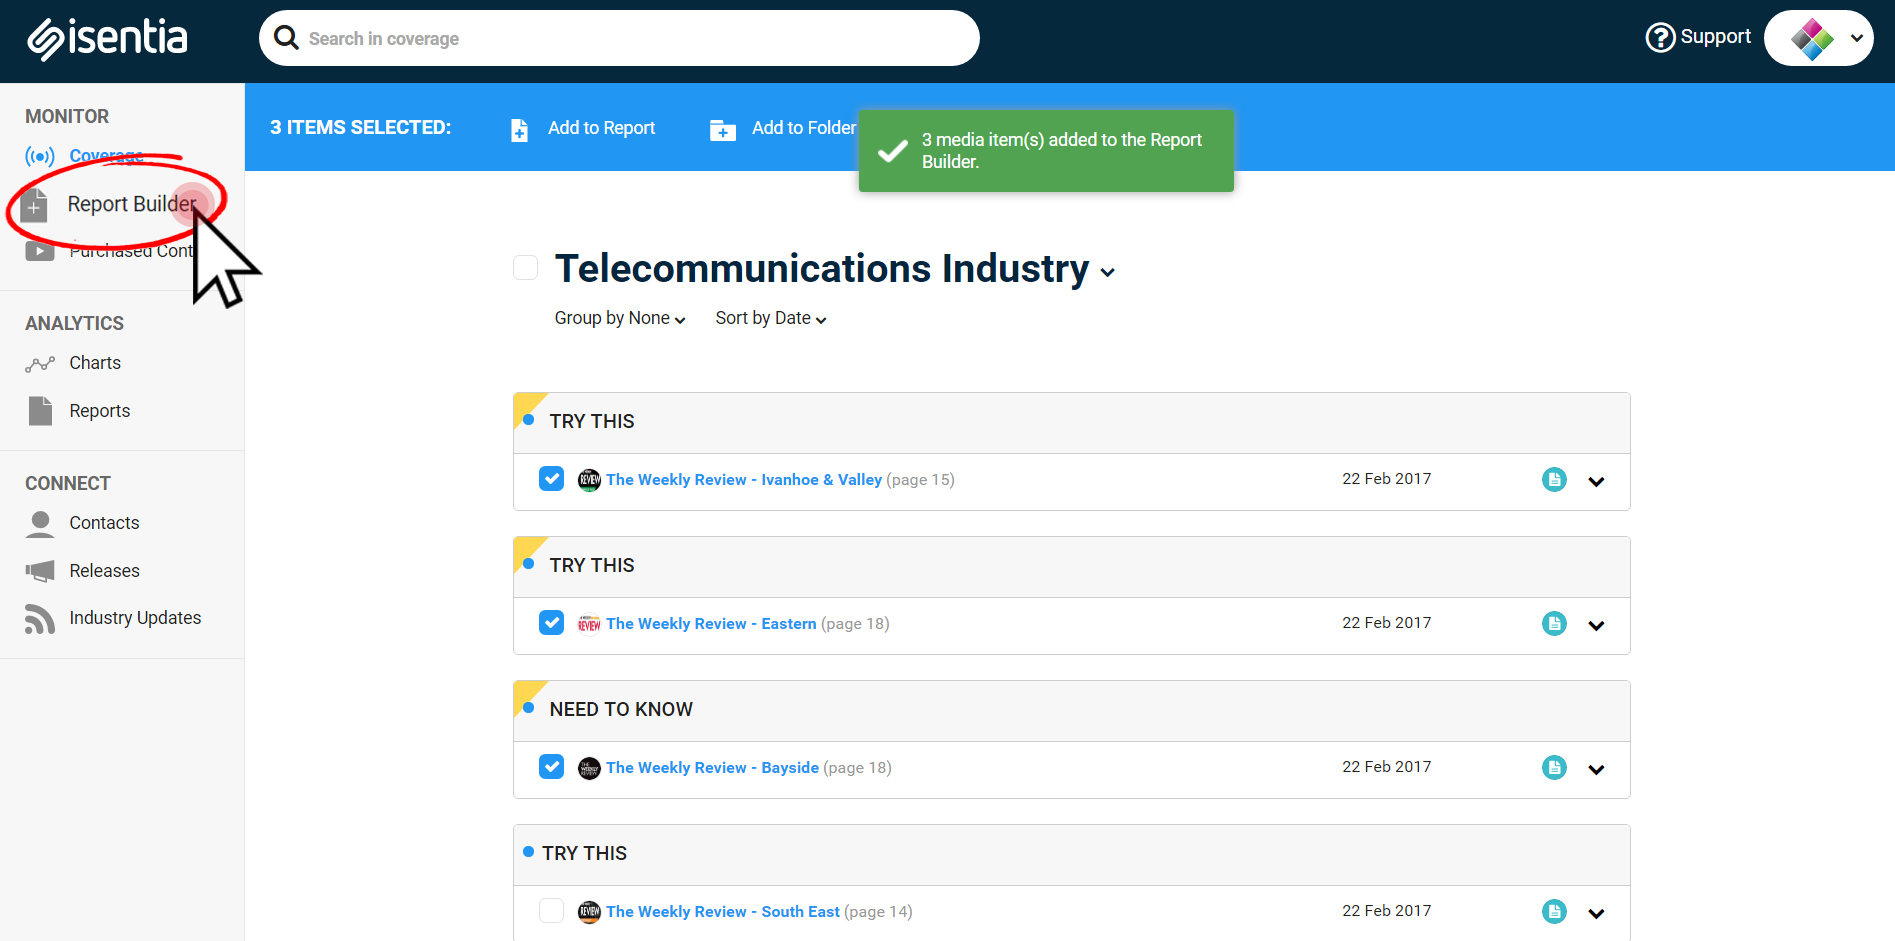
Report Builder is one of the most commonly used parts of Mediaportal. You can find the Report Builder tool under Monitor in the navigation sidebar, to the left of your screen.
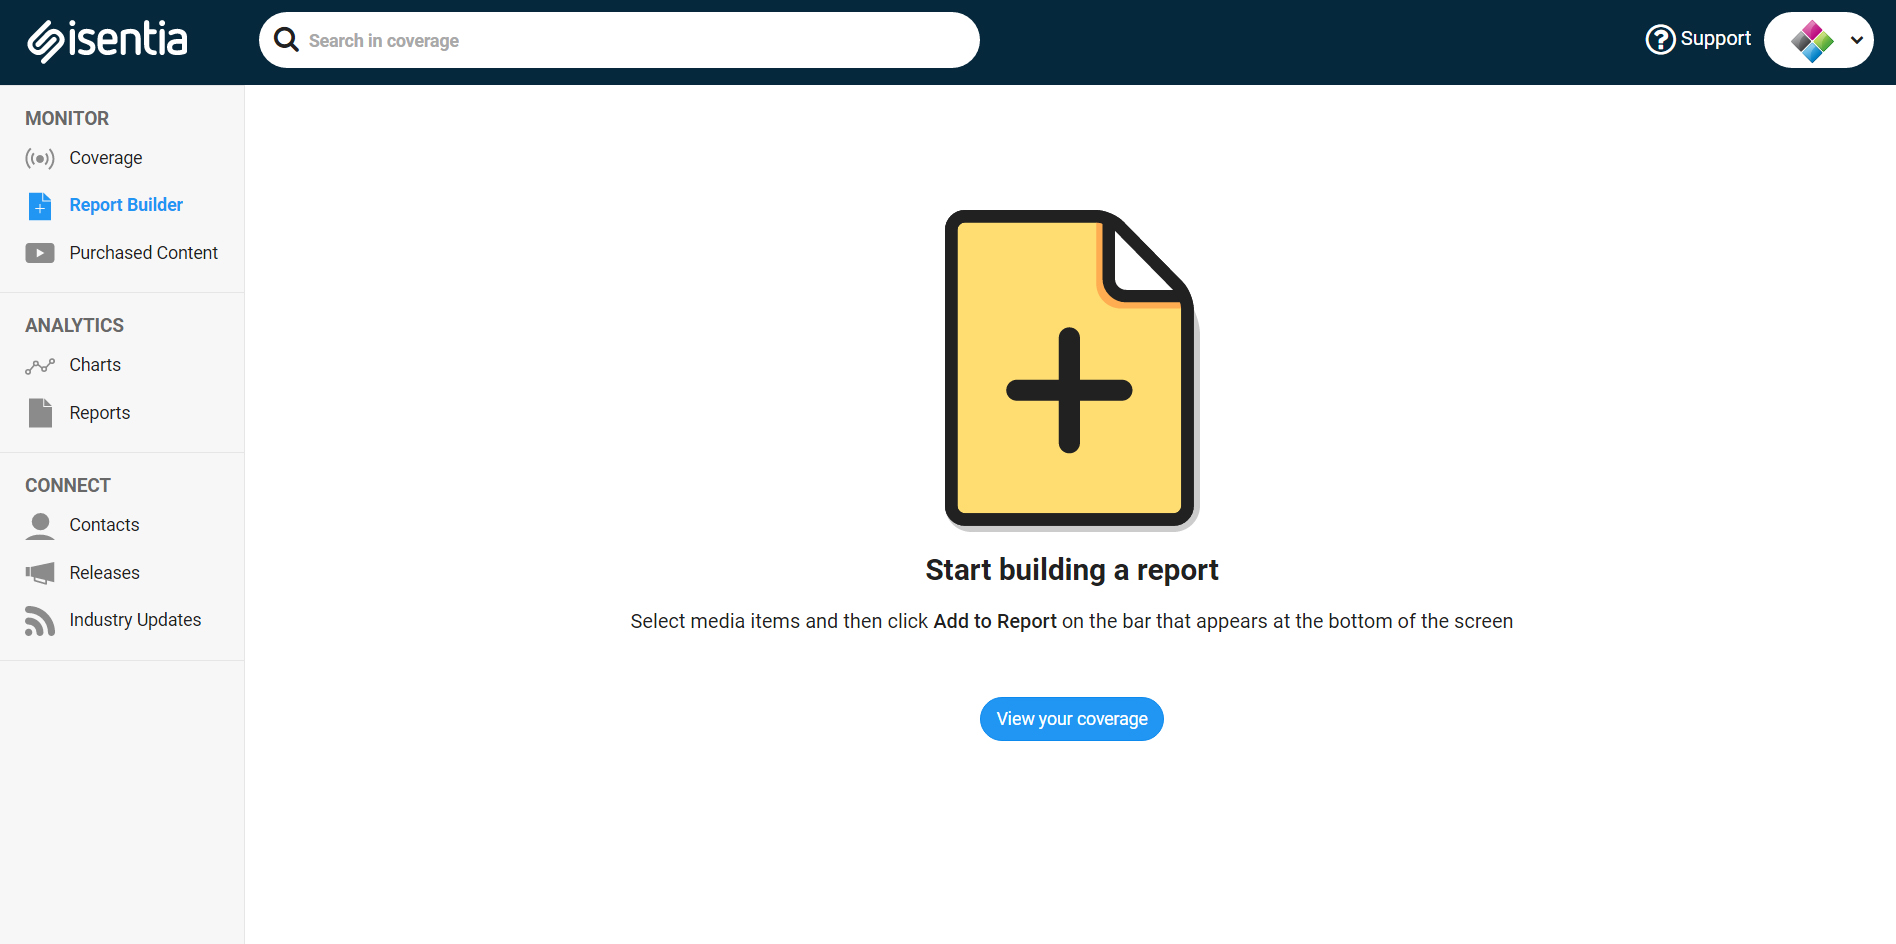
Before you click on the Report Builder tool you need to add some media items to your report. If your report is empty, you’ll see this prompt:
Contents
Adding items to report
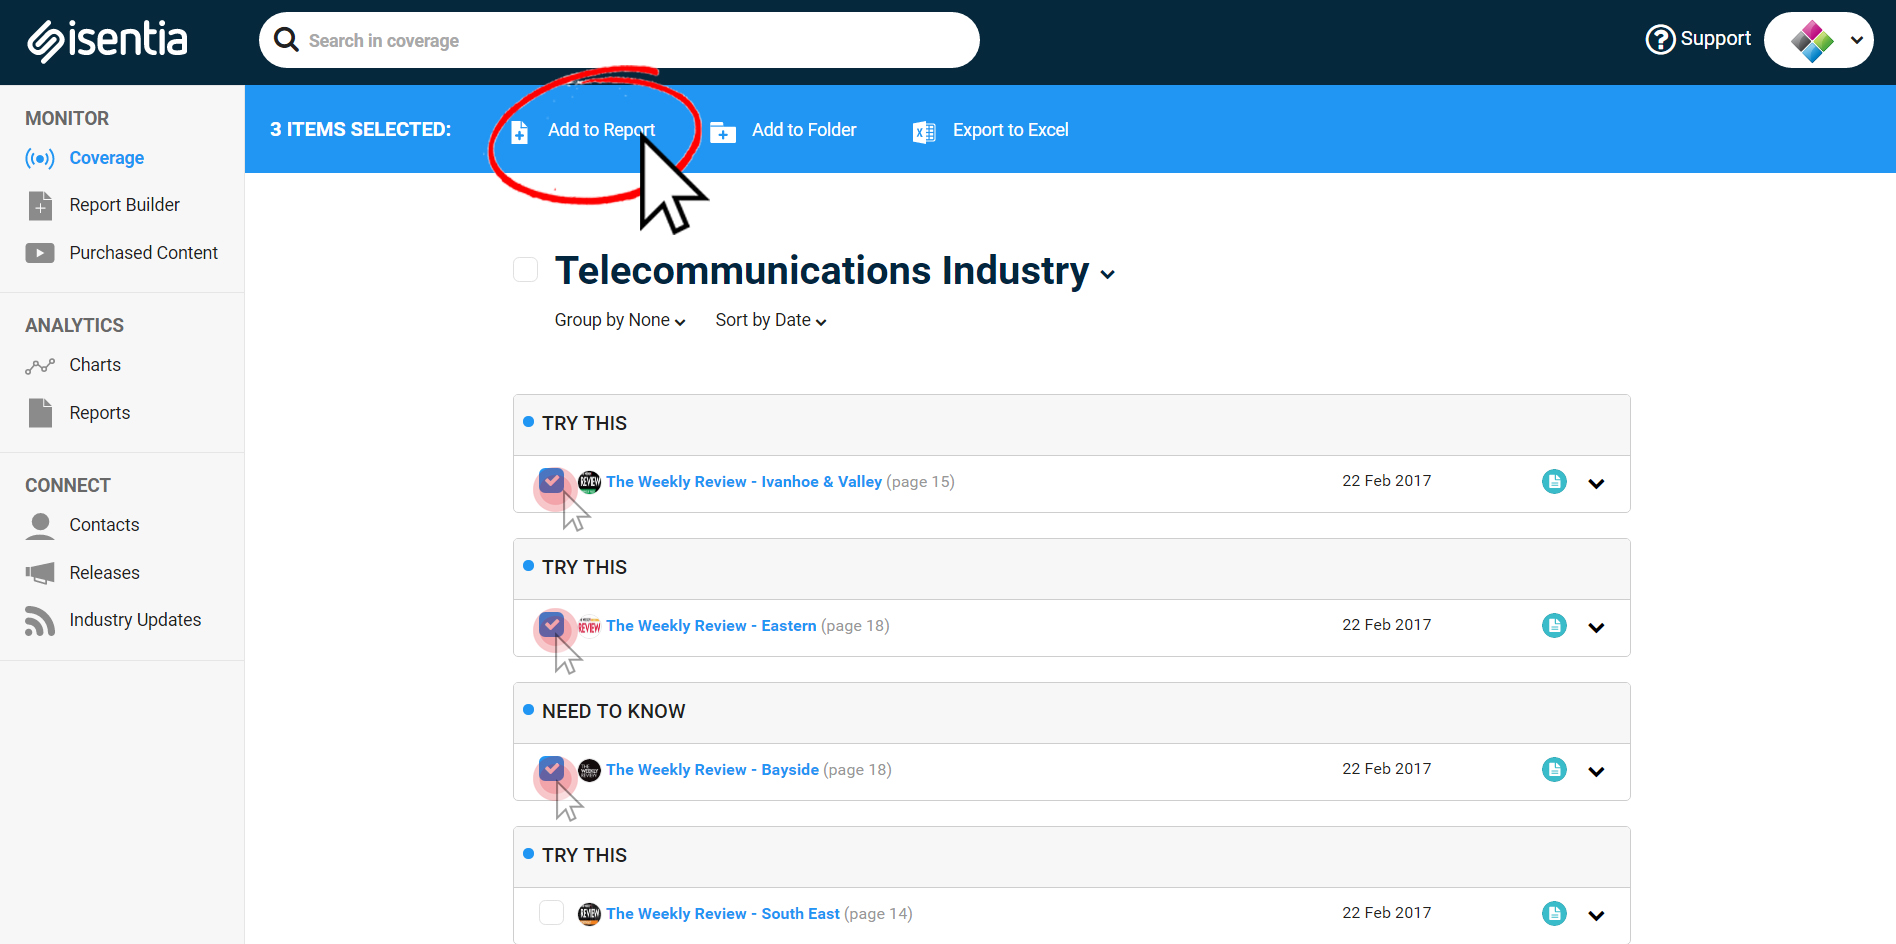
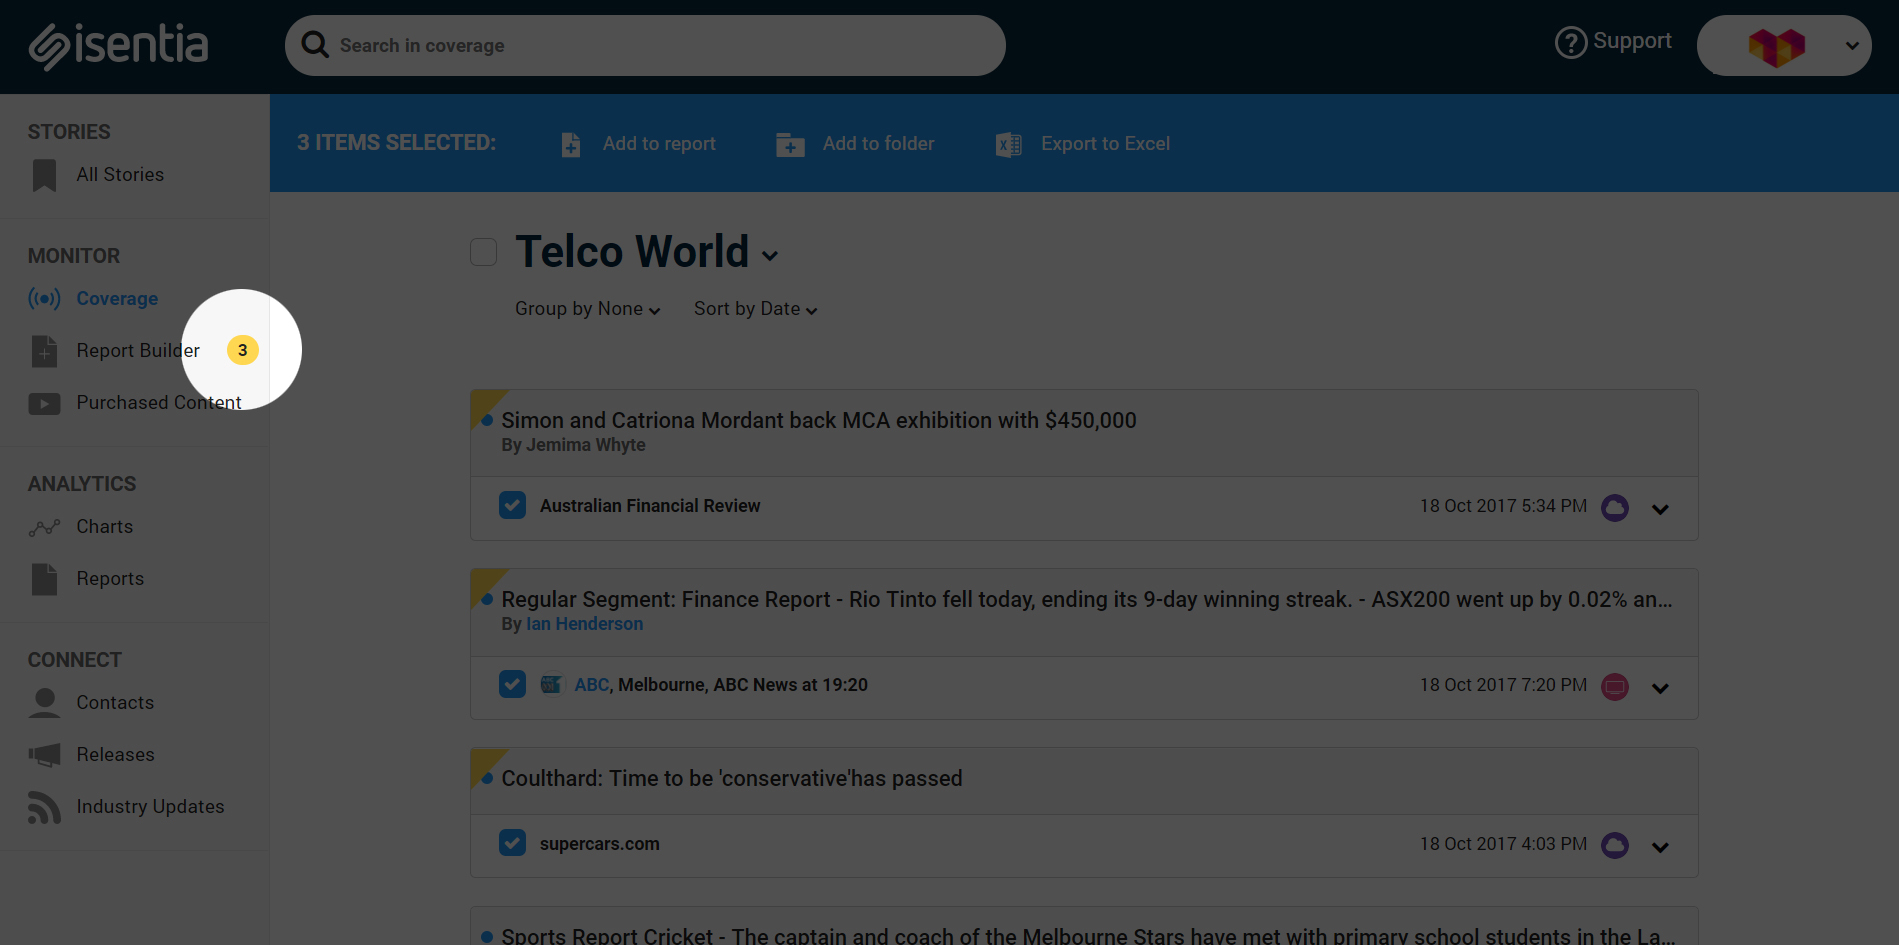
Find the media items you’d like to add to your report, either in your monitoring folders or your search results. Select the media items you’d like to add to your report by ticking the check box to the left of each item. When you select a media item, you’ll see a bright blue action bar appear at the top of the screen. Click the Add to Report icon to add the selected items to your report.
When you add items to your report you will see a coloured triangle in the top left corner of each media item. These triangles help you keep track of which items are already sitting in the Report Builder tool, so you can keep working and adding items.
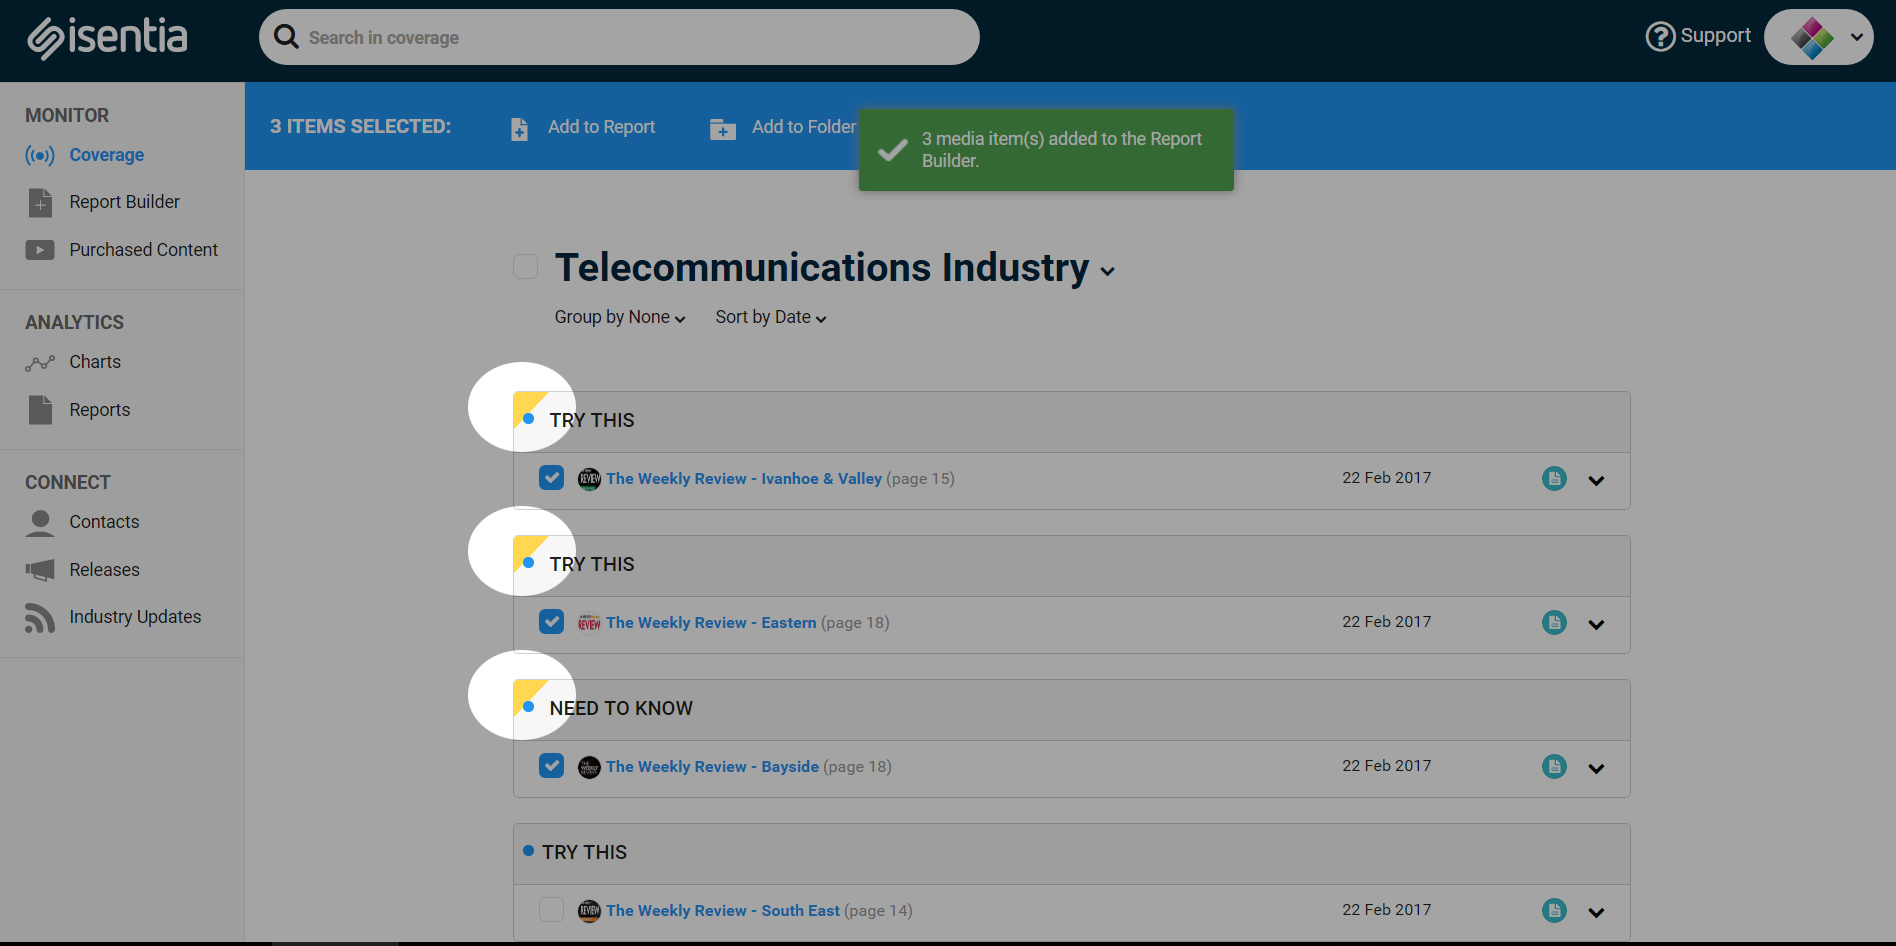
You’ll also notice the item counter beside Report Builder update, on the navigation sidebar on the left side of your screen. You’ll be able to tell at a glance how many items are sitting in the builder.
You can add coverage to your report from multiple briefs or folders inside Mediaportal. Your selected items will be saved in Report Builder until you logout or clear your report.
Building your report
Once you’ve added all the items you need click on Report Builder to start creating your report.
This is where you’ll format and build your report.
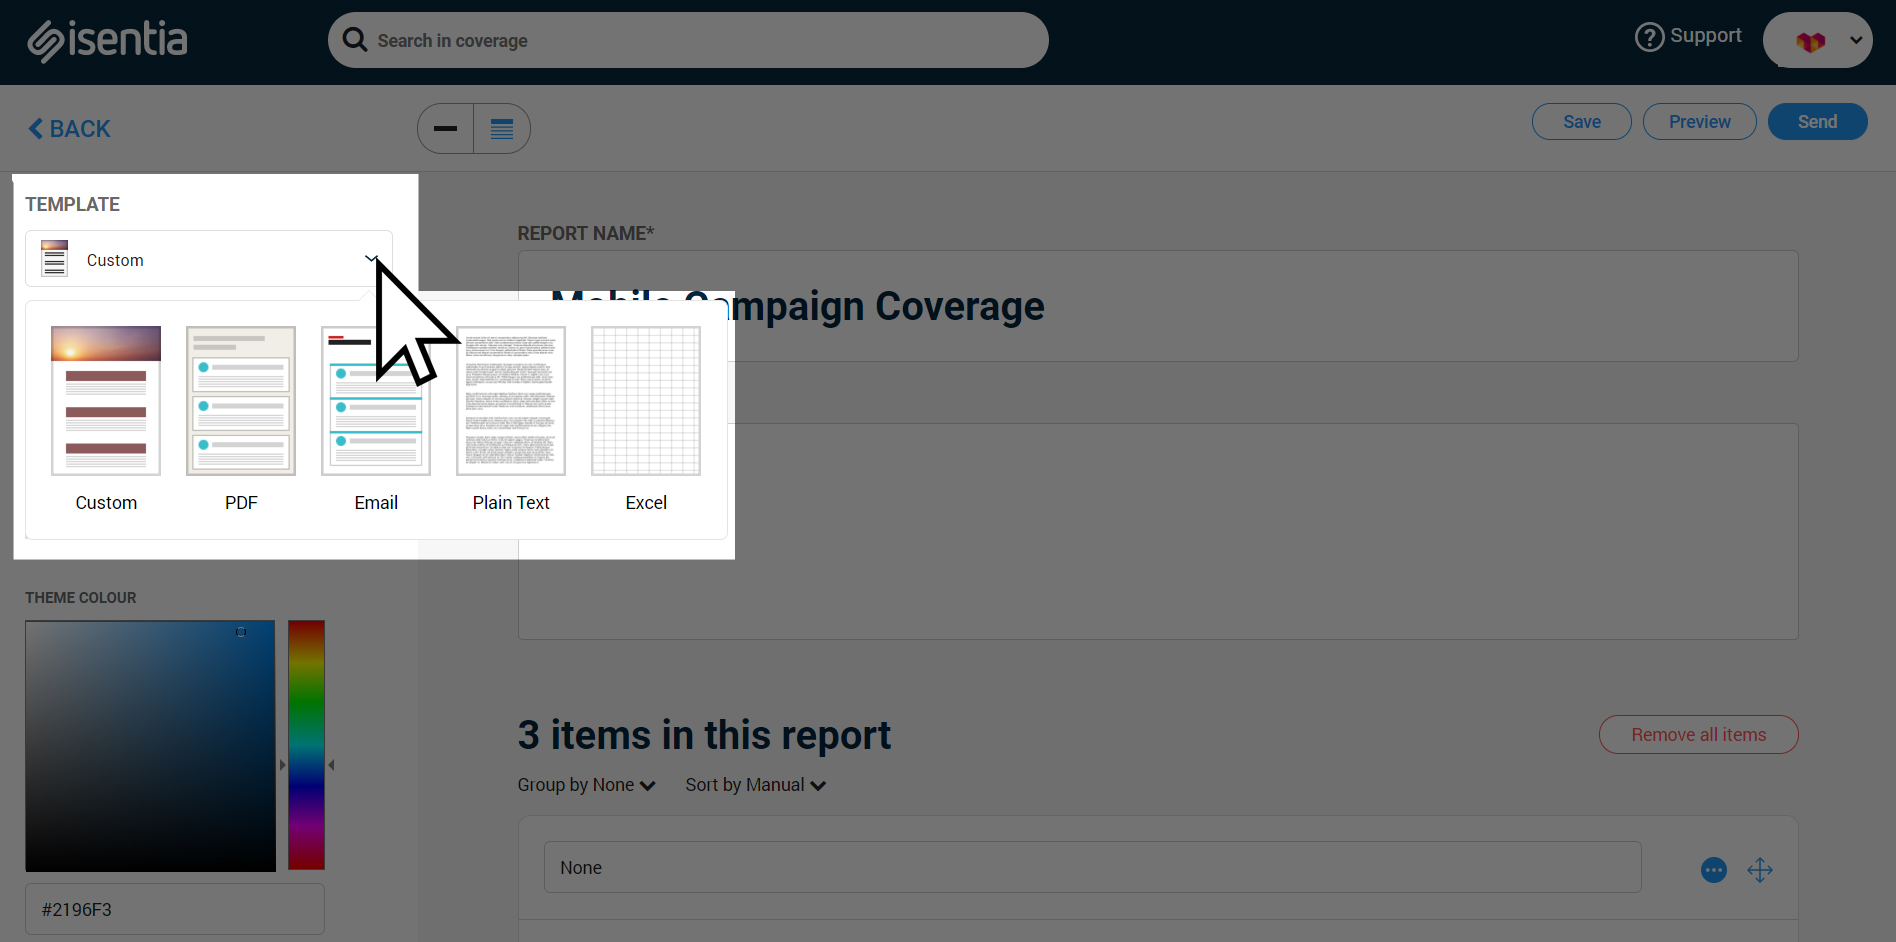
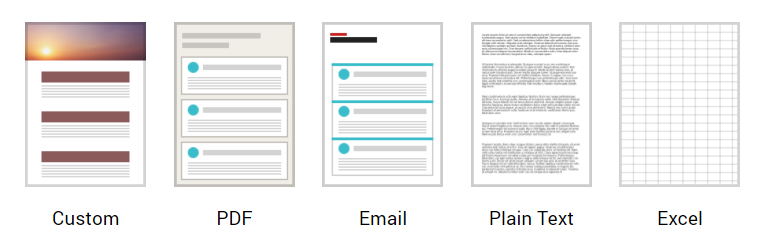
First, click on the dropdown menu under Templates to choose your report format. You can choose from five different report formats:
- Custom
- Plain text file
- Excel file
The options available to customise your report will depend on which format you select.
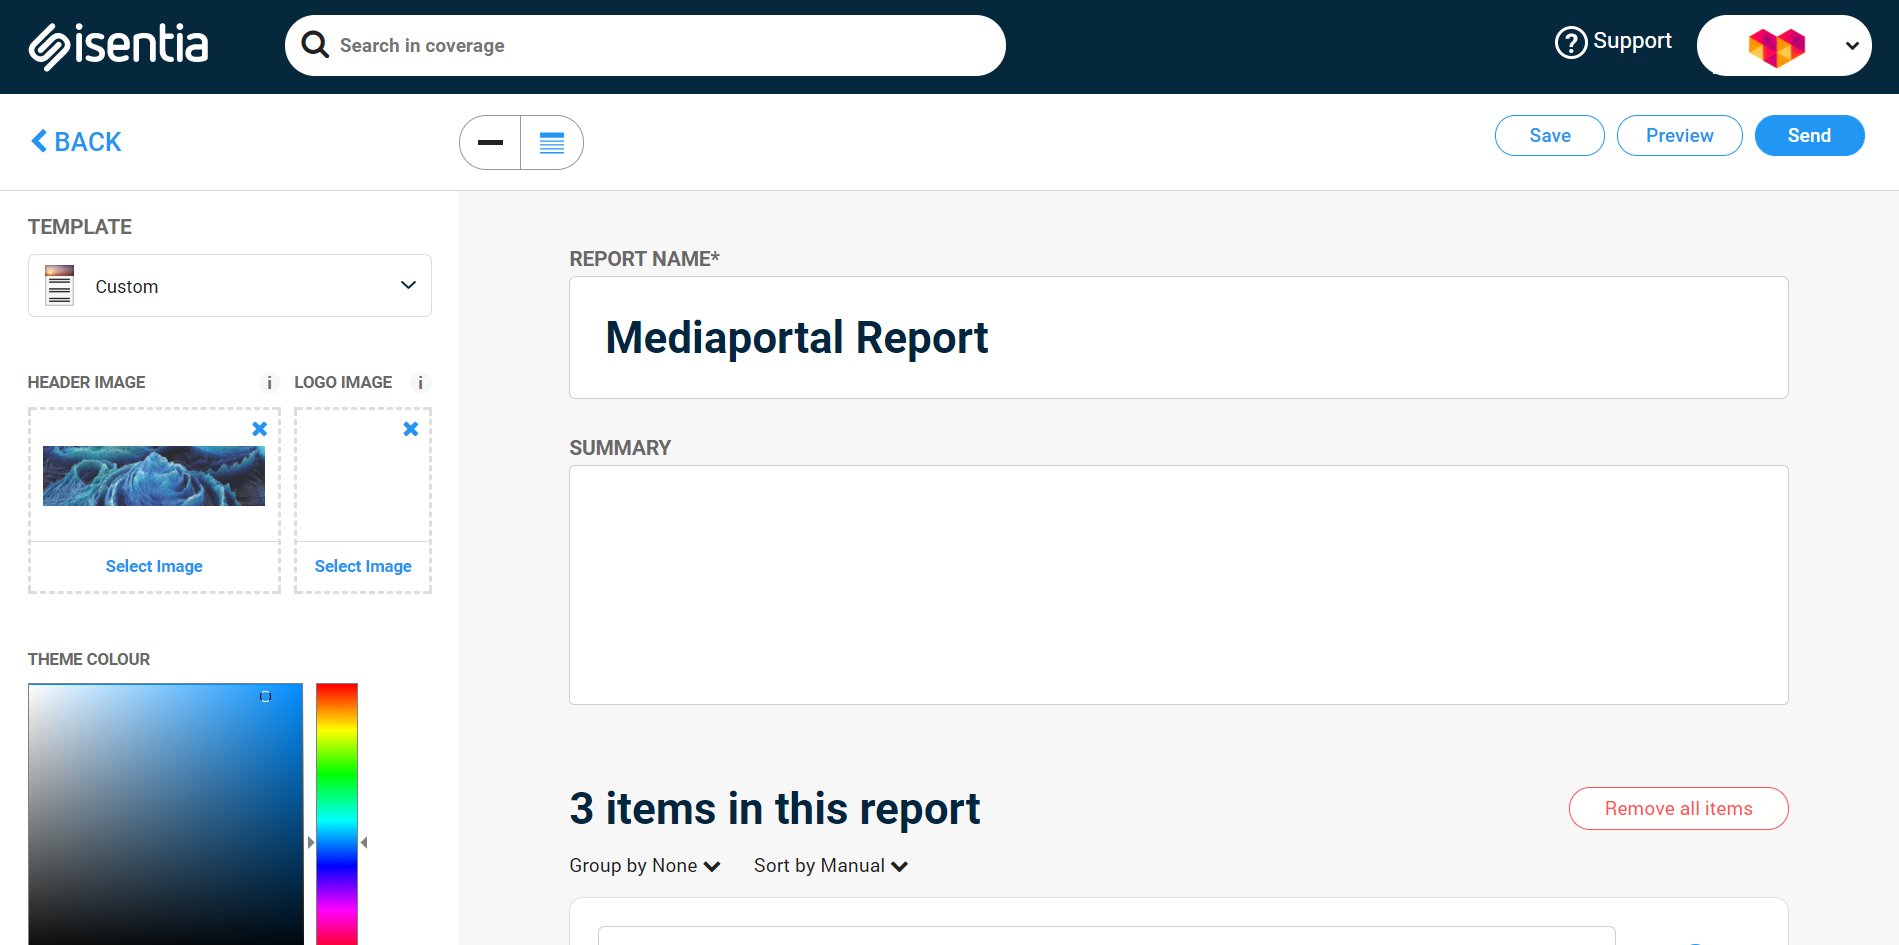
Custom reports
The Custom report template enables you to build a web-based report with some extra features, like embedding external content and customisable theming.
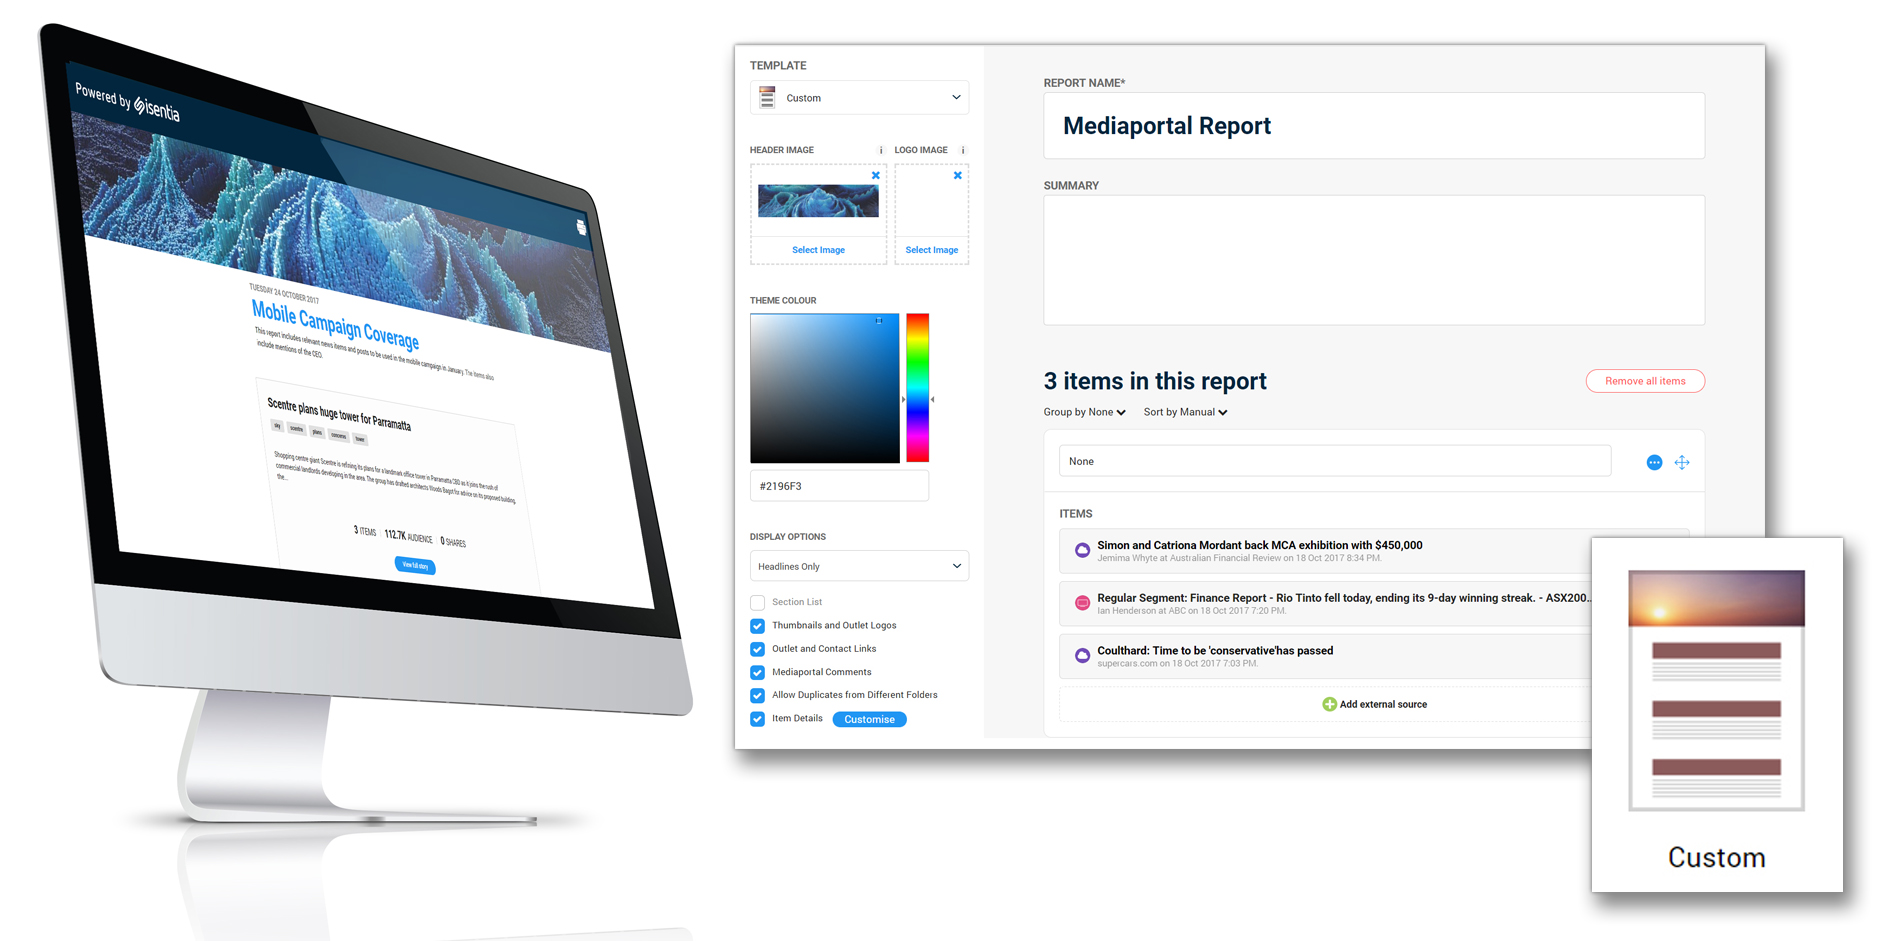
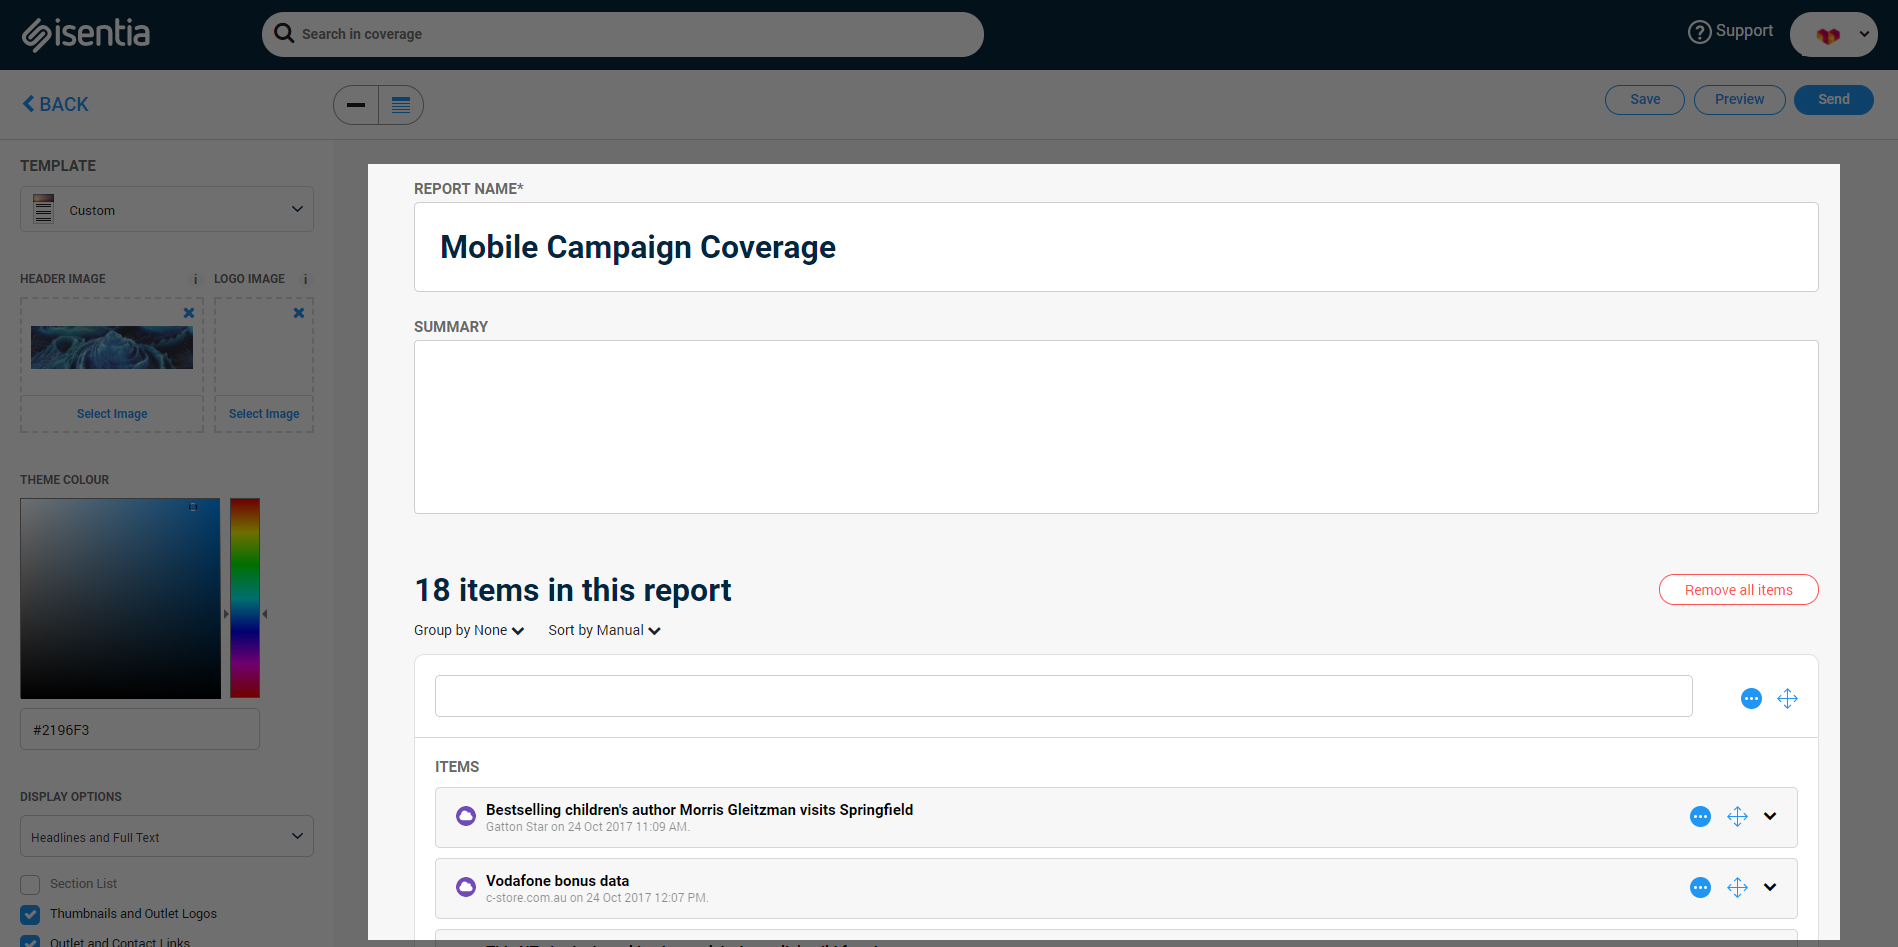
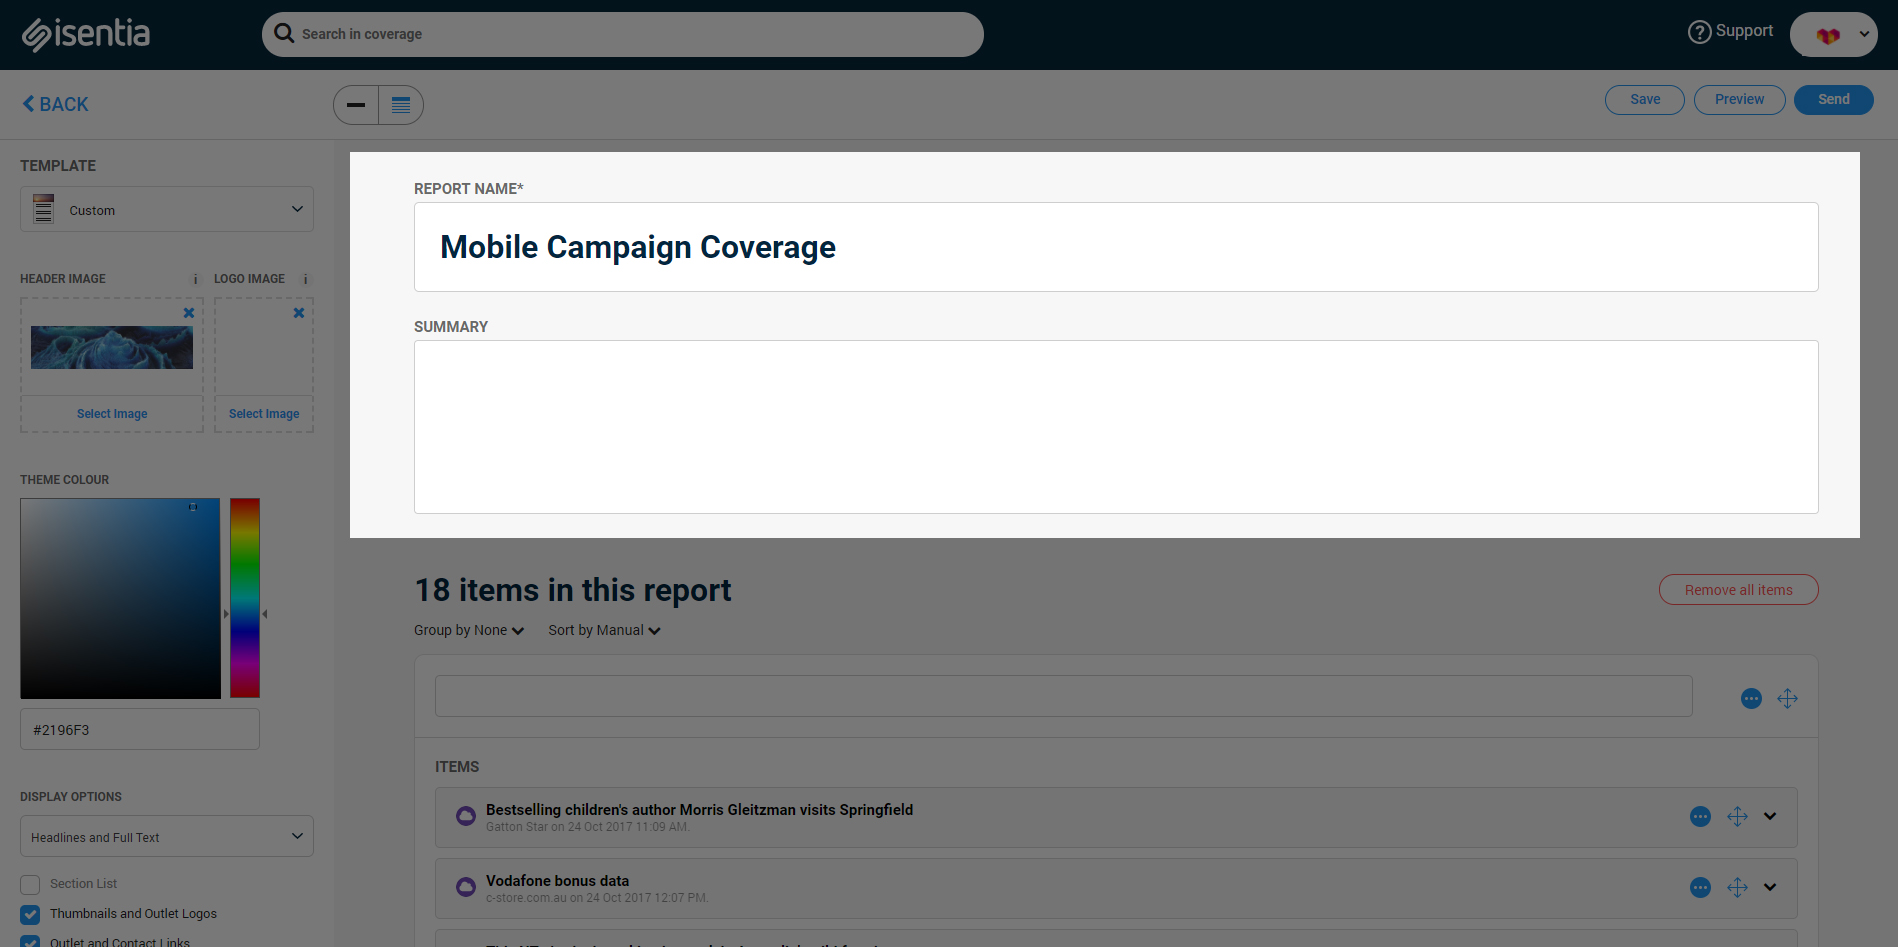
The Custom report format gives you the ability to produce reports that reflect the personality and brand of your organisation; using your own header, logo and colour palette. Use the tools in the left hand panel to add a header image, a logo and pick your theme colour. You can even add in a hex code to ensure you get the right colour match for your look and feel.
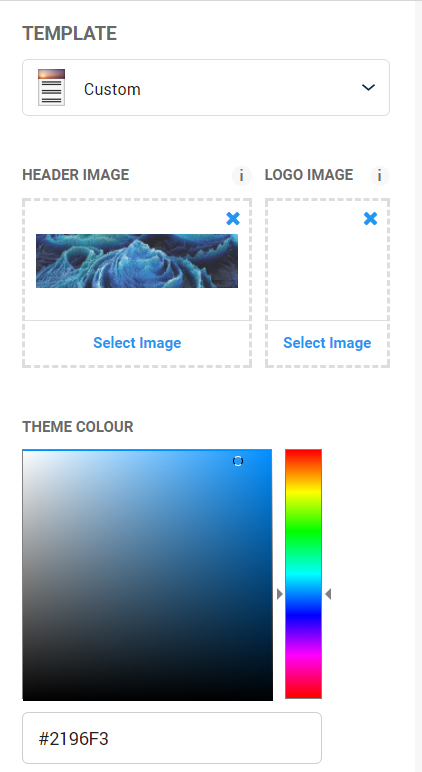
For header images, our recommended header image size is 1440px x 390x. You can use JPEG, PNG or even a GIF.
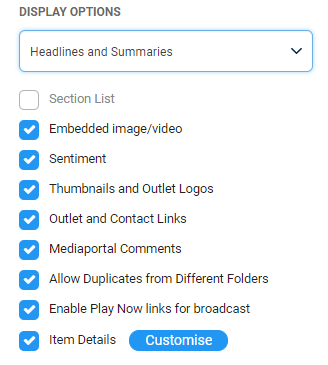
Below the report theming options, you’ll see a list of Display Options where you can control the level of detail you see in report.
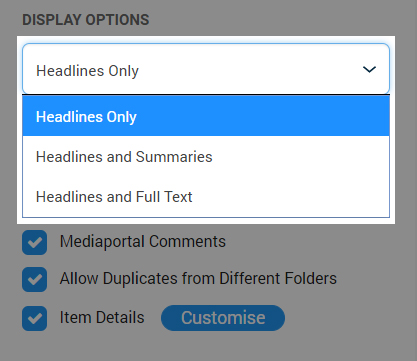
Use the dropdown menu under Display Options to choose how your coverage will appear in your report. Selecting Headlines only will make your report smaller, whereas Headlines and summaries or Headlines and full text will create reports with more detail.
Below the dropdown menu, you’ll see more checkboxes to customise your report.
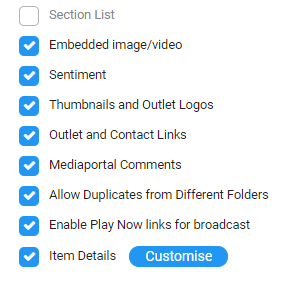
The first checkbox, Section list, allows you to create a report that’s easy to navigate for busy stakeholders. The Sections button will appear on the top right corner of your Custom report and function as a Table of Contents. Report recipients can use this to navigate to the area of the report that’s most relevant to them.
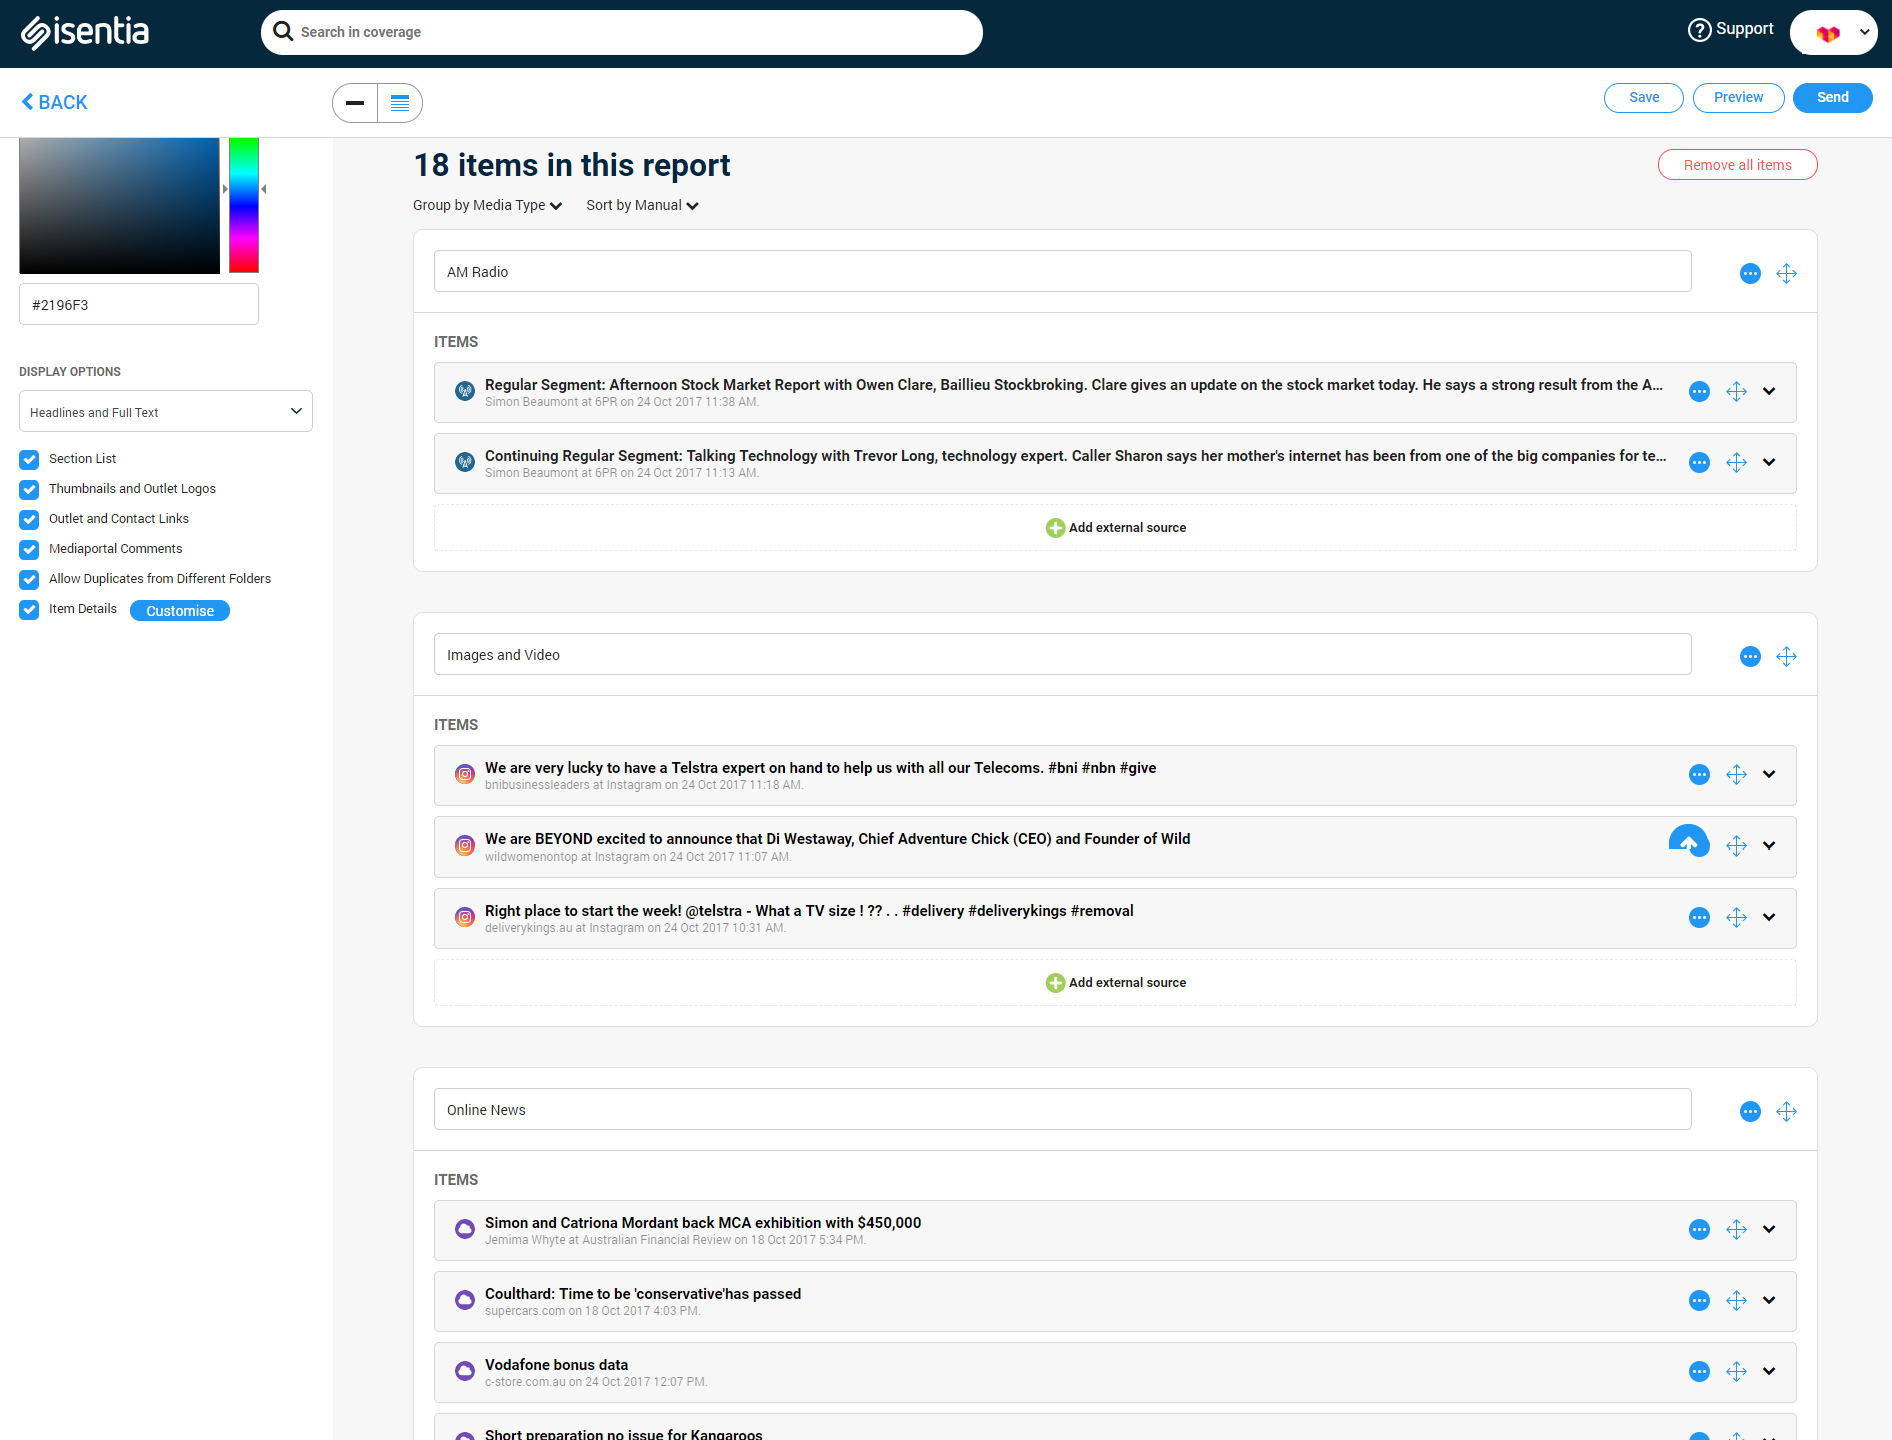
You’ll be able to select the Sections checkbox when there is content in your report in multiple groups – e.g. grouped by media type or folder. You can group your coverage using the Group by and Sort by options just above your media items.
Use the other checkboxes to control the level of detail you see in your report:
- Select Embedded image/video to include images and videos from online articles and social media in the body of the report.
- Select Sentiment to include the positive, negative and neutral badges on media items in the report.
- Select Thumbnails and outlet logos to include thumbnails or logos for media items in your report.
- Select Mediaportal comments to add any comments made on media items to your Mediaportal Report. Untick this if your team has been making notes on media items that you don’t want to include on a report going to a broader group of stakeholders. Using the Custom template, you can also add comments on any of the items or sections in your report.
- Select Oututlet and contact details to turn media outlet and journalist names into hyperlinks – anyone viewing the report can click on these links to be taken through to the Connect profile page for that outlet/contact. That page will give the viewer contact details to get in touch with that media outlet or journalist.
- Select Allow duplicates from different folders to allow duplicate media items in your report. If the same article is in two different folders, and both have been added to your report tick this box for the article to appear twice in your report
- Select Enable Play Now links for broadcast to include Play Now or ordering links in the body of your report. This will allow recipients of the report to stream pre-purchased broadcast audio and video content or order it.
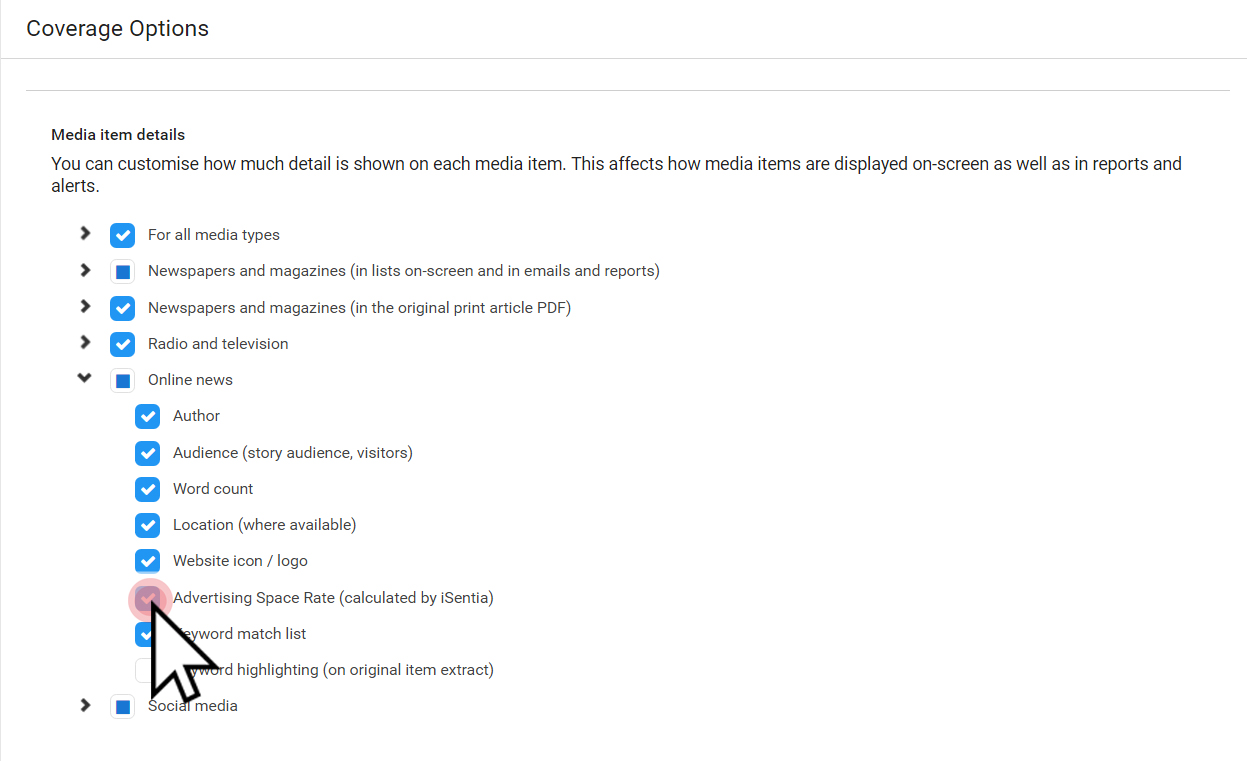
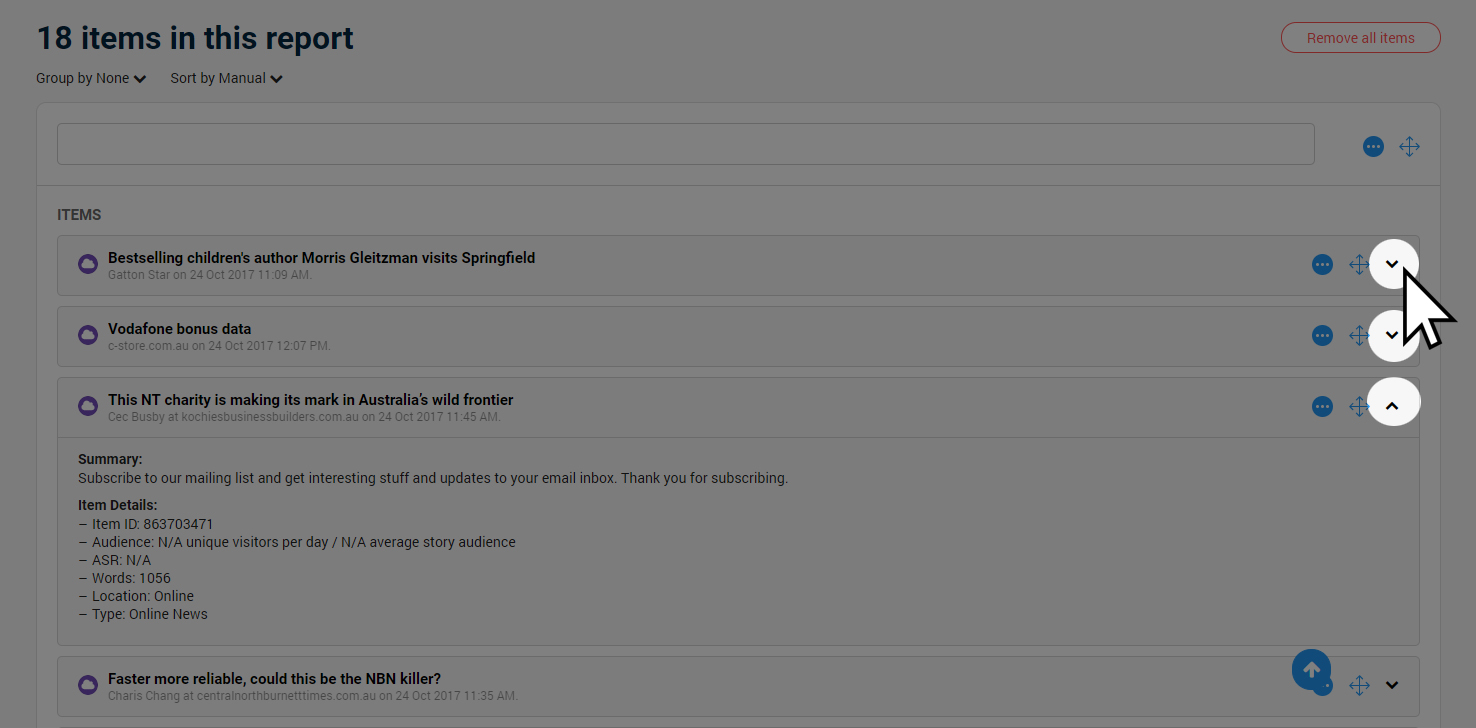
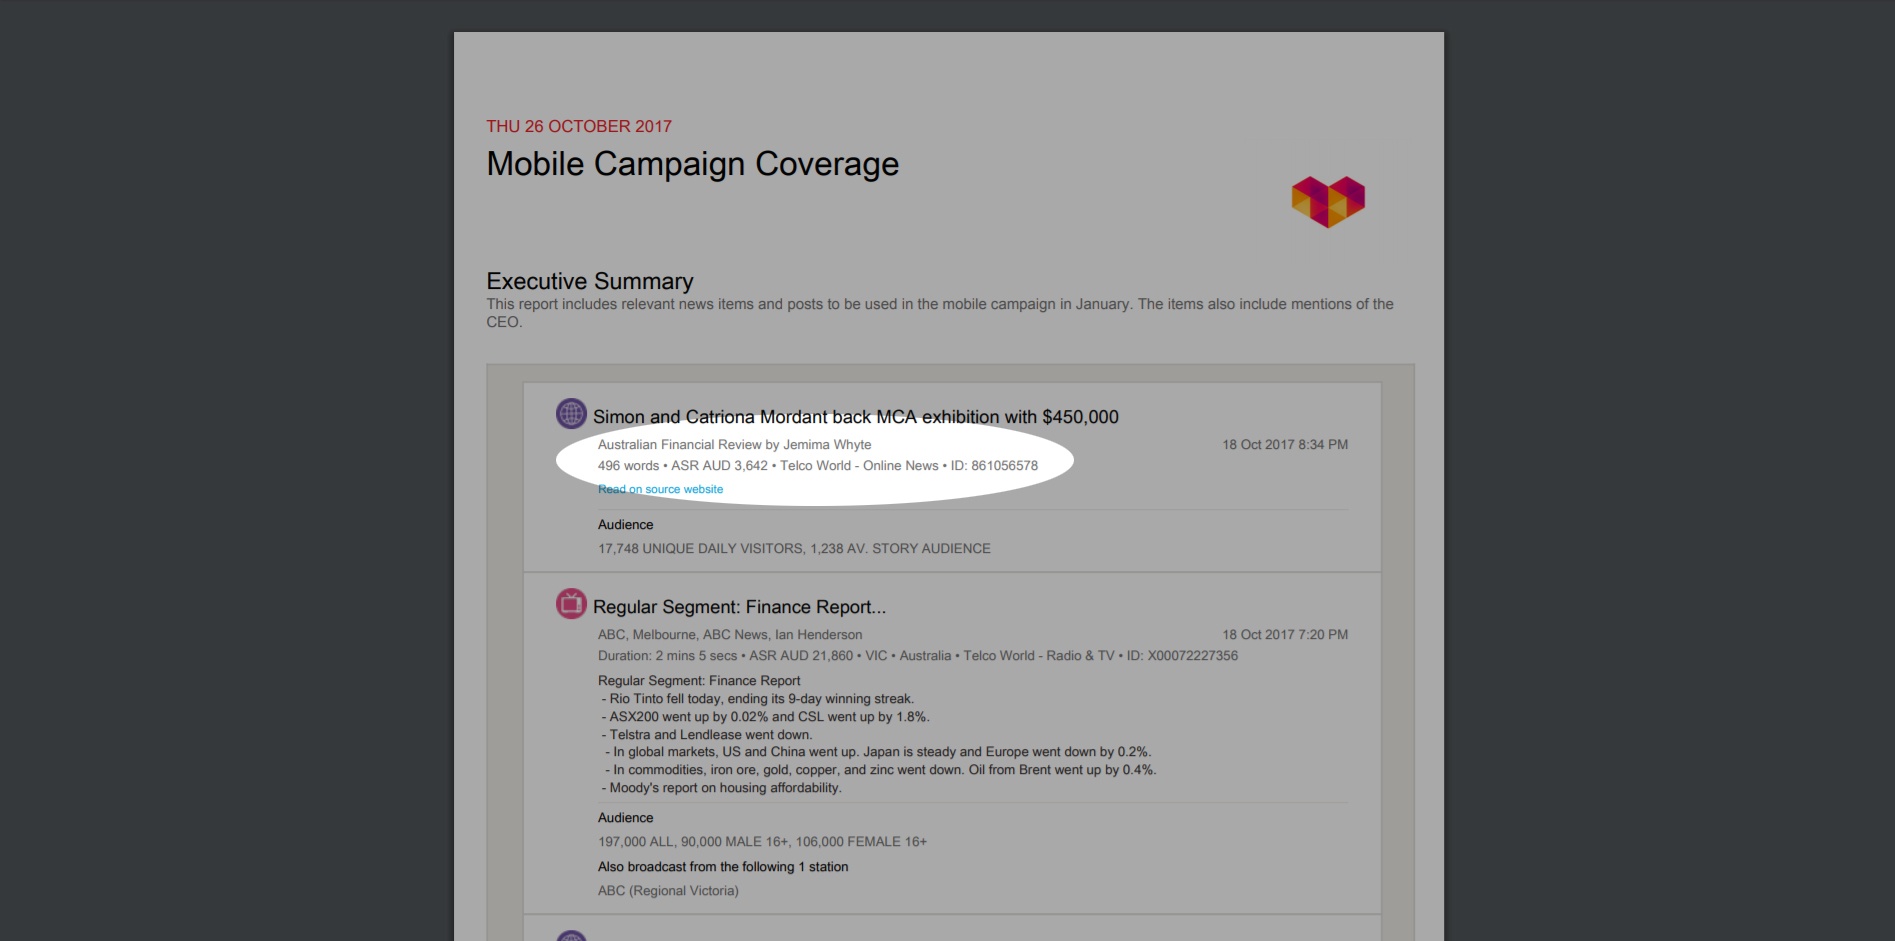
- Select Item Details to add more metadata to your media items, like Audience or ASR figures. De-selecting this checkbox will create a streamlined report with less details. The Customise button beside Item Details will take you through to Coverage Options, where you can adjust which metadata you’d like to display in Mediaportal and in your reports.
When you’ve made changes to how your report will be displayed, you can move into the body of the Report Builder to adjust your report content.
When you’re building your report, you can expand and collapse the media items in your report by toggling the display buttons at the top of your screen.
Click on the title field to rename your report. You can also fill in the Summary field to add some extra commentary to your Report. This is a great place to add context or alert your reader to particular items. Just type any commentary you have into the text box. If you don’t need to add any commentary just leave this field blank.
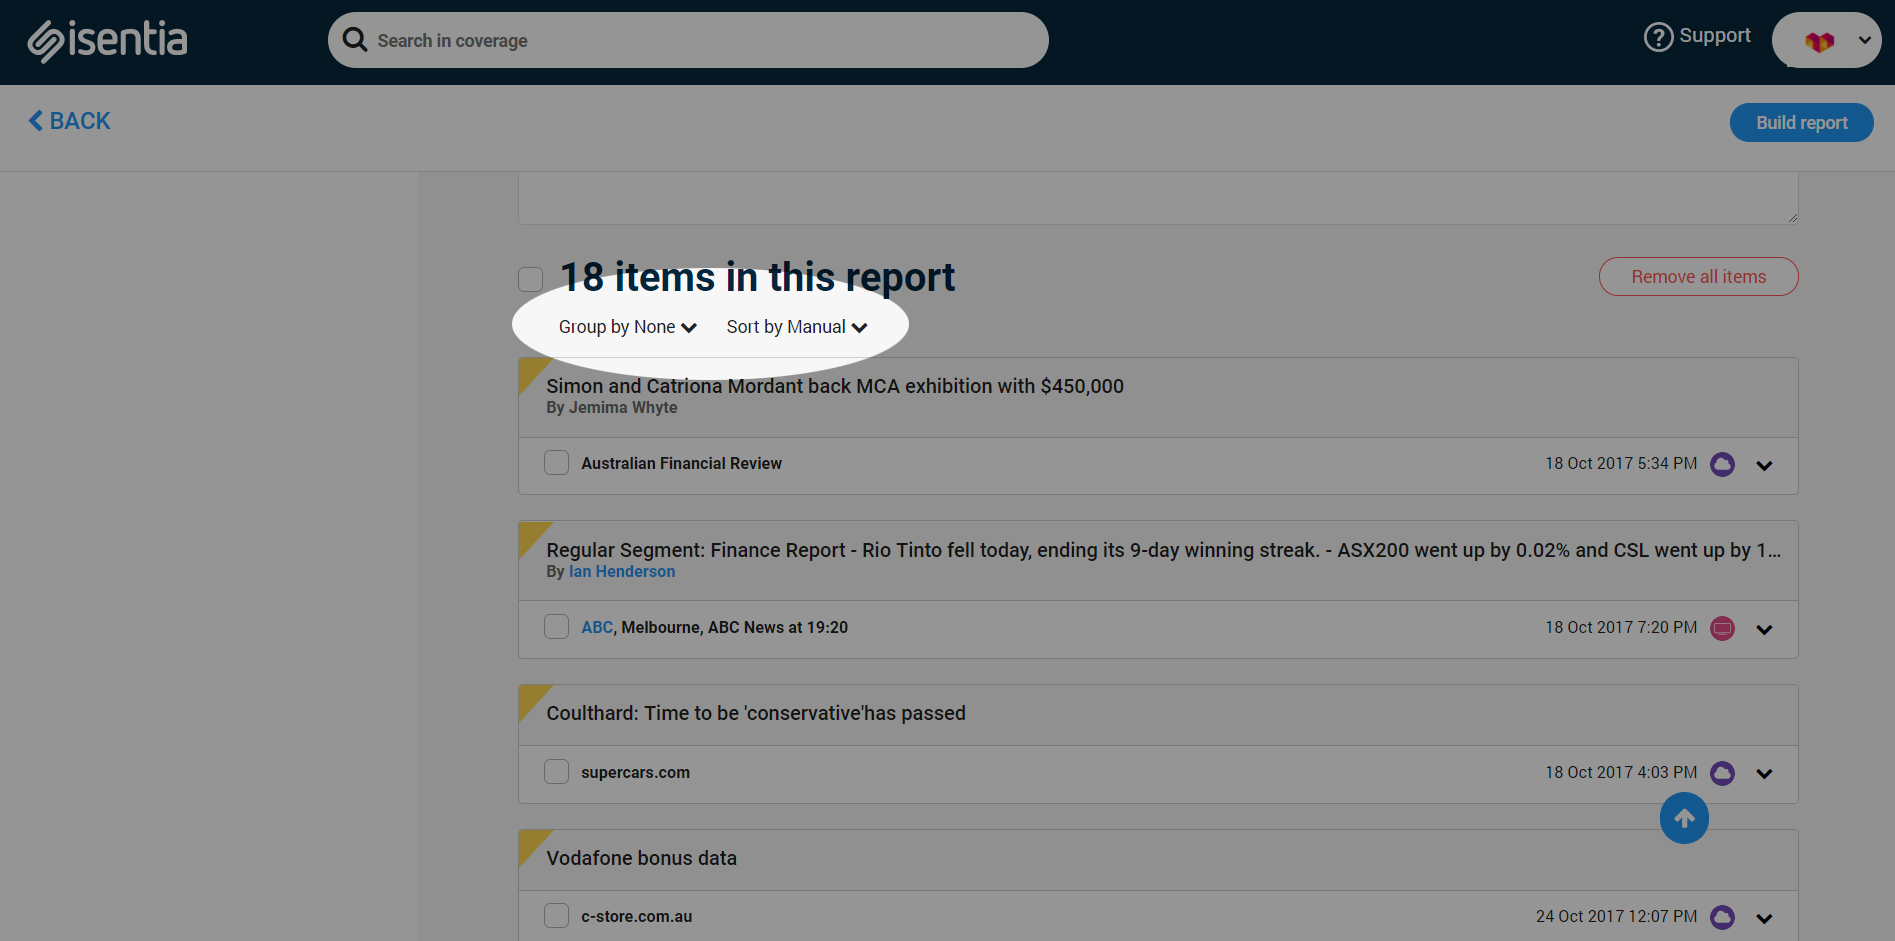
Use the Group by and Sort by menus to organise the order in which your media items appear.
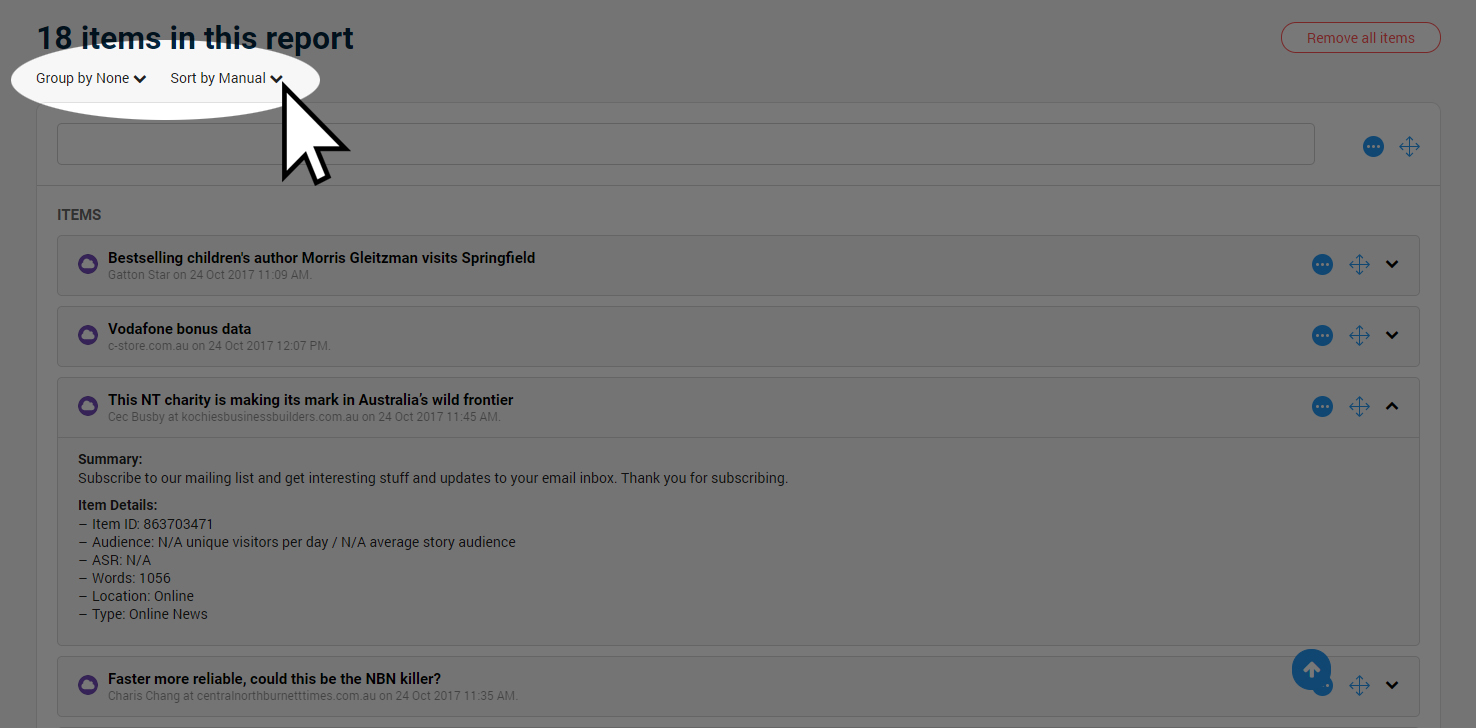
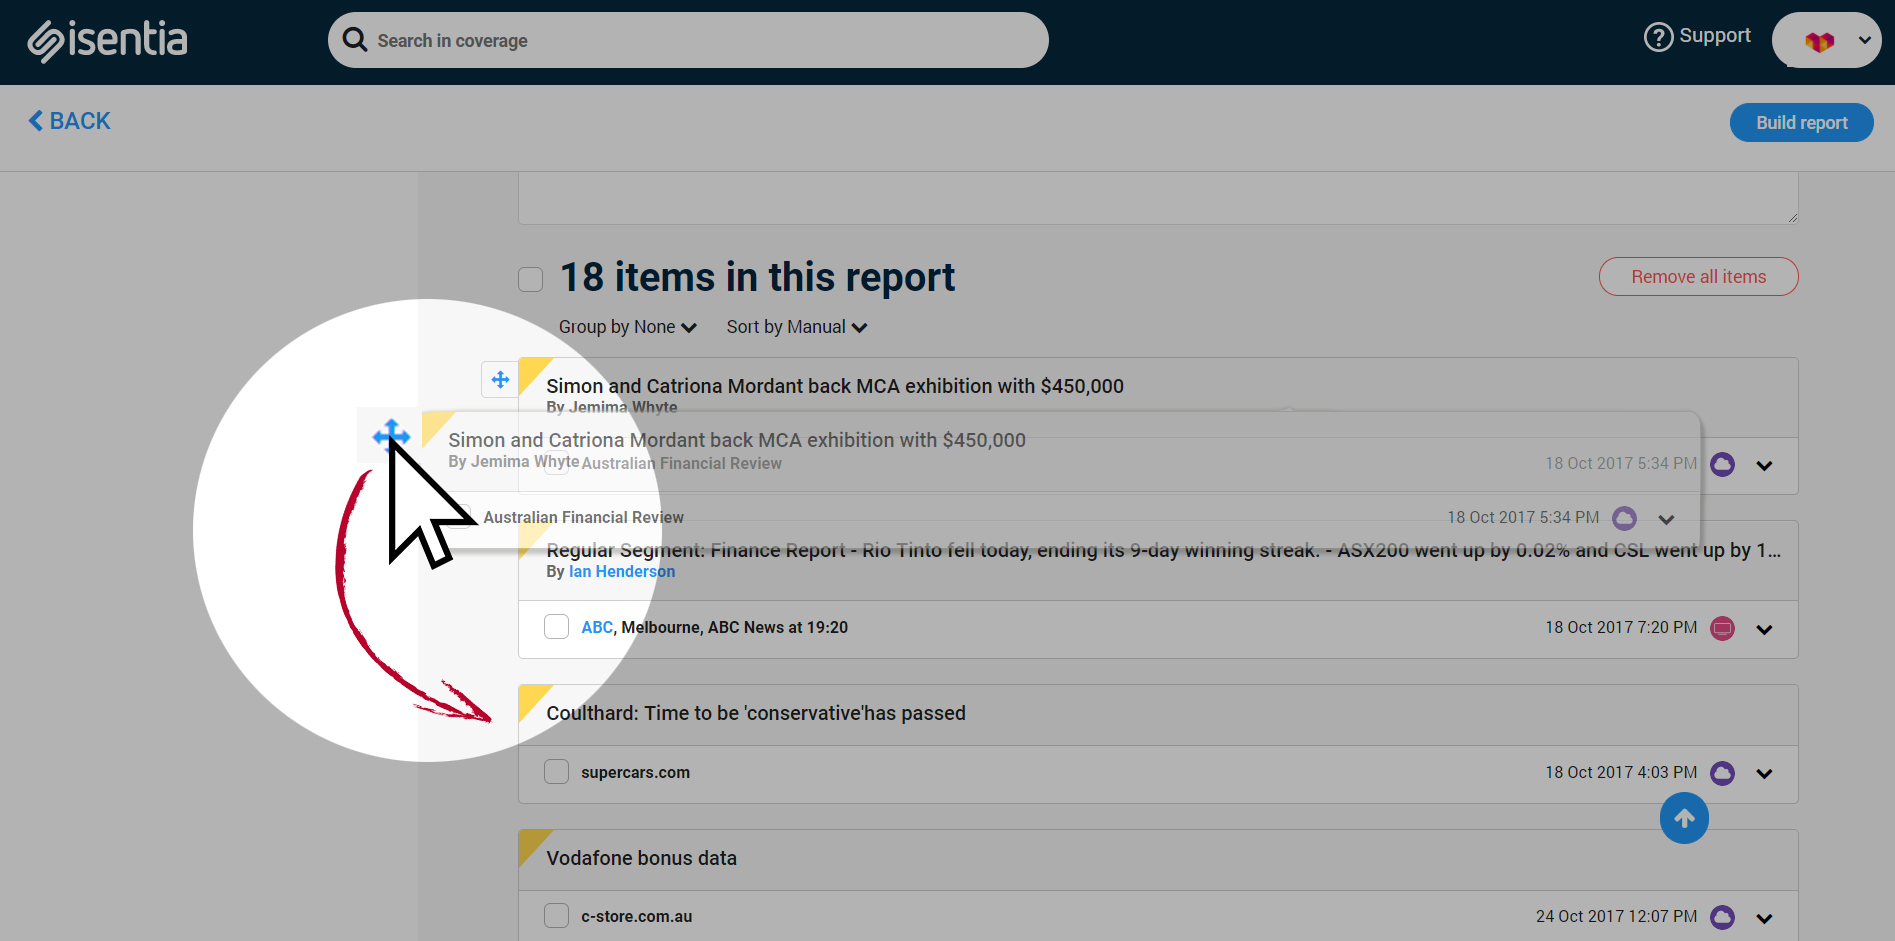
If you select ‘Sort by Manual’ in the Sort by column you can drag-and-drop the report groupings into place, and drag-and-drop individual media items within each grouping.
To drag-and-drop, just click on the crosshairs icon to the right of every media item, and every group of media items, to drag into place.

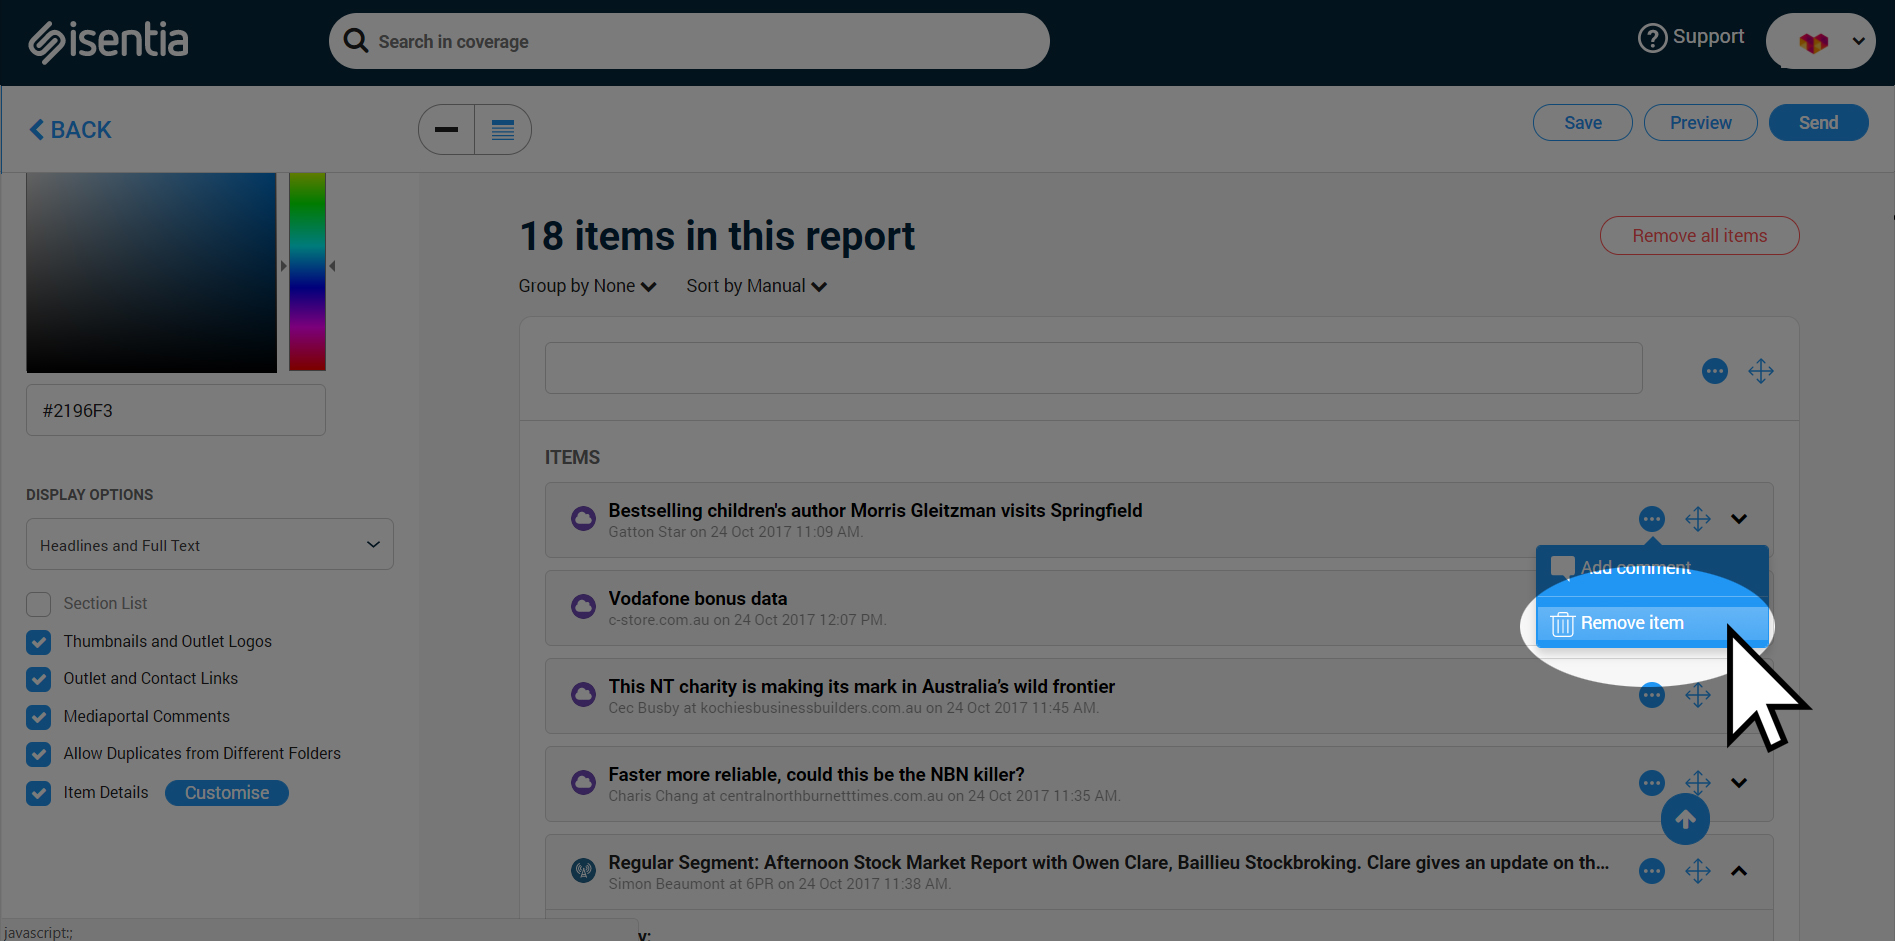
To the left of the crosshairs icon you’ll see the elipsis icon – you can click on this to remove an item from your report, or to add a comment. You’ll also see this icon on your report groupings – you can remove all those items, or add a comment to add content to the grouping itself.

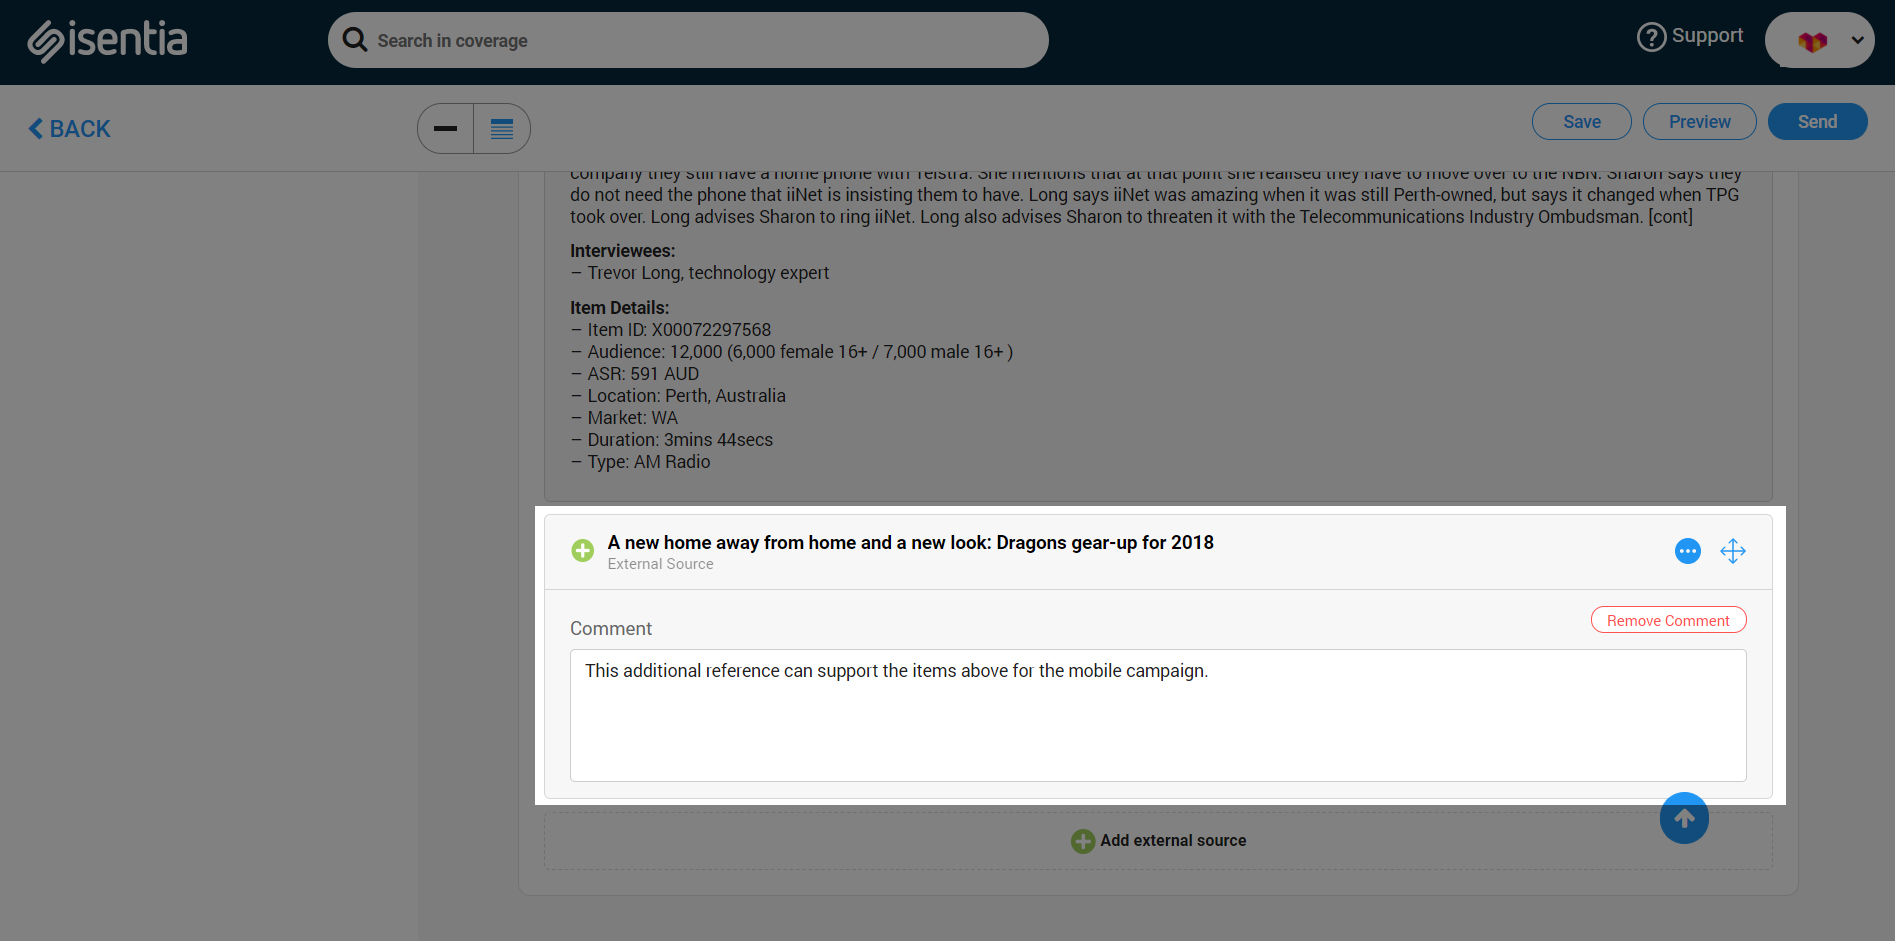
When you’re building a Custom report, you can include content that hasn’t been delivered to Mediaportal. This means you can create a single source for key media and company information with the ability to include external content such as board reports, web links, or other relevant items.
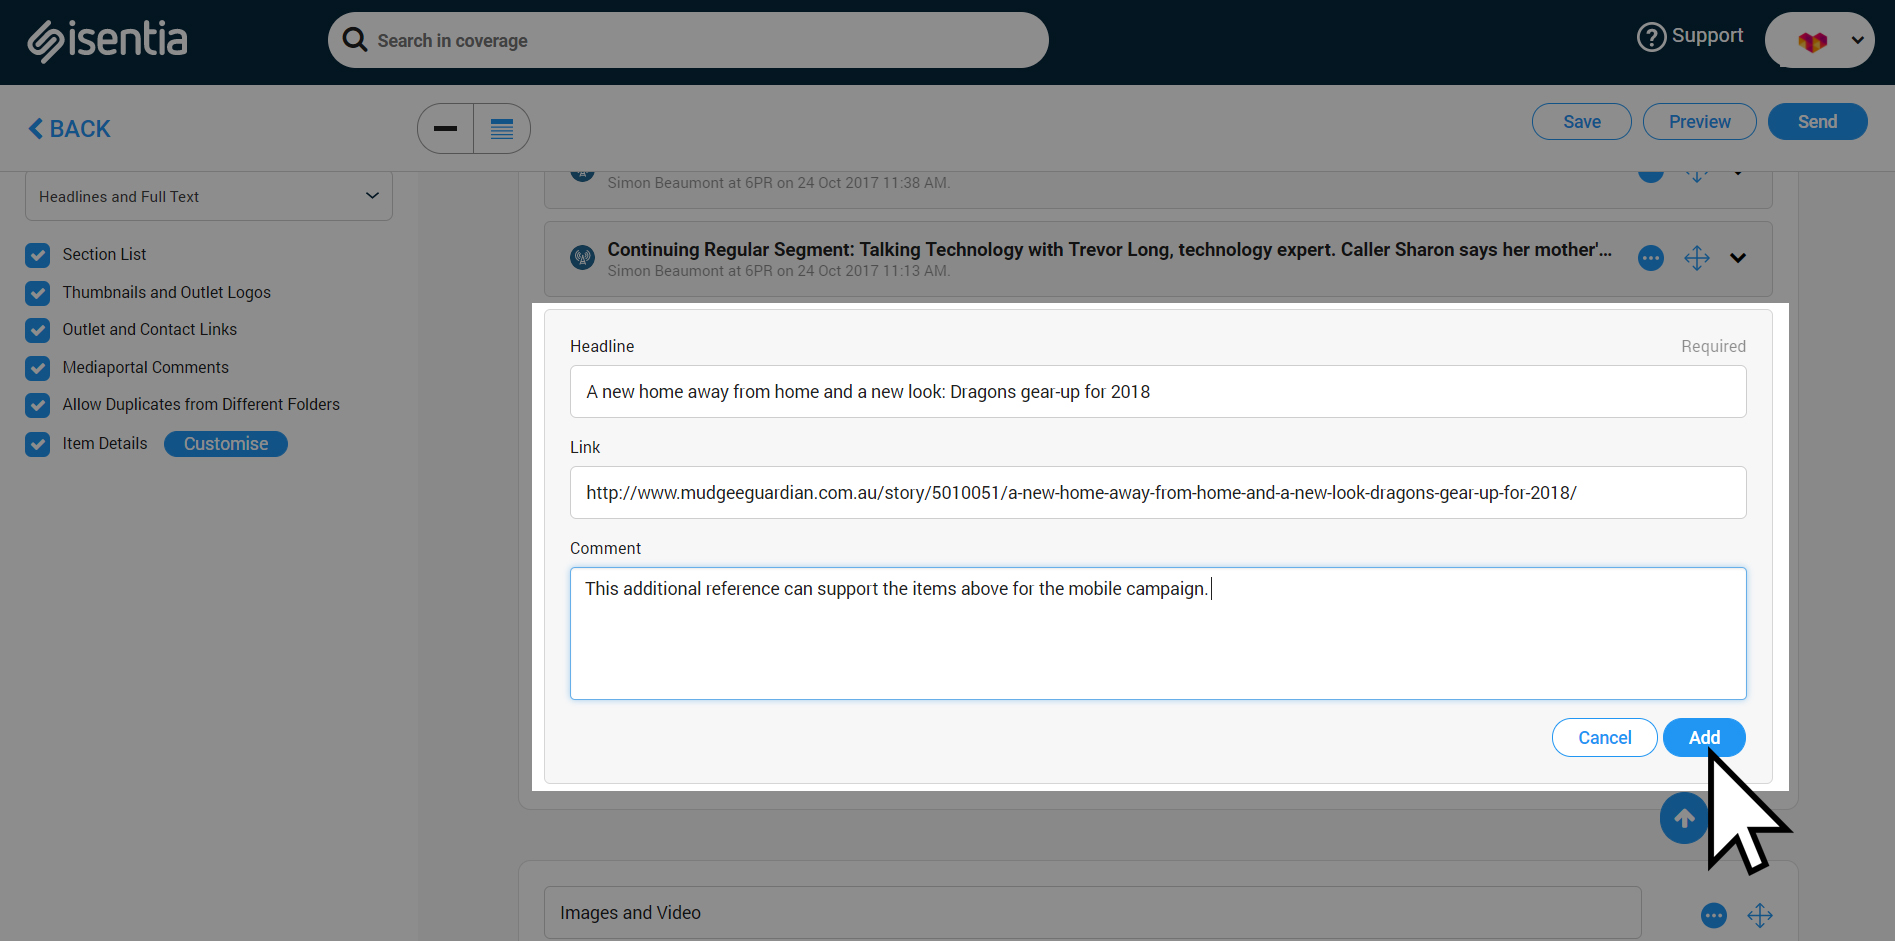
Just click on Add external source to add something extra to your report. You can add in a title, link and any relevant commentary.
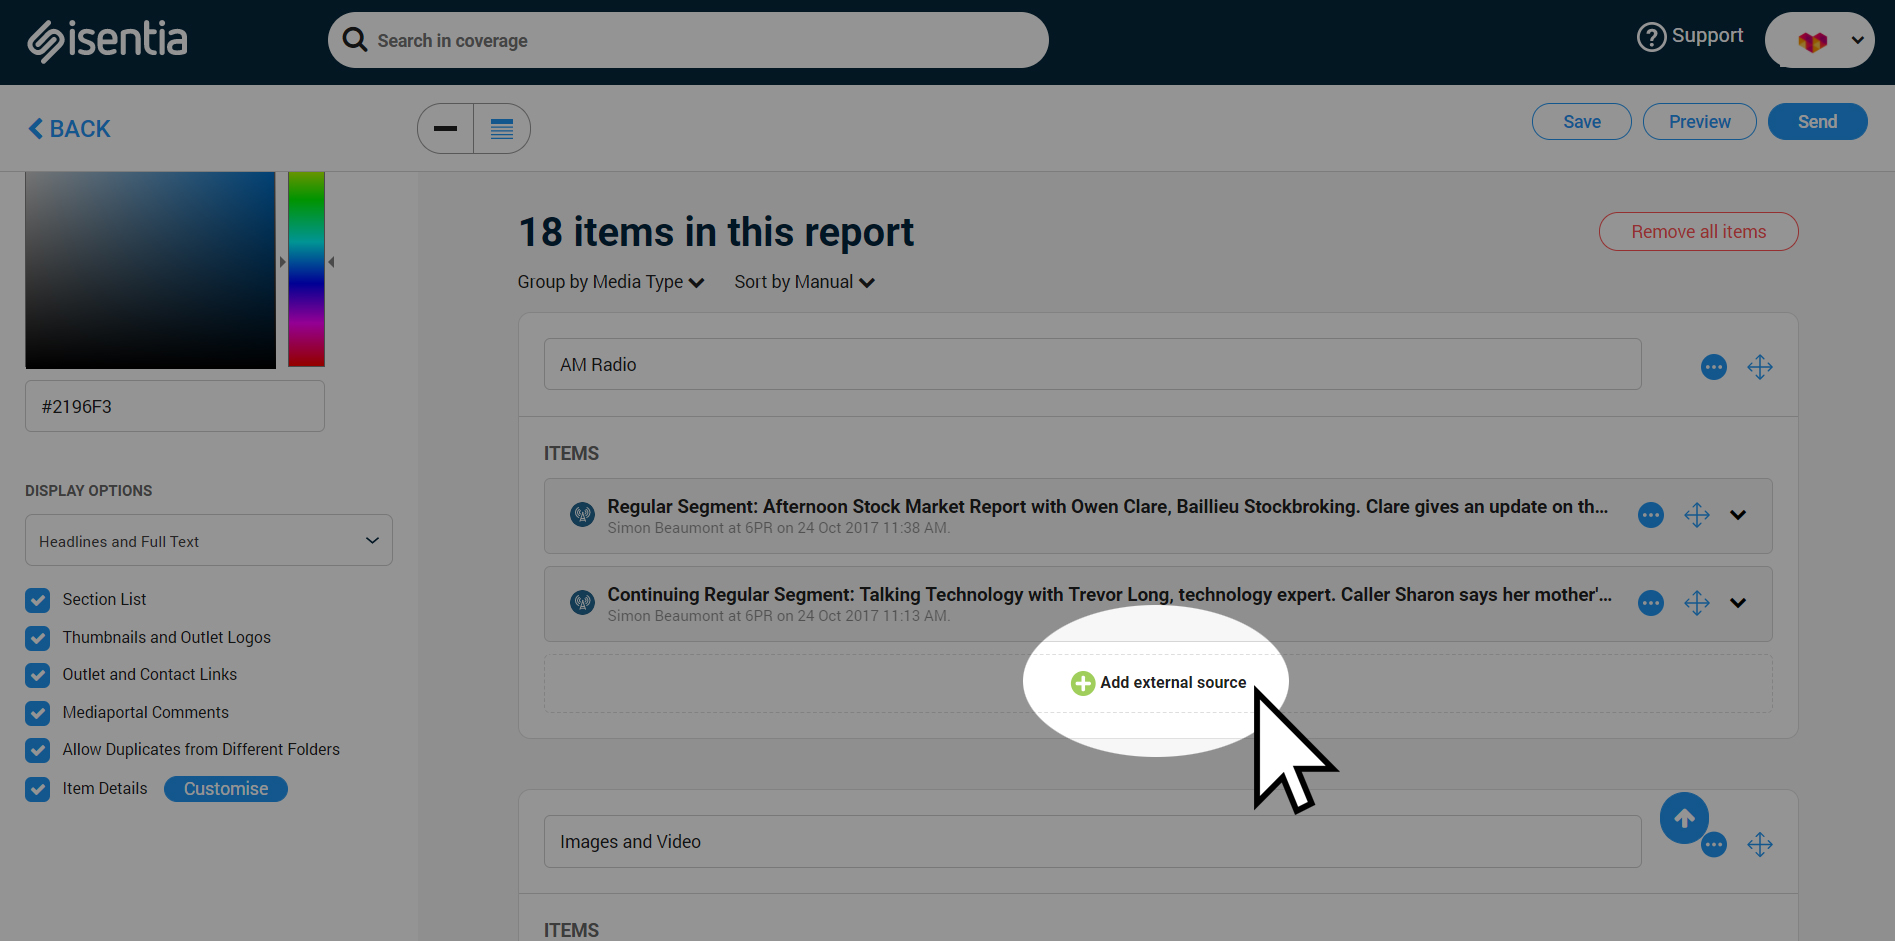
You’ll see this content in your report alongside all your media coverage.
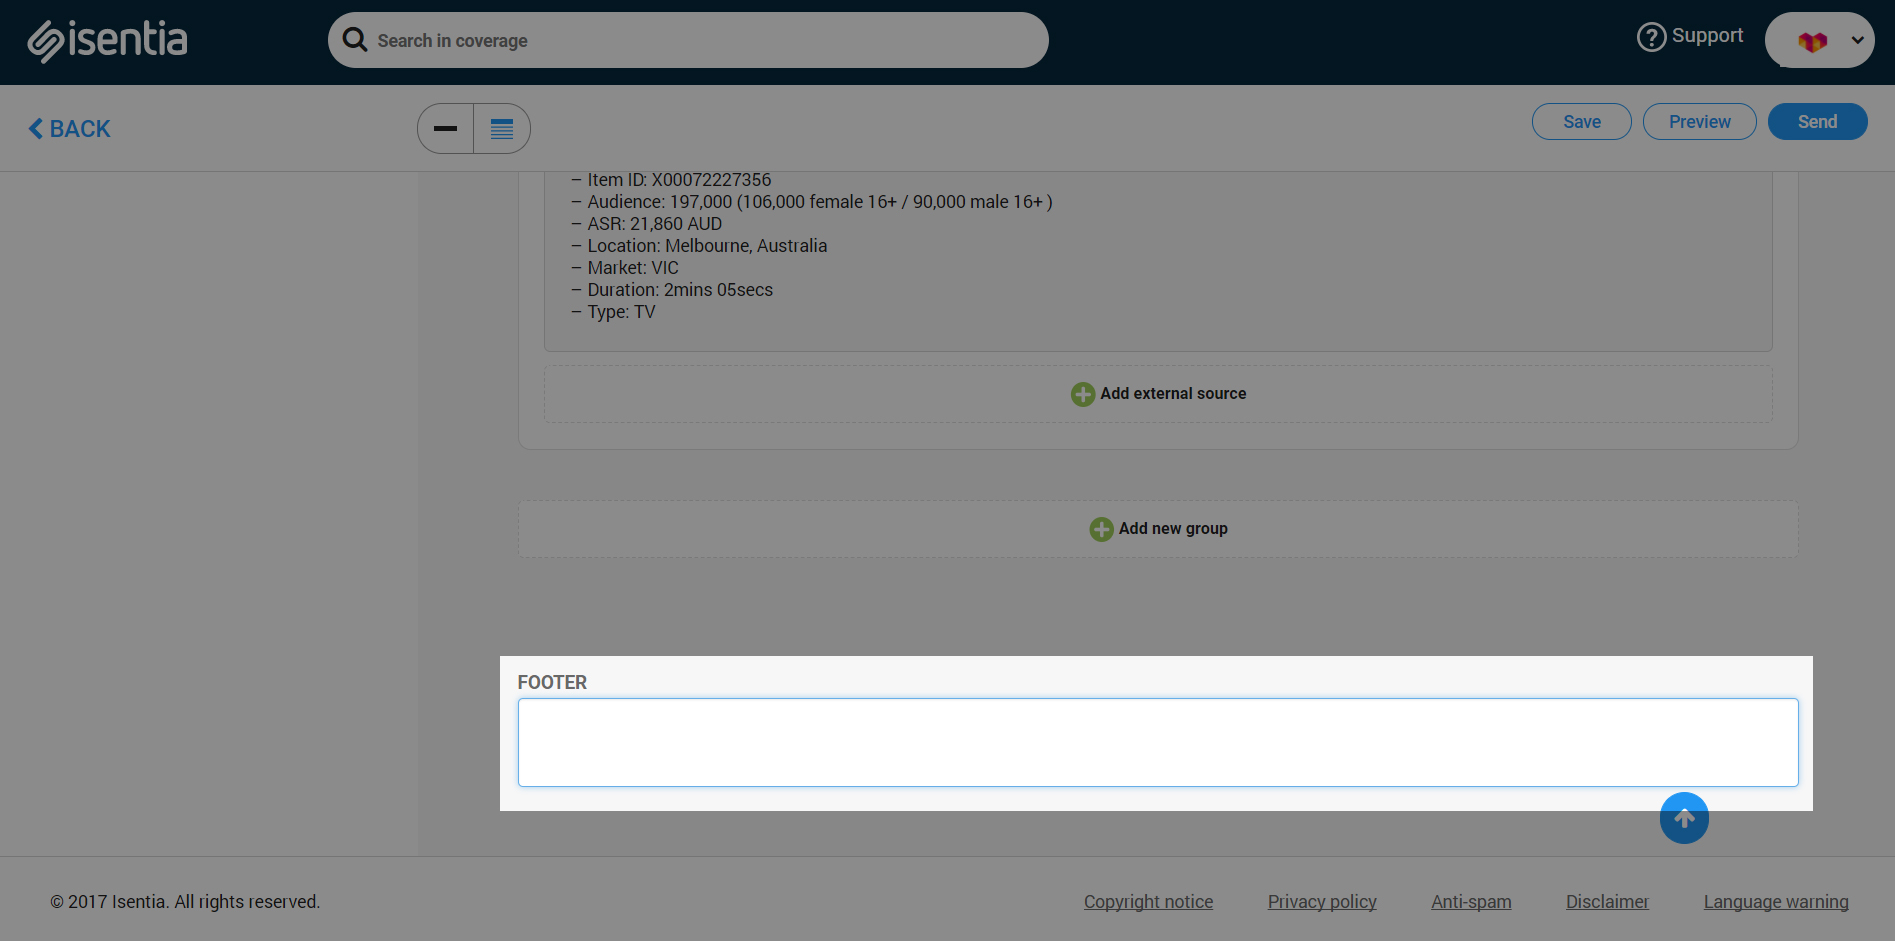
At the bottom of your report you’ll see that you can add any extra details to your footer – this might be contact details for your team or another piece of relevant information. If you don’t need to use a footer just leave this blank.
Distributing your Custom report
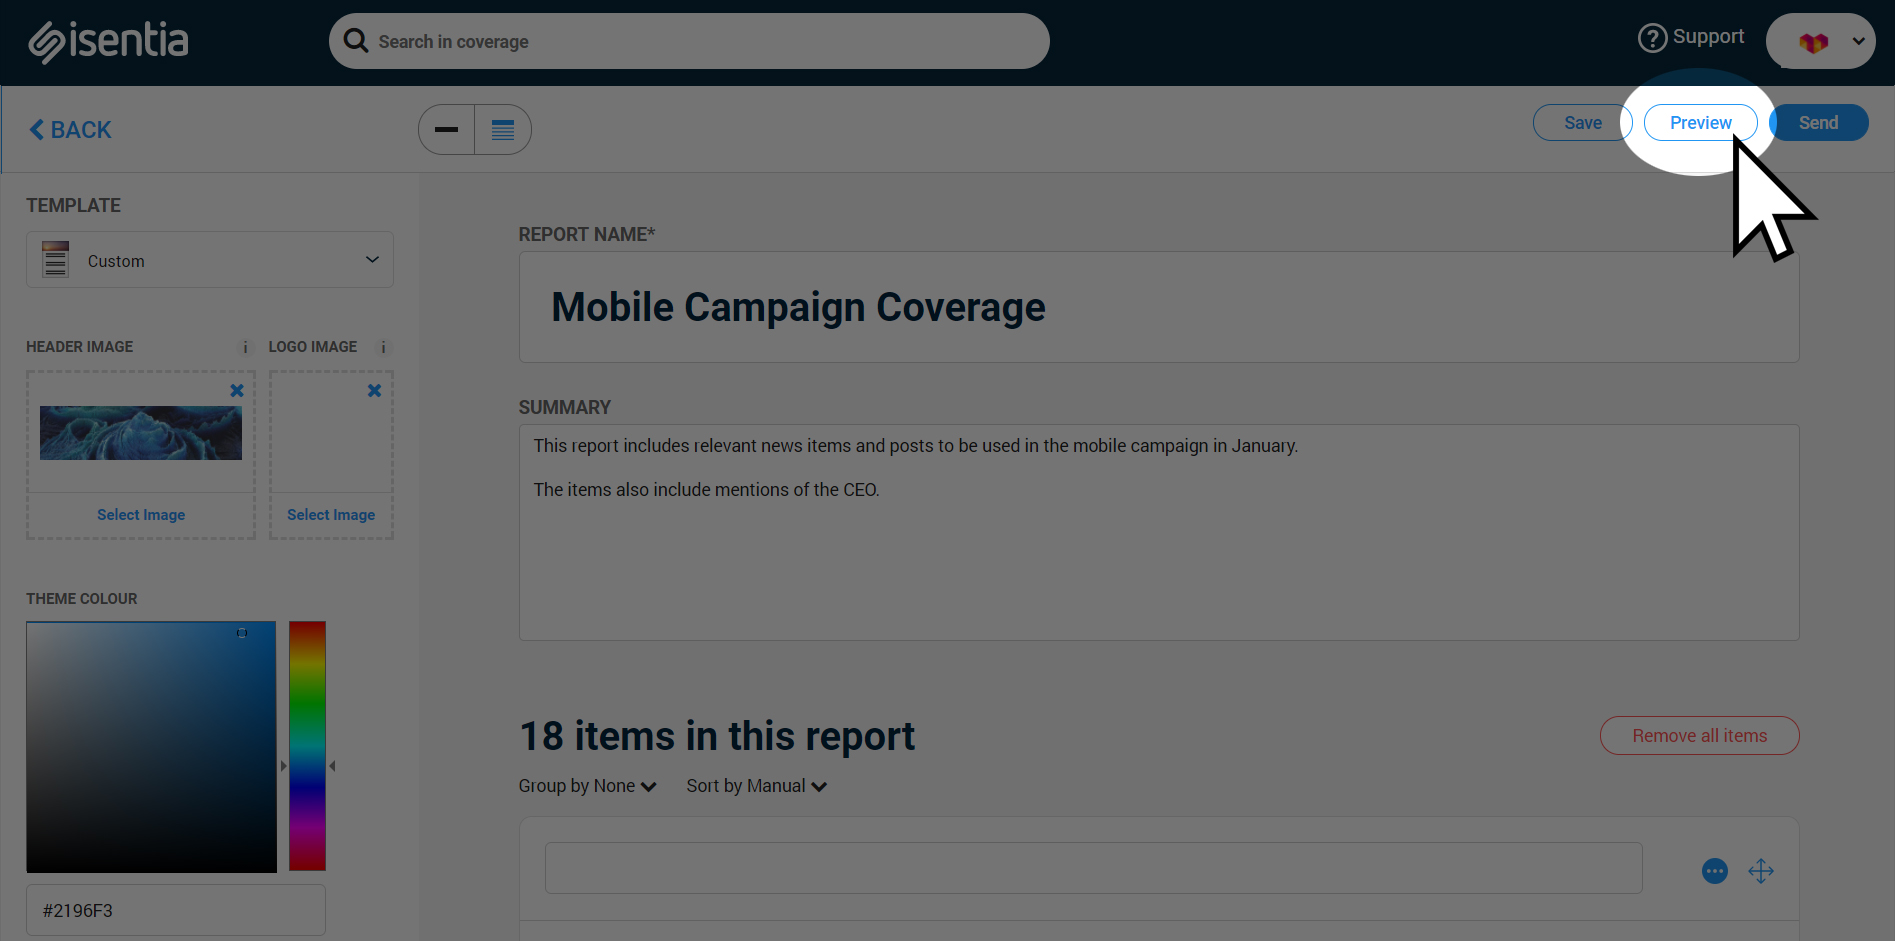
You can use the Preview button in the top right corner to check out what your report looks like at any time.
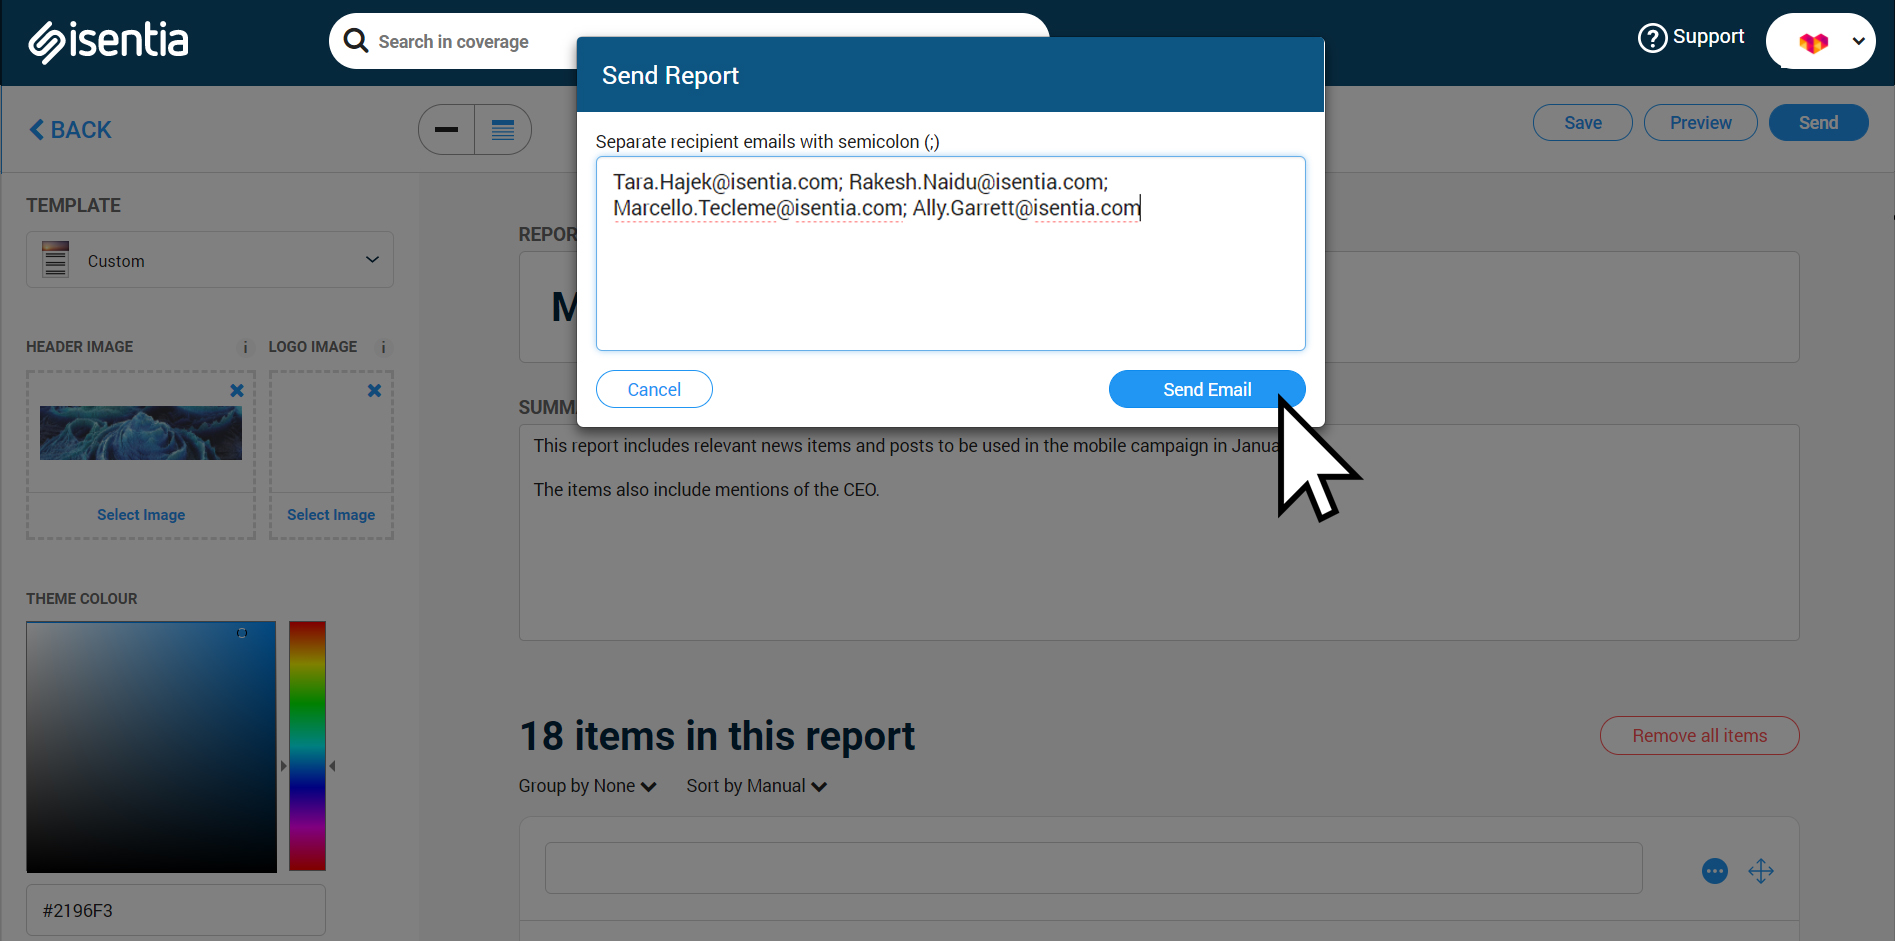
When you’re good to go, click on the Send button in the top right corner. Custom reports are web-based, which means they’re really easy to share with your stakeholders.
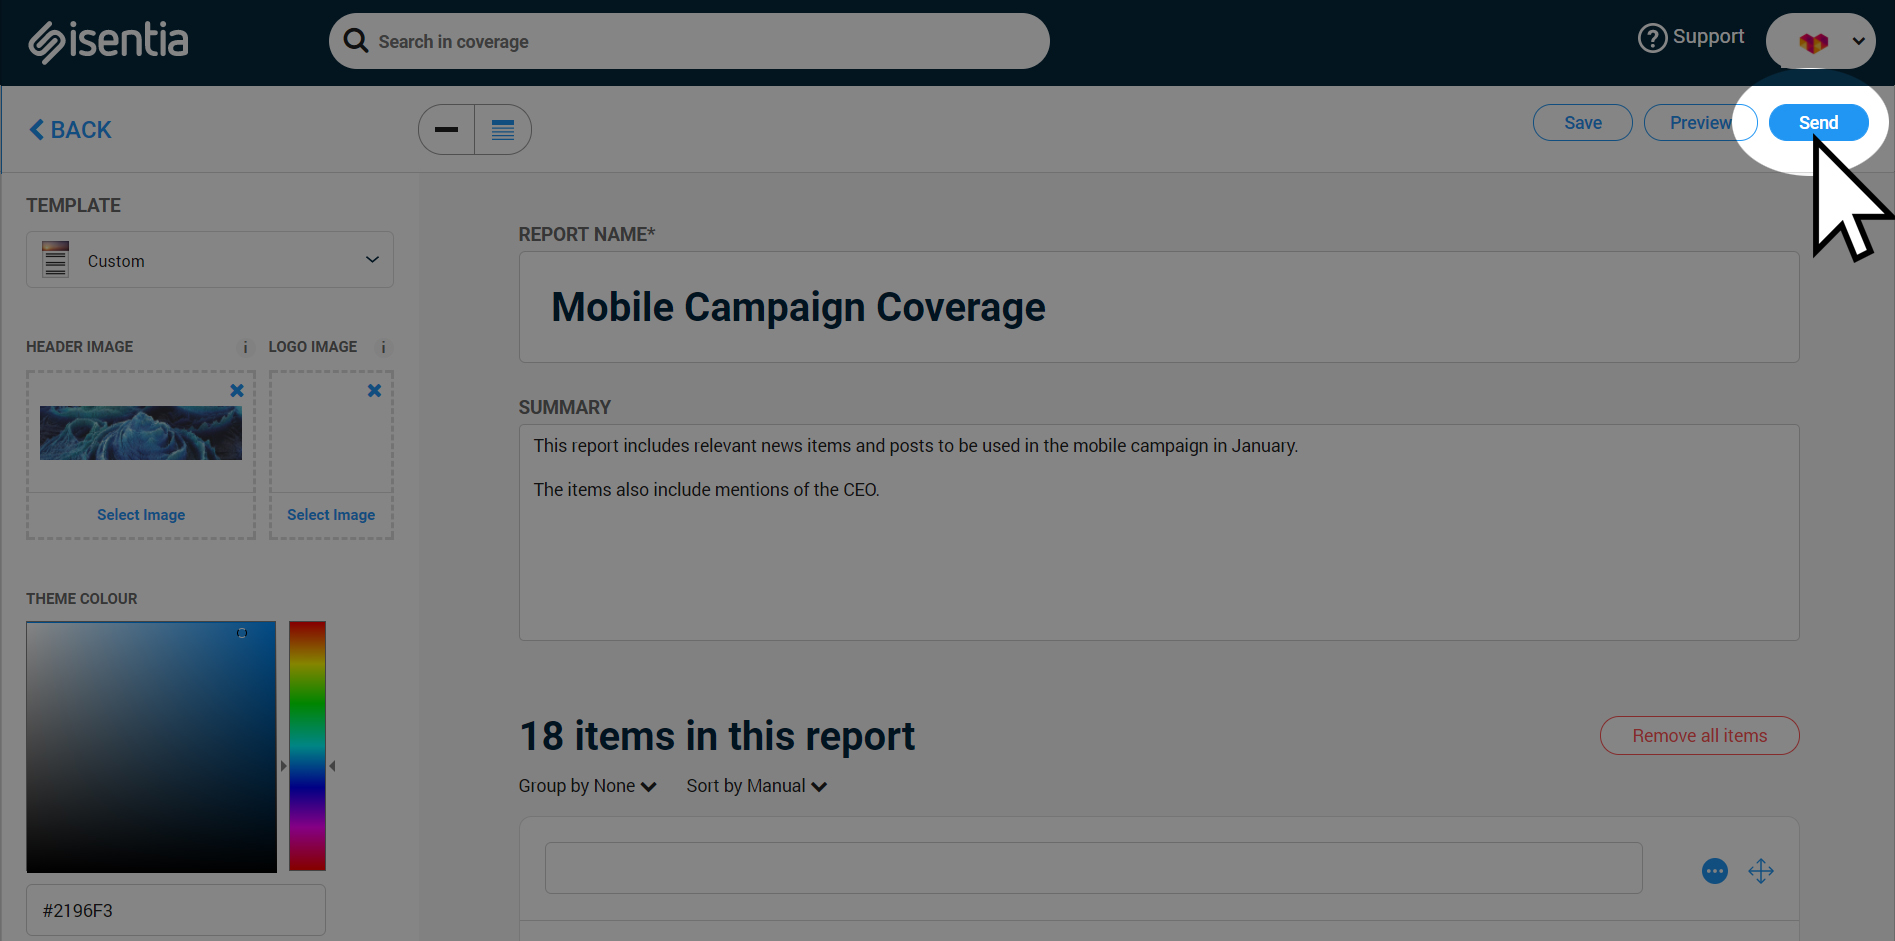
When you click the Send button, you can choose between sending the report as an email via Mediaportal or just copying the link for easy sharing. To send a report via email, just enter the email addresses you need to send to, separated by a semicolon. Please note that you can send to a maximum of 50 email addresses at one time.
If you copy the link you can then go on to share that via email, or via internal communication tools like Slack, Yammer or Workplace. You might even like to share this link with a recipient via text message.
Please note that Custom report links are valid for 30 days. If you need to archive this content you might find a PDF or Excel format report more suitable.
Clearing your report
When you add items to Report Builder those items will stay there until you logout of Mediaportal or remove the items manually. You can remove individual media items from your report by clicking the elipsis icon on an item , and then selecting to remove the item.
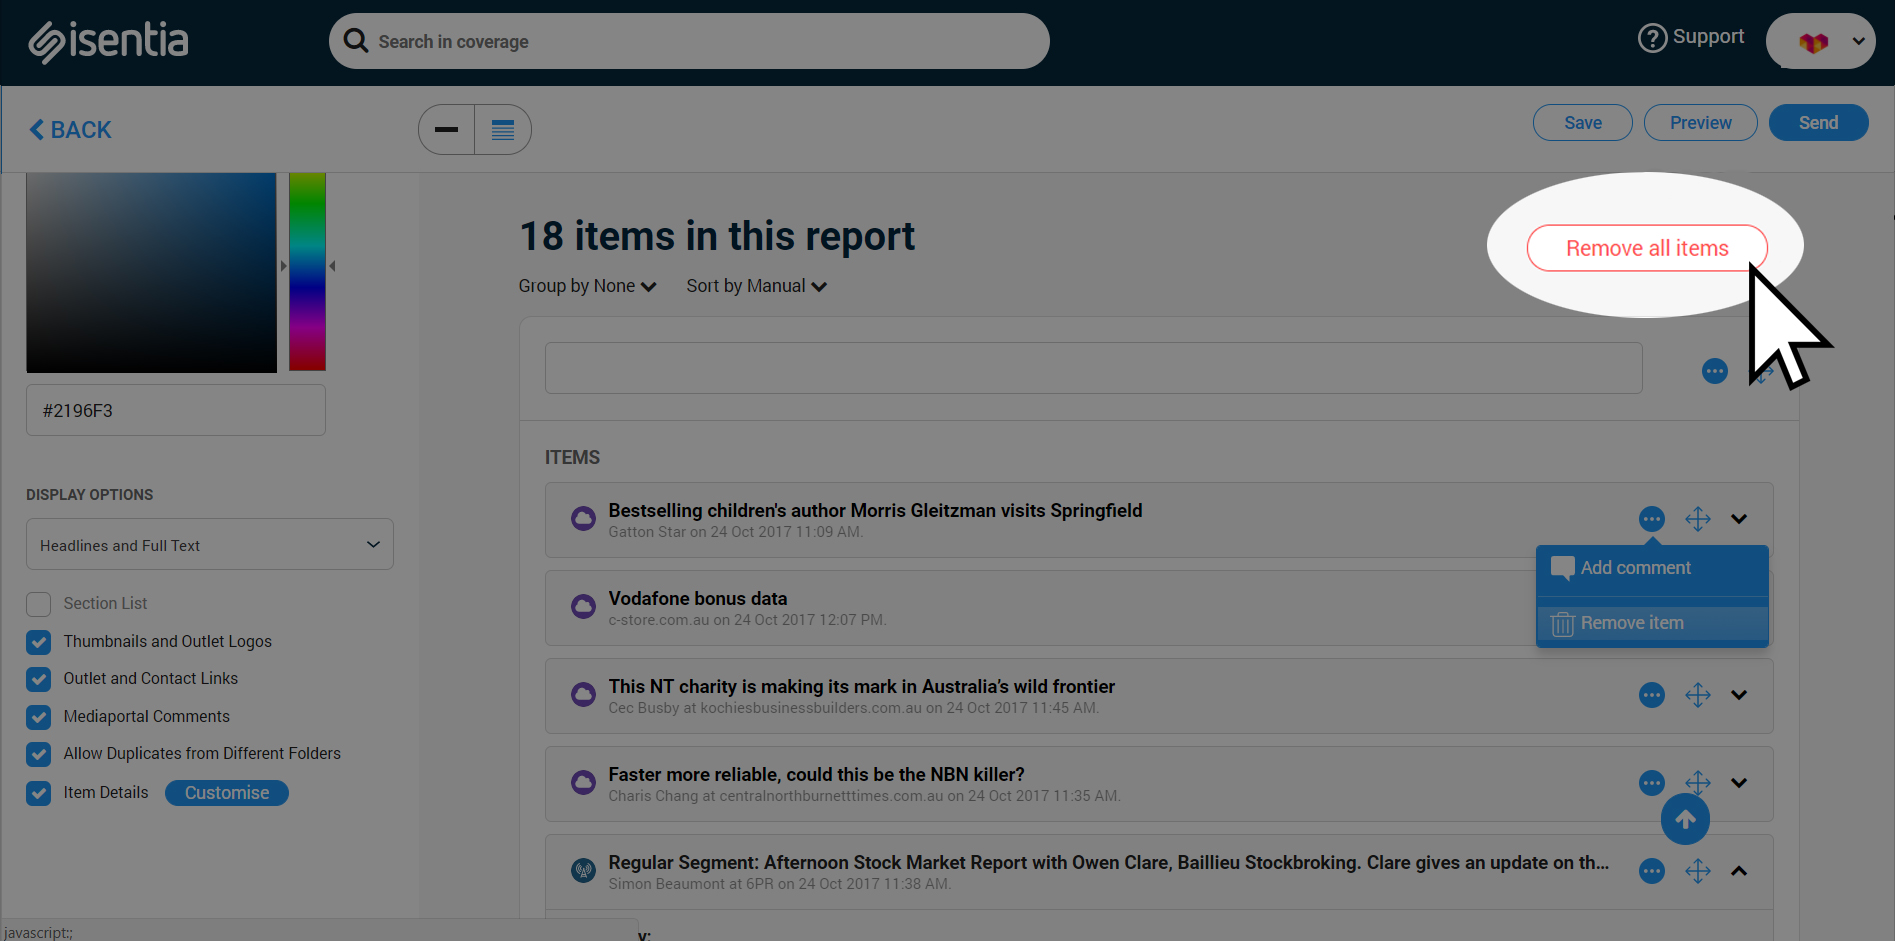
You can remove all of the items sitting in Report Builder at once by clicking Remove all items. This works well if you want to build a whole new report with fresh items.
Other report formats – PDF, Email, Plain Text, Excel
Click on the title field to rename your report. You can also fill in the Summary field to add some extra commentary to your Report. This is a great place to add context or alert your reader to particular items. Just type any commentary you have into the text box and use the buttons above to format. If you don’t need to add any commentary just leave this field blank.
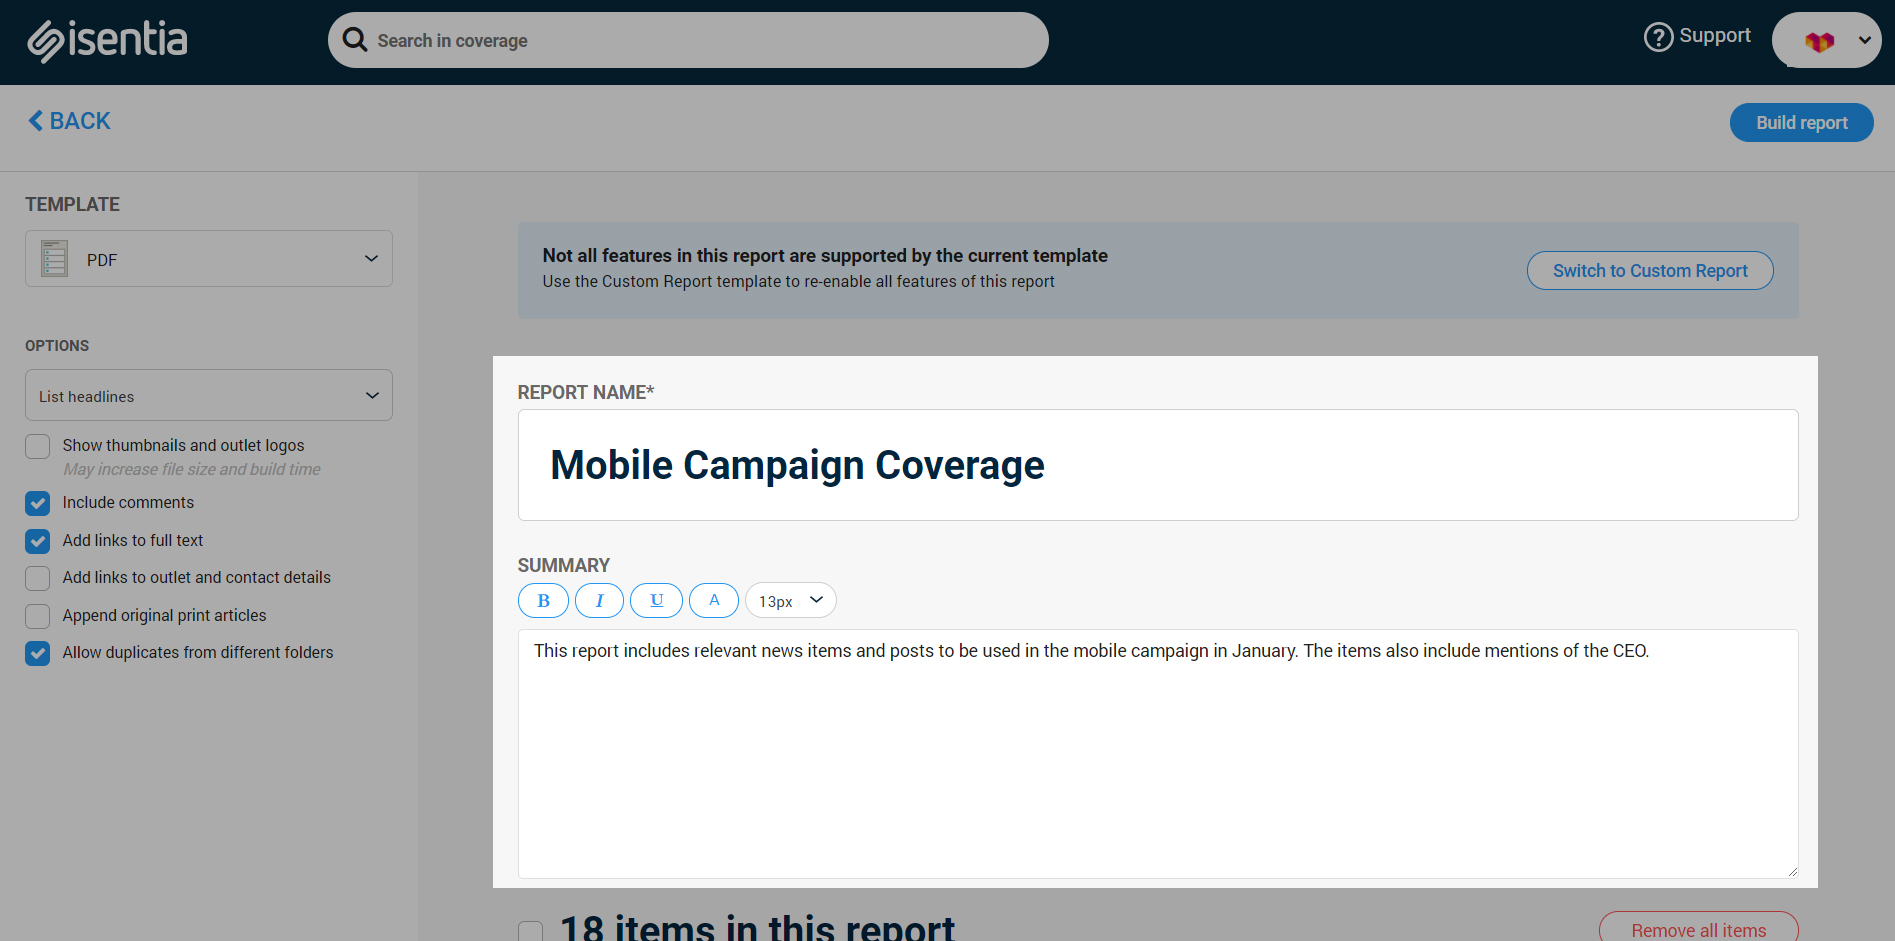
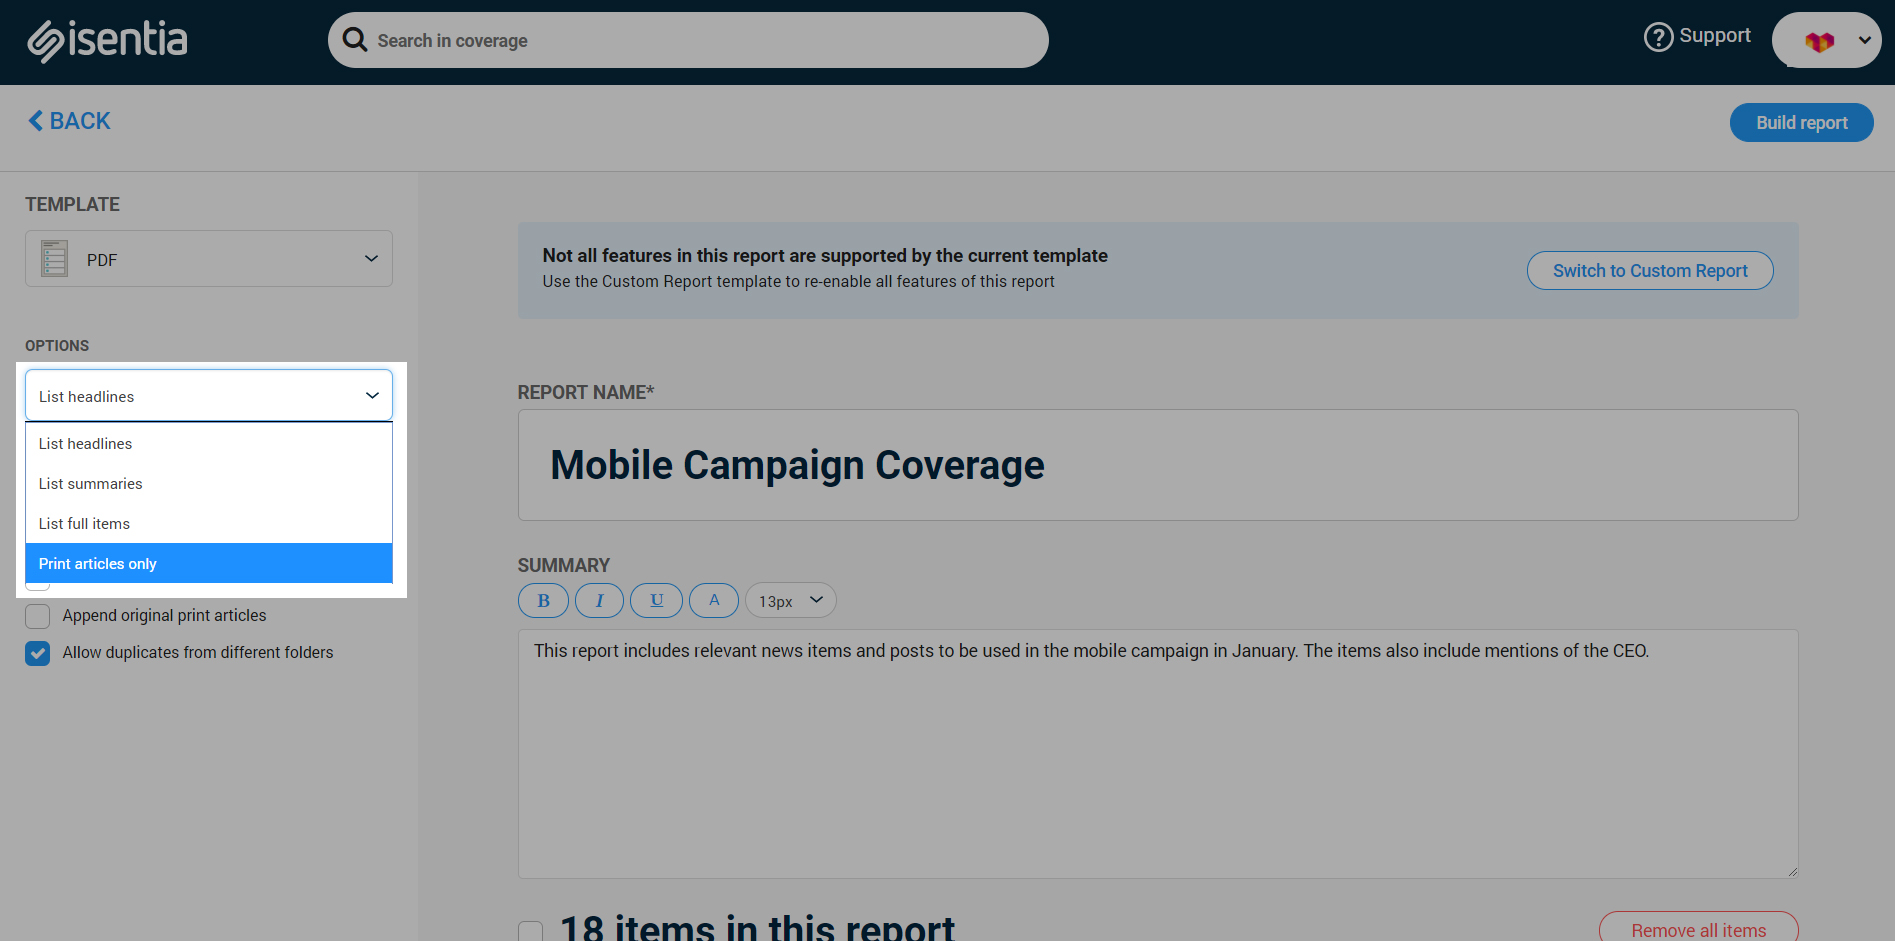
You’ll options to format and customise your report in the panel on the left side of your screen. The format that you select in Templates will influence the options that you see below.
Use the dropdown menu under Options to choose how your coverage will appear in your report. Selecting List headlines will make your report smaller, whereas List summaries or List full text will create reports with more detail. If you want to build a pdf with only the appended print articles, select List print articles only.
Use the checkboxes to customise the level of detail on each media item in your report. The relevant checkboxes will show for the format that you select under Templates.
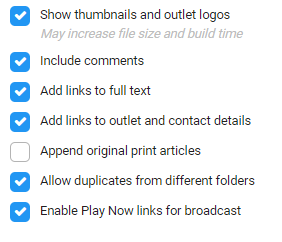
- Select Show thumbnails and outlet logos to include thumbnails or logos for media items in your report. This may increase the file size and the build time for your reports.
- Select Include comments to add any comments made on media items to your Mediaportal Report. Untick this if your team has been making notes on media items that you don’t want to include on a report going to a broader group of stakeholders
- Select Add links to full text to include a link on newspaper/magazine items that you can click to read the full text for that media item
- Select Add links to outlet and contact details to turn media outlet and journalist names into hyperlinks – anyone viewing the report can click on these links to be taken through to the Connect profile page for that outlet/contact. That page will give the viewer contact details to get in touch with that media outlet or journalist.
- Select Append original print articles to add the newspaper/magazine articles to the end of your pdf report
- Select Allow duplicates from different folders to allow duplicate media items in your report. If the same article is in two different folders, and both have been added to your report tick this box for the article to appear twice in your report
- Select Enable Play Now links for broadcast to include Play Now or ordering links in the body of your report. This will allow recipients of the report to stream pre-purchased broadcast audio and video content or order it.
Use the Group by and Sort by menus to organise the order in which your media items appear.
If you select ‘Sort by Manual’ in the Sort by column you can drag-and-drop the report groupings into place, and drag-and-drop individual media items within each grouping.
To drag-and-drop, just hover your mouse to the left of the grouping title or the media item. Click the crosshairs that appears, and hold down your mouse to drag to drag the item into place.
When you’ve finished organising and formatting your report, just click Build this report in the top right hand corner of your screen.
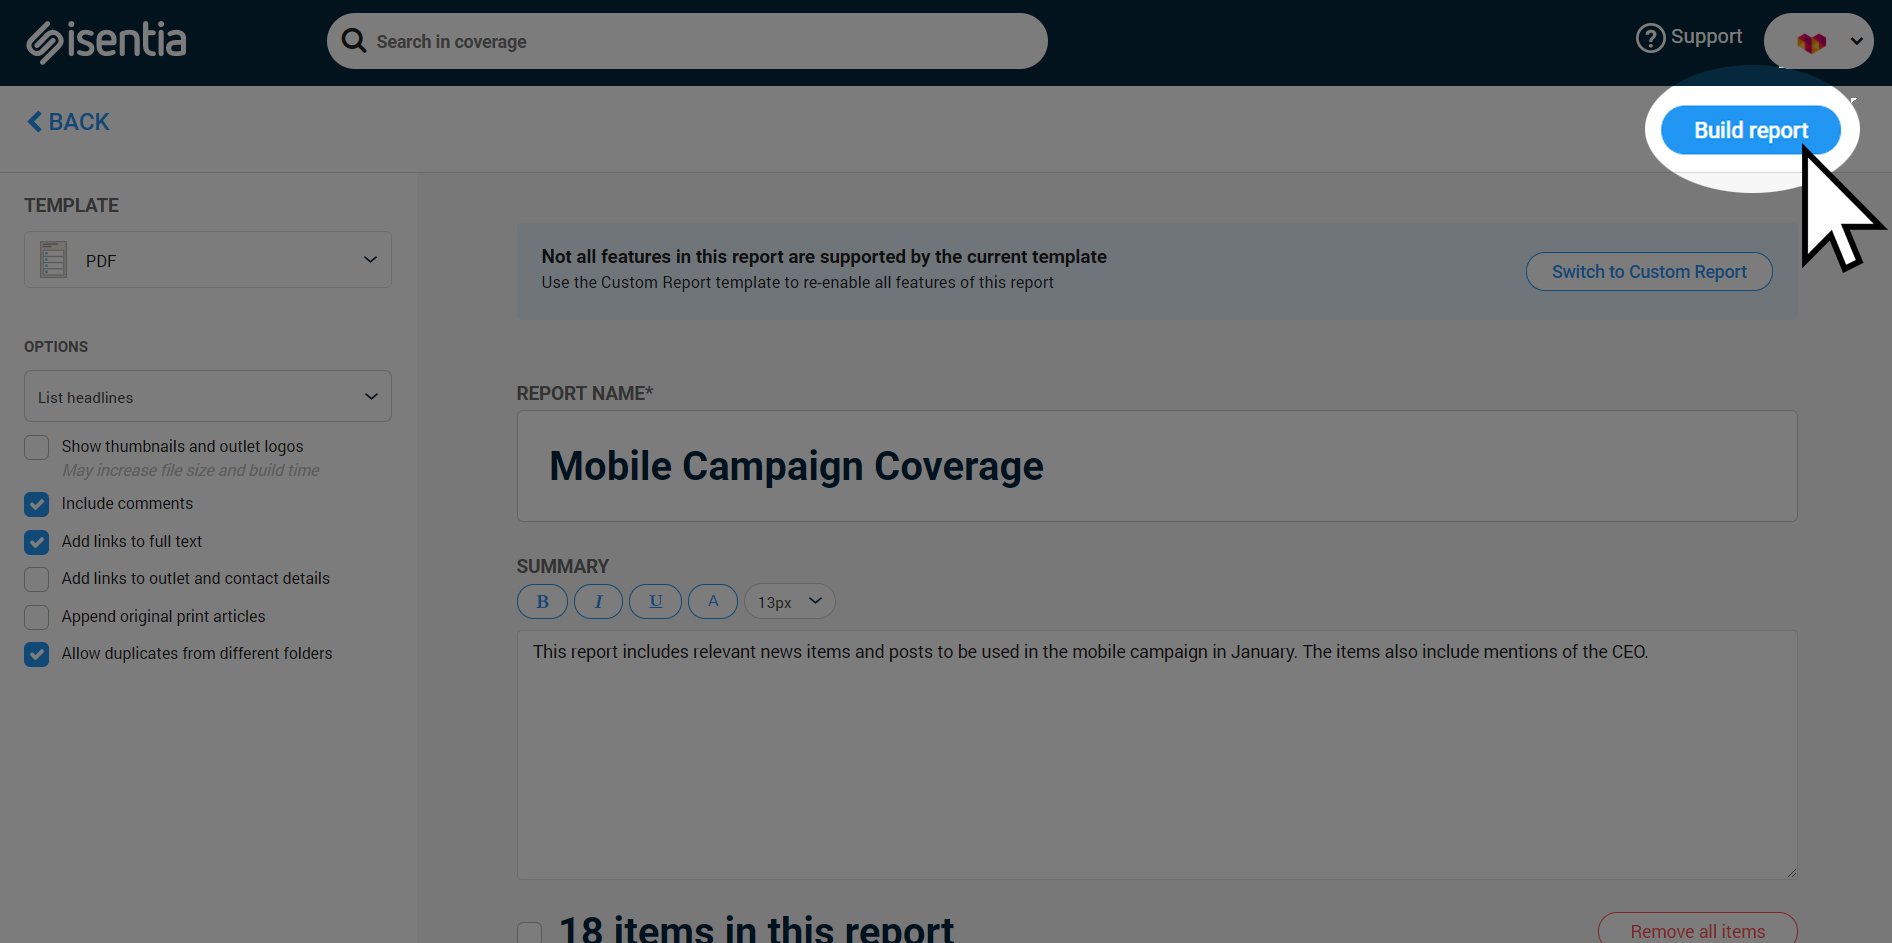
If you selected PDF, Plain Text file or Excel file as your report format, your report will begin to build straight away. If you selected to send as email, your report will be sent to the email address associated with your login. You can check and modify this email address in your Mediaportal Settings.
Clearing your report
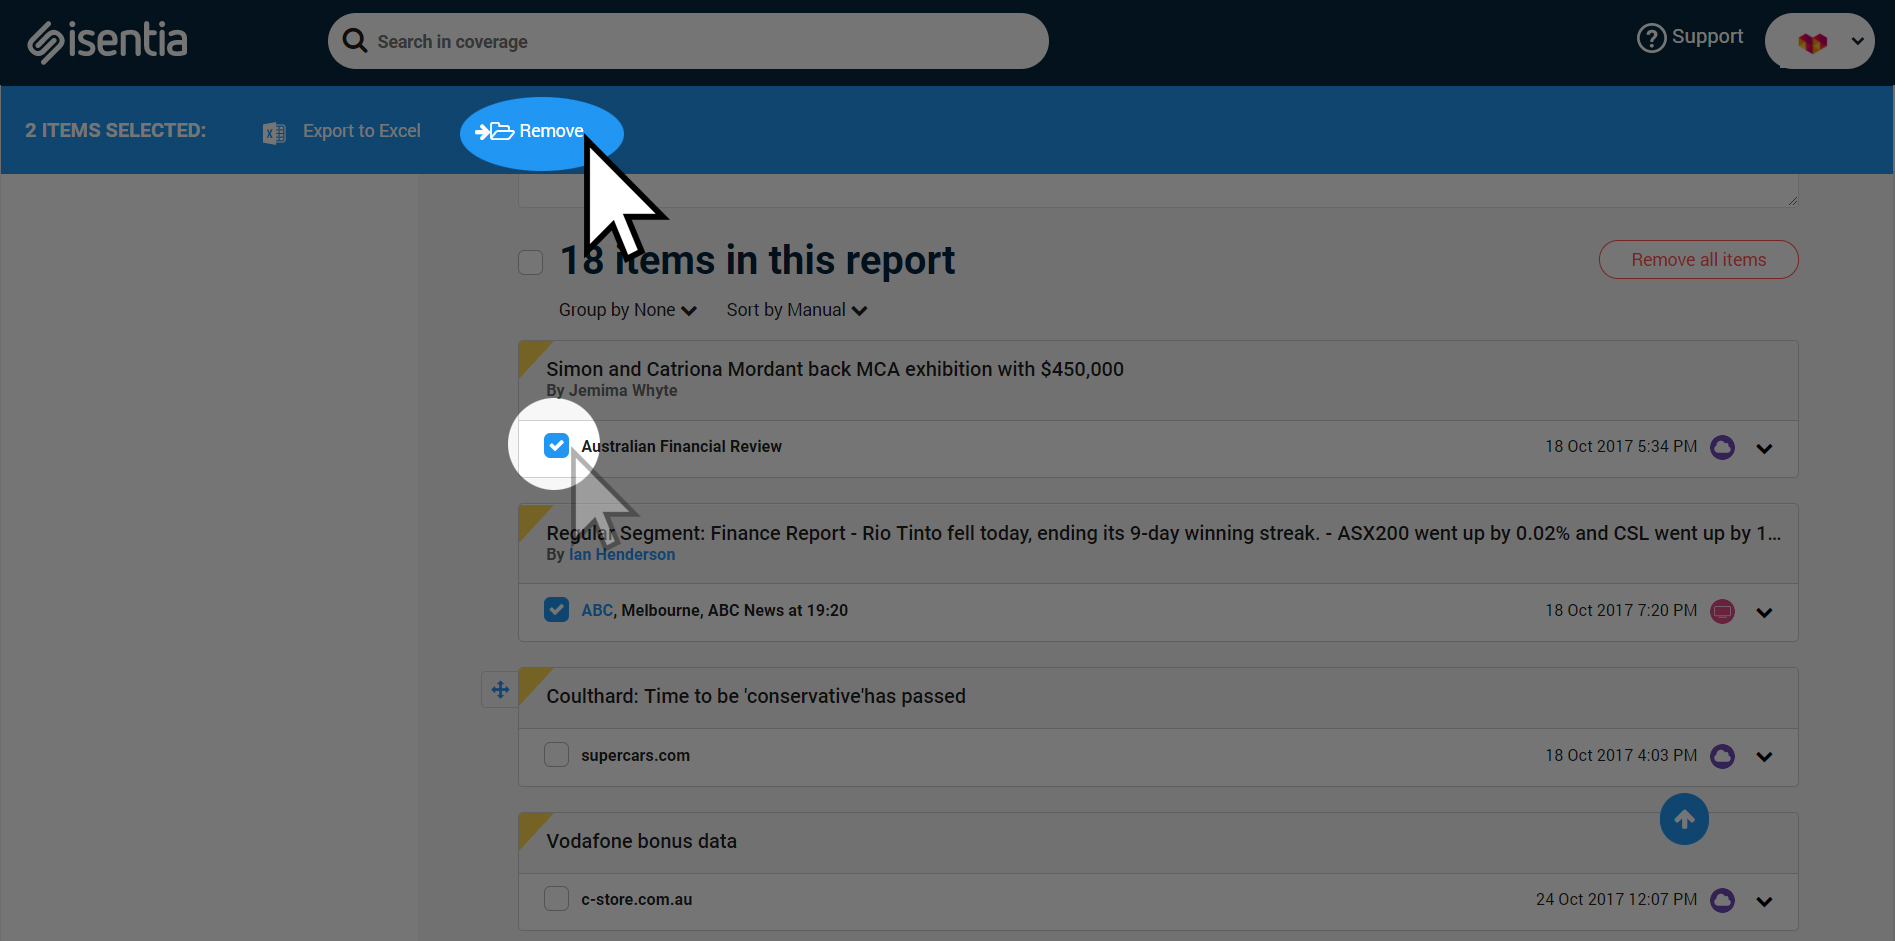
When you add items to Report Builder those items will stay there until you logout of Mediaportal or remove the items manually. You can remove individual media items from your report by selecting them, and then clicking Remove on the bright blue action bar that appears.
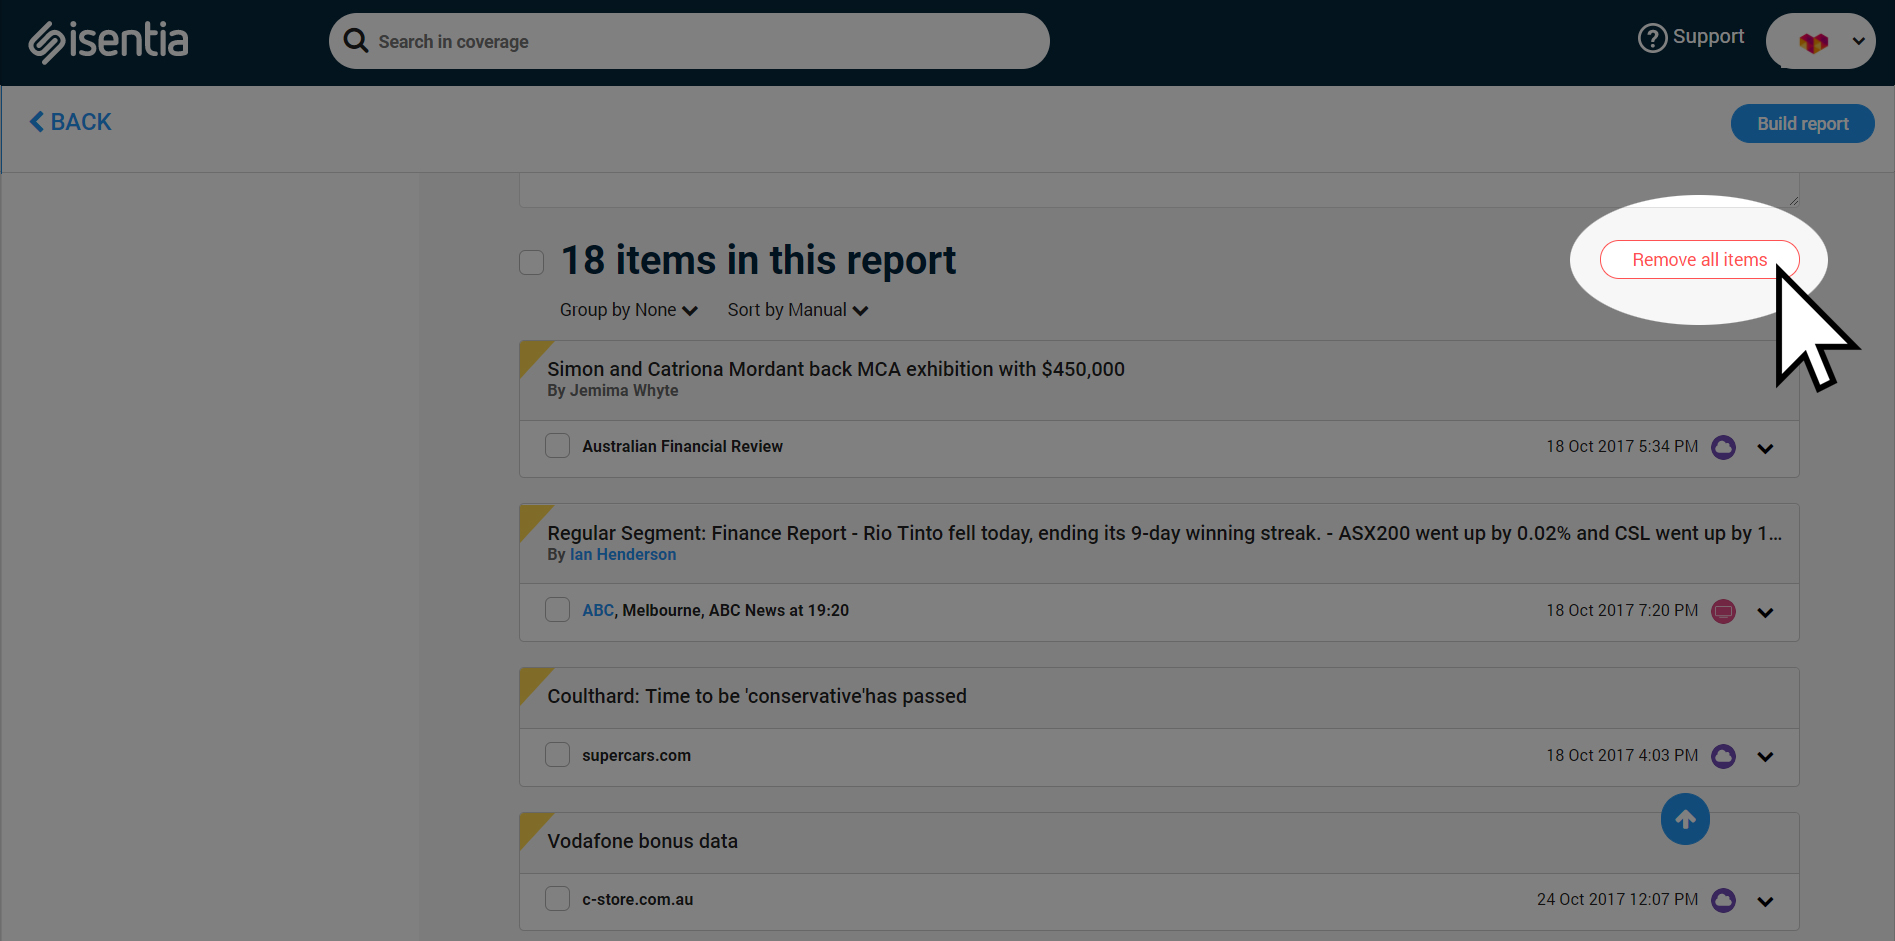
You can remove all of the items sitting in Report Builder at once by clicking Remove all items. This works well if you want to build a whole new report with fresh items.
Data in reports
You’ll notice that media items in your reports come with useful data – like a word count or an ASR figure.
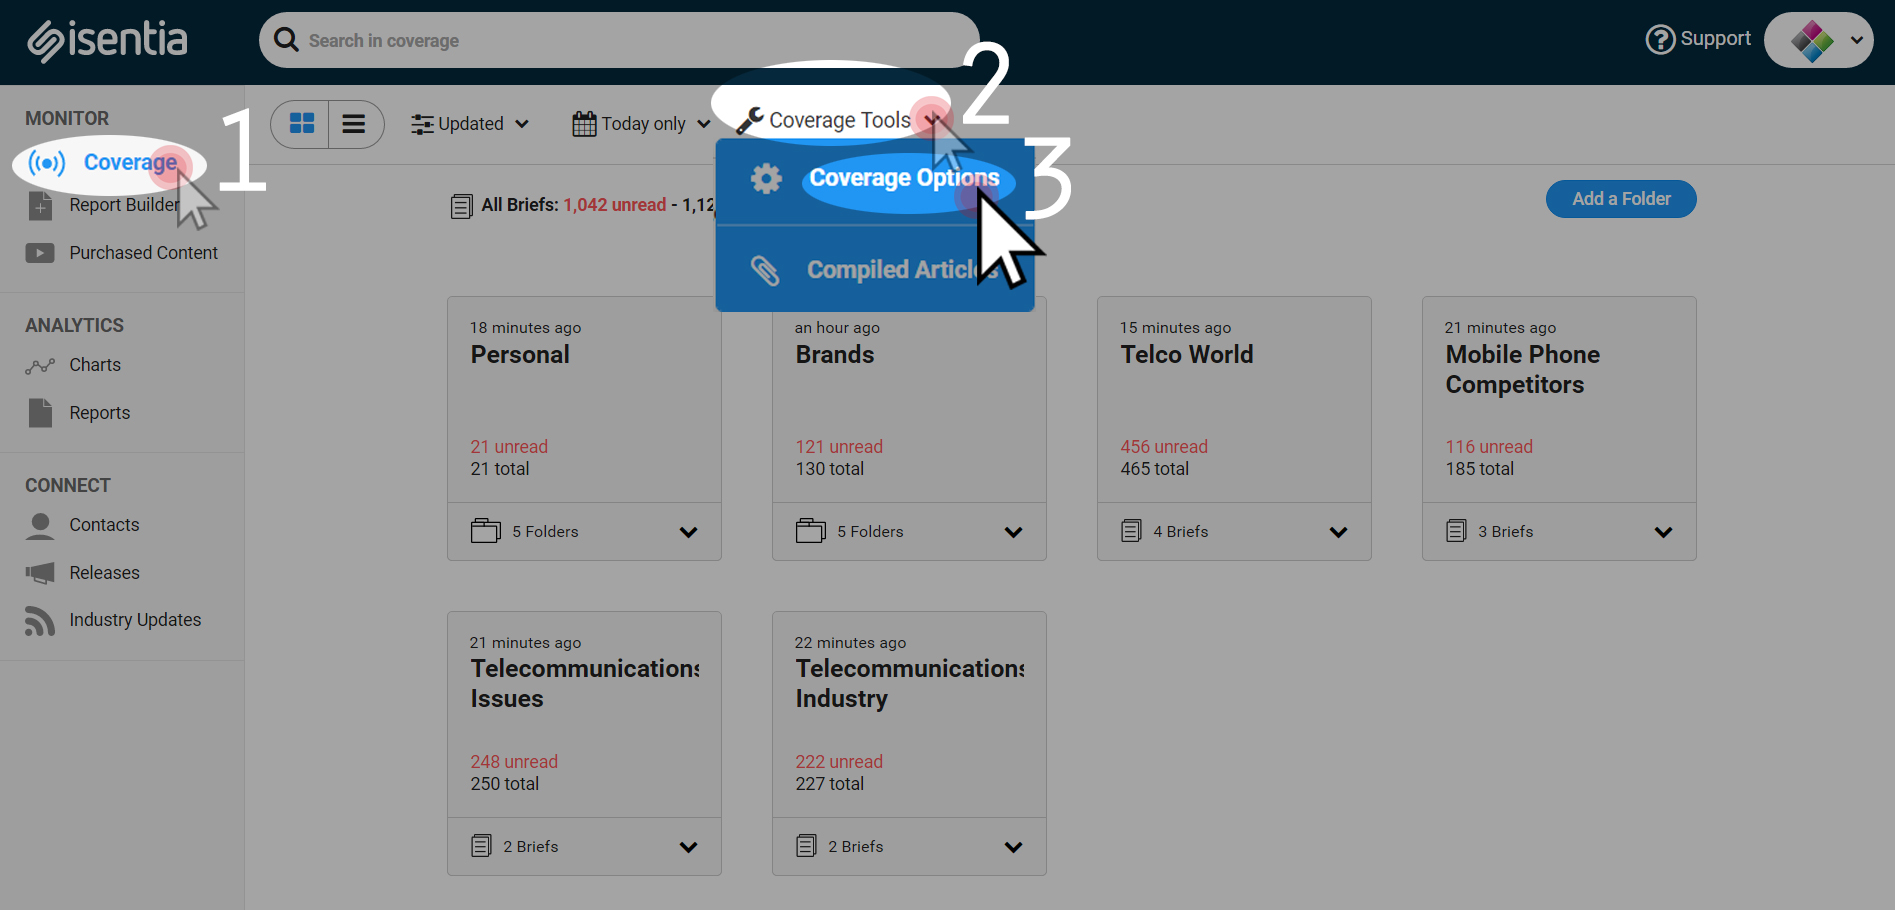
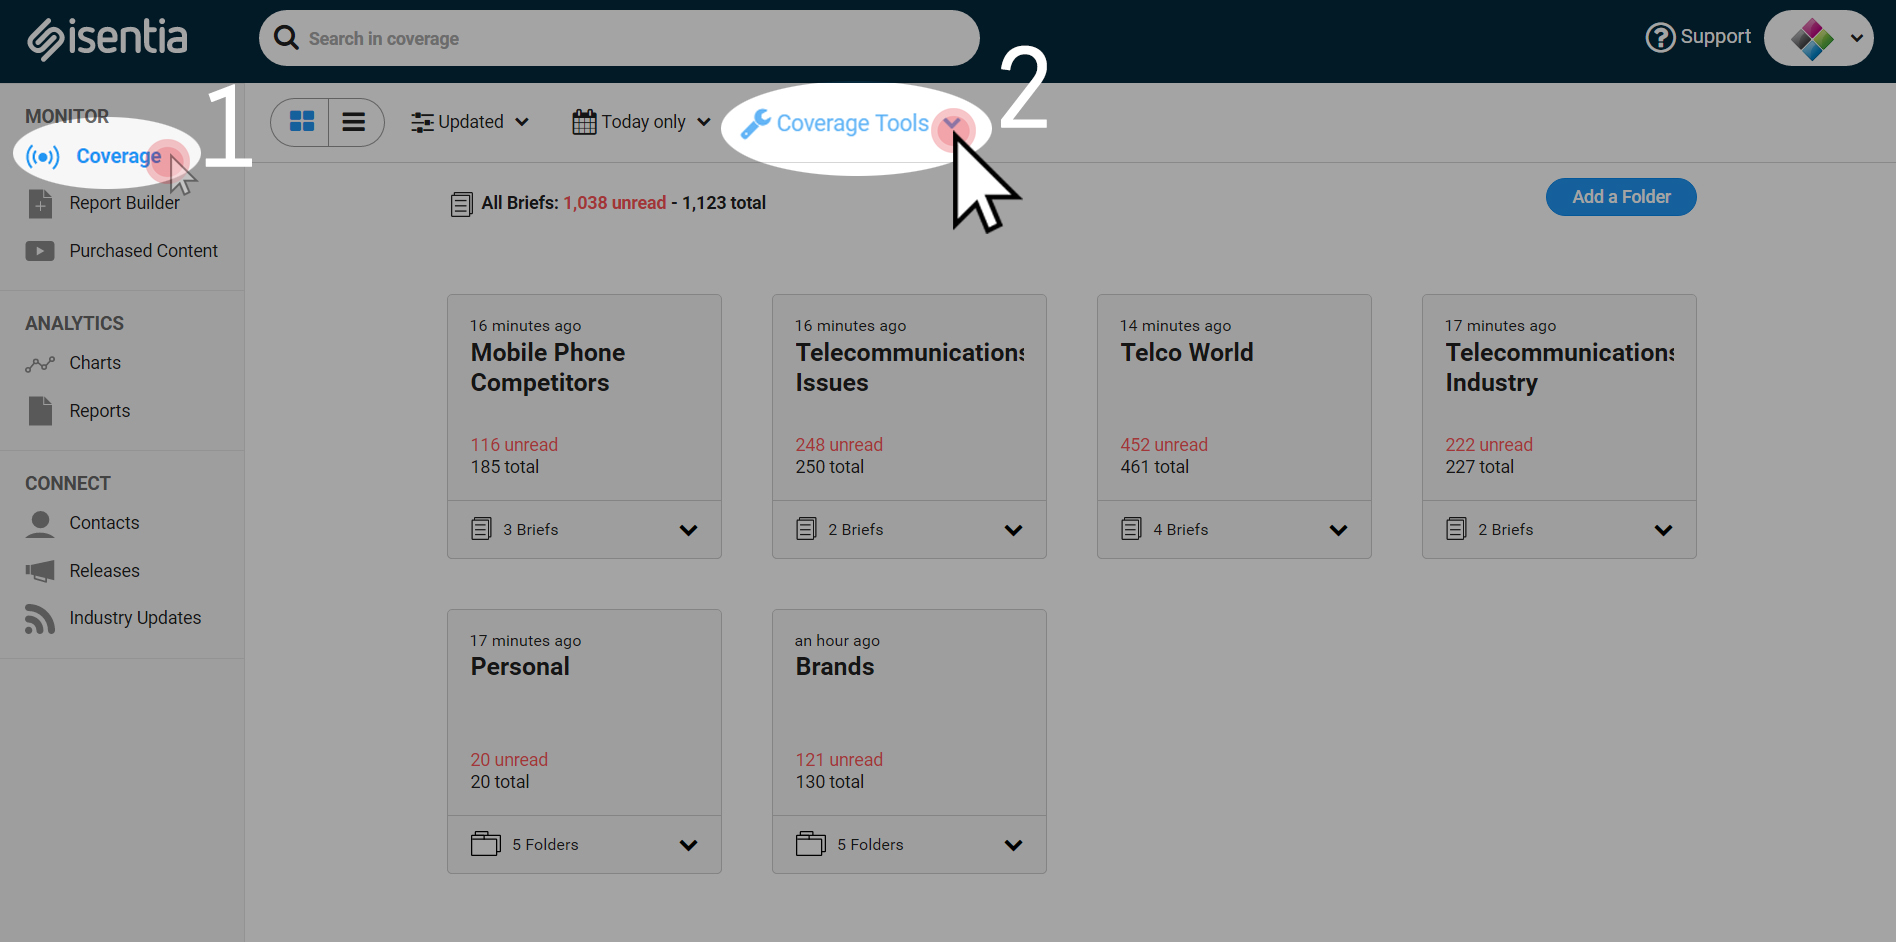
You can control the data that is included in your report in Coverage Options, which you can find by clicking on Coverage Tools in the Coverage area. Choose Coverage Options in the dropdown menu and stay on the Media display tab.
Use the Media item details section to control how much detail is shown on each media item. For each media type, you can choose what details are shown onscreen in Mediaportal, and in emails and reports.